
This tutorial will teach you how to cook butternut squash in a variety of ways. Learn how to roast butternut squash, including tips for how to peel butternut squash (it’s easier than you think!). Save money by preparing this hard winter squash yourself. I’ll show you how to make a tender whole roasted butternut squash, as well as how to roast cubed squash. Likewise, I’ll teach you how to toast butternut squash seeds for a crunchy, salty snack. I have also provided a how-to video and links to some of the best butternut squash recipes below. Tough-skinned butternut squash might seem daunting at first, so I have added some tips for those with limited arm strength. Trust me, learning how to cook butternut squash is easier than you think!

What is butternut squash?
Butternut squash is one of my favorite winter squash varieties. It belongs to a species known as C. moschata., a group of squash that also includes the Winter Crookneck, the Cushawsome, and some varieties of pumpkin. Butternut squash, like all squash, has ancestry in North America. Archaeological evidence suggests that squash may have first been cultivated on the isthmus between North America and South America (known as Mesoamerica) around 10,000 years ago.
Squash was one of the three main crops planted by Native Americans, known as the “Three Sisters”– maize (corn), beans, and squash. Native Americans and early American settlers prized butternut squash for its long shelf life. The most popular and widely available butternut squash is the Waltham Butternut, which was originally cultivated in Massachusetts.
In fall and throughout the cold weather months, winter squash varieties like butternut squash line the produce shelves. Winter squashes are different from summer squashes (like zucchini and yellow crookneck)—the skin is hard and inedible, while the inside is firm and flavorful. Winter squashes mature on the vine. Because of their tough outer shell, they keep well for long periods of time. Consequently, storing them in winter is easy. There are some squashes that qualify as both summer and winter squashes. When harvested early, they are summer squash, but if left to mature on the vine, they develop a hard outer shell and become winter squash.
How do you prepare butternut squash?
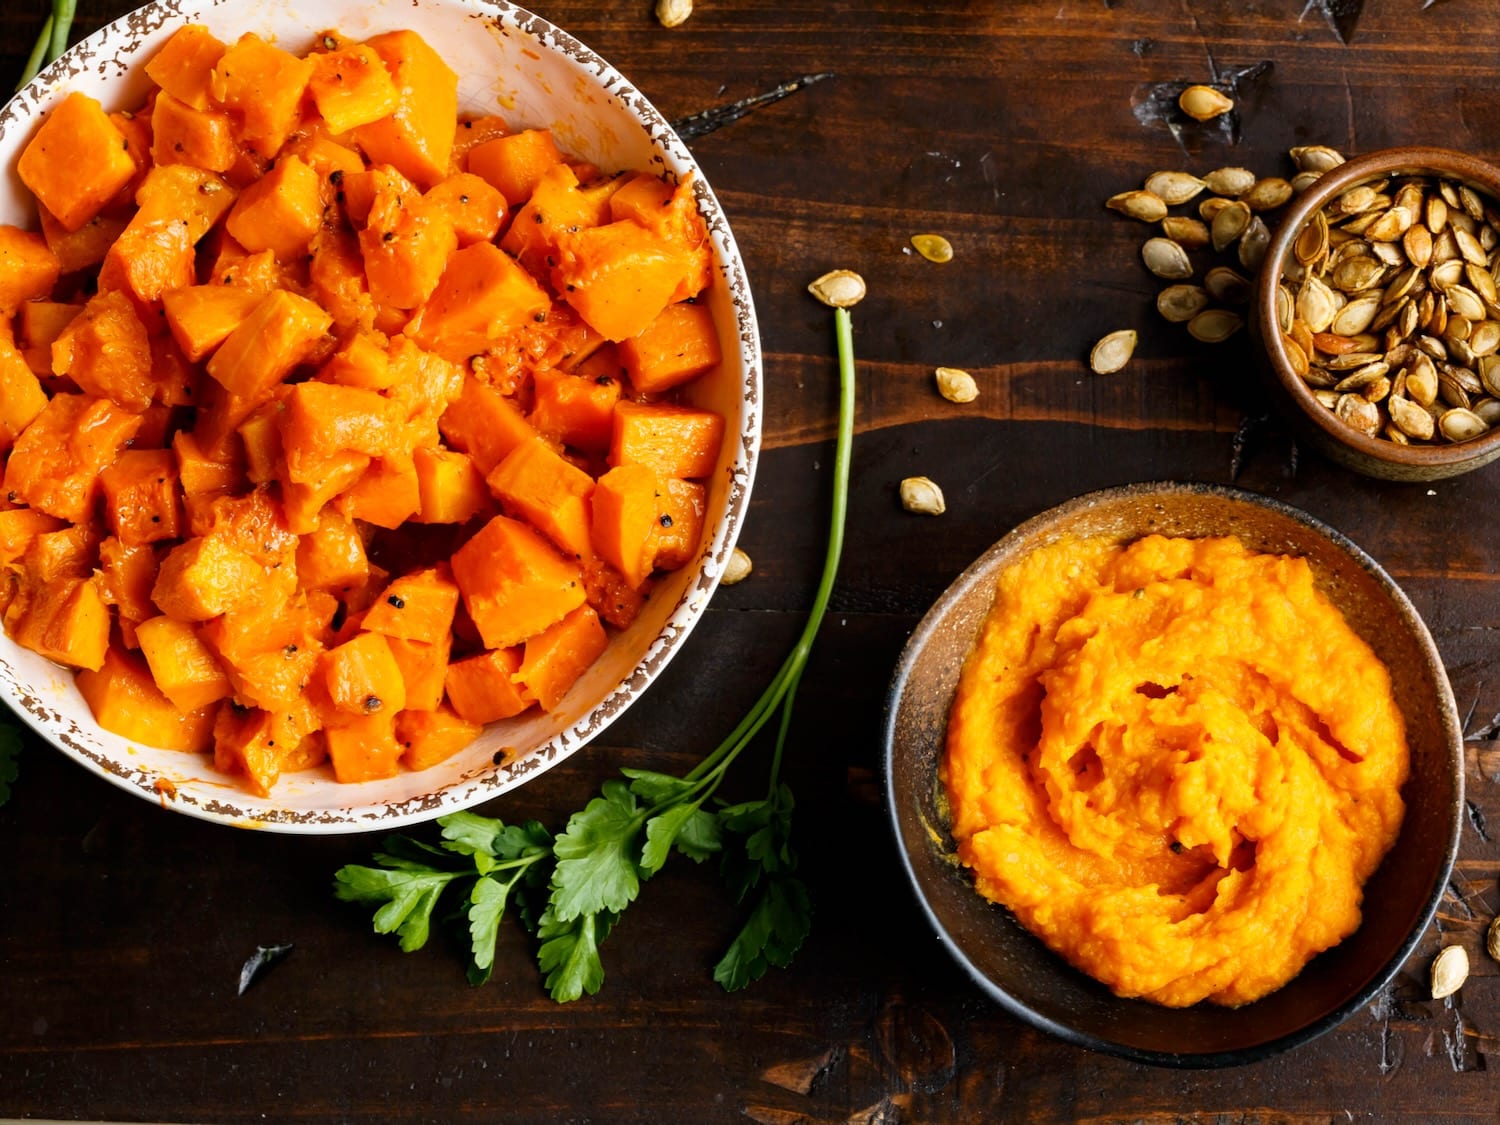
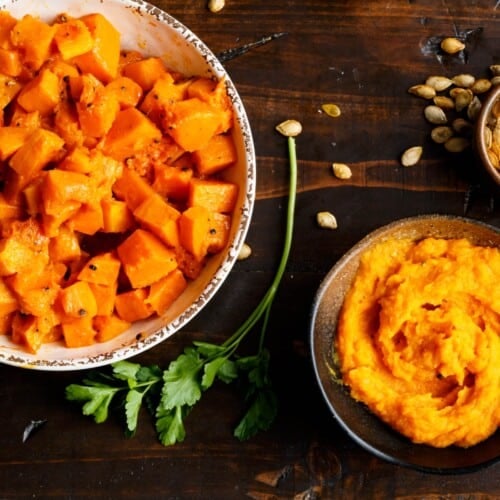
Butternut squash can be prepared in a variety of ways – by steaming, boiling, baking, or roasting. The most delicious results come from roasting. I have outlined several different ways to bake or roast a butternut squash in this post, including roasting a whole squash, as well as cooking cubed squash pieces. From choosing to peeling to slicing to seeding to roasting, by the end of this tutorial you’ll be a butternut squash pro.
Is butternut squash healthy?
Butternut squash is very healthy and nutritious. The flesh is full of vitamins A and C, and it has a naturally sweet flavor that really emerges when roasted. Additionally, the seeds contain protein and heart-healthy fats. It’s a delicious seasonal squash. And when you learn how to roast butternut squash, you’ll be hooked! It’s so easy, tasty, and versatile. You can use butternut squash in soups or stews, as well as other hearty winter dishes. The first step is learning how to prepare it. And the second step is learning some great butternut squash recipes. I’ve got you covered on both fronts!
Can you eat butternut squash seeds?
Short answer – yes! I’ve shared instructions for how to roast butternut squash seeds in this recipe. They’re smaller and more tender than pumpkin seeds, and are every bit as delicious when roasted (in fact, I like them even better!).
When I learned to roast pumpkin seeds, I discovered an awesome tip from Elise Bauer at Simply Recipes—boil the seeds for ten minutes in salted water before roasting. This extra step really helps the shells toast up crisp, and it also makes the seeds more digestible. I’ve used this tip when toasting butternut squash seeds, and it works the same way. Thanks Elise!
Check out more butternut squash FAQ’s here, or scroll down to the cooking tutorial below. Happy butternut squashing!

Butternut Squash FAQ’s
It depends on how you want to cook it, and what texture you want to achieve. Butternut squash skin is edible, but its texture can be tough or papery after cooking. For most recipes, peeling the butternut squash is preferred – that is why I have shared how to peel a butternut squash in this post. For butternut squash soups and stews, it is generally best to remove the skin. If you want to keep the skin on your roasted butternut squash, you may do so – just know that the texture may be less than desirable.
Preparing a hard-shelled butternut squash can seem intimidating, but it doesn’t have to be. All you need is a serrated peeler or paring knife, and a chef’s knife for slicing. Doing this prep work yourself will save you a lot of money compared to buying the pre-peeled and diced variety. Buying a whole squash will give you a very significant savings—the pre-cubed costs over four times more. Peeling and dicing a whole squash should only take around 10 to 15 minutes. And the effort is so worth it! Peeled butternut squash is a key part of recipes like my Jeweled Black Rice Salad or my Butternut Squash and Crispy Kale Bake.
Peeling butternut squash is easier than you think! While these hard-skinned winter squash may seem difficult to peel, there is a trick to it. In this post I show you how to remove the skin with a peeler or paring knife. I’ll also show you a quick tip for peeling it more easily – with just 2 minutes in the microwave, you’ll become a butternut squash peeling pro!
Mature butternut squash comes in sizes ranging from 1 to 5 lbs. The average butternut squash will be around 2 to 3 lbs. After peeling and seeding, your squash will lose 2-3 oz of weight. For example, a 3 lb squash will yield about 2 lbs 13 oz of flesh. This is helpful to know for recipes that call for a certain amount of diced, peeled squash—if your recipe calls for 2 lbs of diced squash, you’ll want to look for a squash that is around 2 lbs, 3 oz in weight.
Recommended Products:
How to Cook Butternut Squash
Ingredients
- 1 whole butternut squash (any size squash will work; 2 pounds of squash equals 6 servings)
You will also need
- A sturdy chef’s knife, cutting board, rubber mallet (optional, if needed), baking sheet
You may also need
- Extra virgin olive oil, salt, black pepper, minced garlic, seasonings of your choice
NOTES
Instructions
How to Choose Butternut Squash
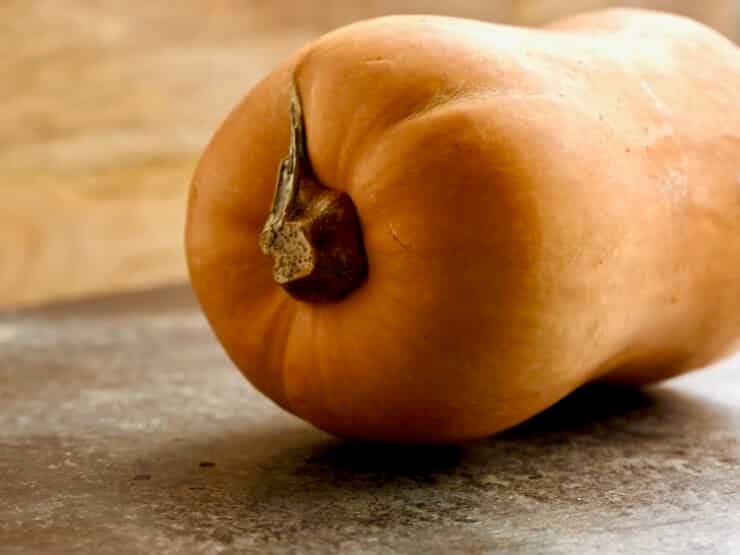
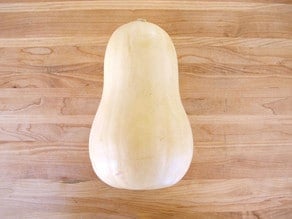
- Butternut squash is seasonal. In the U.S., the best time to buy ripe local squash is September through October. It may be available at other times throughout the year as an import. Look for butternut squash with a solid beige color, without any deep cuts or bruises. A little surface scratching is normal. Choose squash that feels heavy for its size. Avoid squash with brown patches or punctures, which can introduce bacteria and mold. Butternut squash will keep in a cool, dark part of your kitchen for several weeks– it does not need to be refrigerated.

How to Peel and Seed Butternut Squash
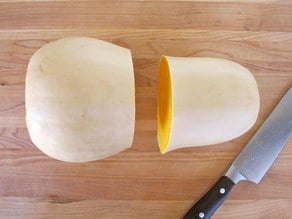
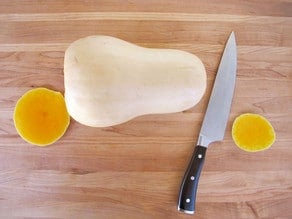
- Slice off the stem and bottom ends of the squash, so that both ends are flat.
- Slice the squash in half, just where the thinner end begins to widen around the middle.
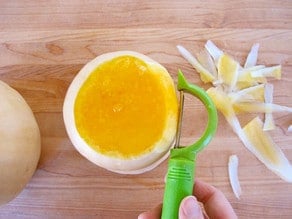
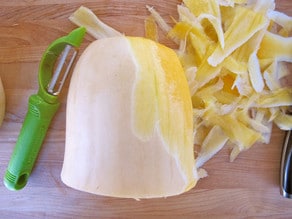
- Turn each half so that a flat end rests against the cutting board. Use a sharp serrated peeler or paring knife to peel off the skin in downward strokes.
- You will notice light green lines emerging beneath the skin as you peel. You want to make sure to peel all of those green lines away from the squash—they can be tough and fibrous. The squash isn’t completely peeled till all of those green lines have disappeared and the orange flesh remains.
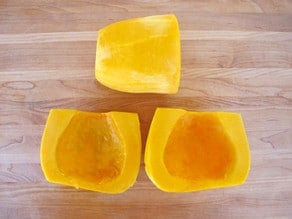
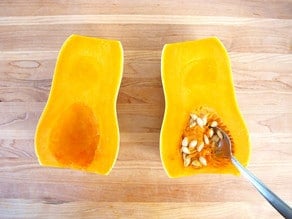
- Once both halves of the squash are peeled, slice the fatter half lengthwise. Scoop out the seeds with a metal spoon. Reserve those seeds… they are absolutely delicious when roasted! (instructions below)
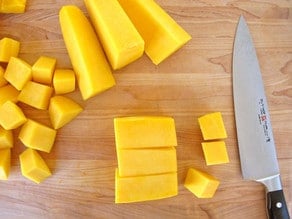
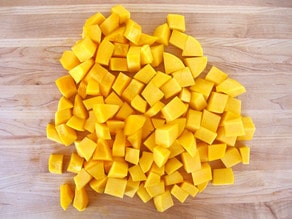
- Now you have three sections of peeled squash, which you can slice or dice depending on your preference.
- I usually dice the squash into 1-inch cubes, which helps it to cook faster and more evenly.


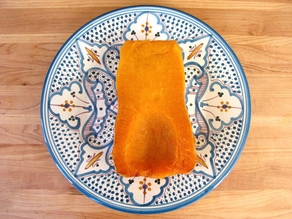
How to Make Whole Roasted Butternut Squash
- There are two ways to roast butternut squash—skin on, and skin off. It’s easiest to roast a whole butternut squash skin on, that way you don’t need to deal with peeling. This method words best if you are planning to make a butternut squash puree like this Maple Butternut Squash Puree, or if you simply want to scoop out the cooked flesh and you’re not worried about the presentation. To roast skin on, preheat oven to 400 degrees F. Slice off the stem and bottom ends of the squash so that both ends are flat.
- Set the squash on a cutting board with the widest cut end flat against the board. Use a heavy chef’s knife to cut the squash from top to bottom, slicing it in half vertically. This may be difficult depending on how strong or sharp your knife is, or how big and thick your squash is. Take your time. If you encounter some resistance, you can tap downward on either end of your knife blade with a rubber mallet to slowly move it along. If you've pre-microwaved your squash, the slicing should be easier.Once you’ve sliced the squash in half, scoop out the seeds with a metal spoon. Reserve them for roasting, if desired.
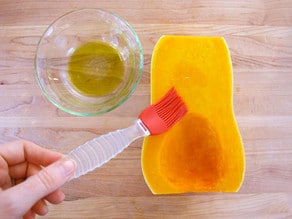
- Brush the cut surfaces of the squash with olive oil.
- Place the squash halves cut side down onto a baking sheet.
- Roast the squash for about 1 hour, turning the sheet once halfway through cooking. Start checking for doneness around 45 minutes—smaller squash will cook faster. It will take a full hour or longer to cook a 3 pound squash.The squash is done when the flesh is tender all the way through to the skin. The outer beige skin will be slightly blistered and browned. The inner flesh will be dark orange, soft, and caramelized around the edges.

How to Roast Butternut Squash, Peeled
- The easiest way to roast squash that has already been peeled is to dice it into 1-inch squash cubes. The smaller size will help the squash to roast more evenly.
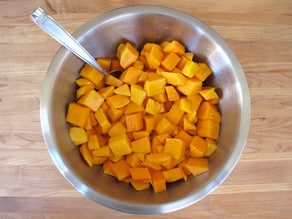
- Preheat oven to 400 degrees F. Place the cubes into a large mixing bowl and toss with 1-2 tbsp olive oil (I use about 2 tbsp for a 3 lb. squash). You can also toss it with minced garlic, if you’d like.Spread the squash out evenly across 1 or 2 baking sheets. I like to line the tray with a silpat for easy cleanup. Sprinkle the squash with salt, pepper, and any other seasonings you like. For more delicious ideas, check out my caramelized Maple Roasted Butternut Squash recipe.
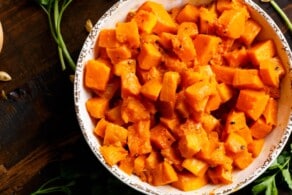
- Roast the squash for 30-40 minutes, stirring once halfway through cooking, until the largest pieces of squash are fork tender.

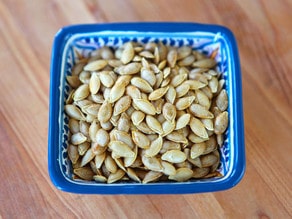
How to Roast Butternut Squash Seeds
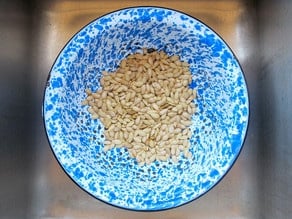
- A 3 lb squash will produce about 1/3 cup of cleaned seeds. Preheat oven to 325 degrees F. Place seeds and pulp into a mixing bowl. Cover the seeds with water. Use your fingers to separate seeds from the fibrous butternut squash threads. It is easiest to do this underwater.Drain the seeds in a colander. Pick through the seeds and discard the loose orange squash threads.
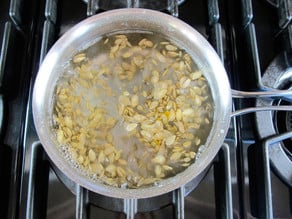
- Bring 1 quart of water and 1 tsp of salt to a boil. Add the seeds (up to 2 cups of seeds per quart of water) and boil for 10 minutes.
- Drain the seeds in a colander and pat dry with a paper towel or towel. A few seeds will stick to the towel as you dry, just use your fingers to brush them back into the colander. Pour the seeds into a mixing bowl and toss them with a little olive oil or melted butter. I use about 1 tsp of olive oil or 2 tsp of melted butter per 1 cup of seeds.
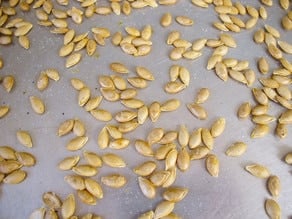
- Spread the seeds out in a single layer onto a baking sheet. Season with salt and any other seasonings or spices you like. Smoked paprika, cinnamon-sugar, nutmeg, chili powder, or cayenne (spicy!) will all work well. I prefer my seeds simple, with a generous sprinkling of salt.
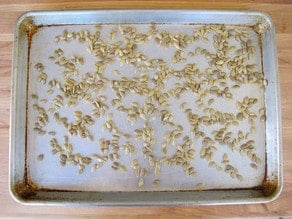
- Toast the seeds in the oven for about 20 minutes, watching carefully to make sure they don’t burn. They won’t change color much (if they turn too brown they’ll be over-done), so the best way to check for doneness is to taste them. I’ve found that once I hear a few seeds “pop” like popcorn in the oven, that’s the perfect time to take them out. Don’t let them stay in much longer after that first “pop,” or you risk burning them.
- The seeds end up crispy and delicious, with a flavor similar to fresh popcorn. Delish!
Nutrition


Great information, thanks so much. In the past, I have always peeled, halved, cut in slices, and cooked my butternut squash in the pressure cooker for less than 5 minutes, then mashed it up, added butter and salt and pepper and served. It’s always been delicious, but I like the idea of cubing and roasting it too. Was wondering what you think it would taste like with some nutmeg or cinnamon added to it.
I use fresh grated nutmeg on roasted butternut squash. It gives it great flavor. Cinnamon works also, it’s a matter of preferece.
Hello
I have a huge squash, I mean huge it is at least yard long and very thick. Do I still use the meathod in your tuturial?
Thank you
Just prepared my first squash according to your instructions – they were invaluable! Plus I would never even have thought of roasting the seeds and they are delicious! Many thanks indeed!
Thank you so much for this tutorial. I roasted a butternut squash for the first time today, following your instructions for roasting skin-on, and it worked wonderfully. I made a pureed soup out of it, along with roasted carrots and parsnips, and it was fantastic!
Thanks for the great post! It was very helpful!
Amazingly easy and beautiful instructions. So delicious!!
I stumbled over your step-by-step tutorial by chance, as I was trying to find any info on how to best deal with a butternut. We don’t have much variety on pre-peeled, sliced/ chopped pumpkin/ squash, here in Germany, and I just purchased my first ever butternut a few days ago. I really had no idea how to go about it, as I need it mashed to make cupcakes.
Anyhow, I’m in love with your ‘fool-proof’ (I can be a bit inept) directions!
Great information!! How would you suggest freezing the squash for the winter?
Hi, Tori’s assistant Ashley here! You should spread the raw squash pieces on a sheet tray and freeze, be sure they aren’t touching so that they don’t freeze together. Once frozen transfer them to an airtight container and put back into the freezer. Hope this helps!
Thank-you so much for this recipe, we have never tried any squash except zucchini and yellow but we are broadening our horizons, It tasted GREAT!
I am a total non-cooker. A friend gave me a butternut squash and I wanted to cook it as a thank you. I followed your instructions to bake it in halves. I used some garlic seasoning with the olive oil. So easy and so yummy. Thanks for posting easy instructions for “cookophobics” like me!
Am I correct in thinking that since the butternut squash seeds are crisp, you eat them whole, not popped open like pistachios?
Correct Barb!
Thank you very helpful!!
I usually steam butternut squash. But, I tried your recipe and roasted the squash (1-inch squares) instead. This is my go to recipe from now on. The squash seems to hold more flavor roasting it. Thank you.
I am making a butternut squash casserole for Thanksgiving but none of my recipes tell me how to prepare my squash to use in the casserole (it is a sweet casserole dish),so i’m not sure should i peel it,seed it and cut it into chunks and cook it in water or should i roast it ,any ideas ….
I was told that boiling the squash turns it to rubber. Its not like other vegetables that u boil to get soft. Thats probably why i havent seen even 1 recipe saying to boil it.lol. its usually cooked in the oven.
Boiling it does not turn it to rubber. You can boil it til it’s fork tender, then mash it with butter and salt as you would potatoes. You shouldn’t over-cook it because it can get water-logged, which makes it a thinner consistency. We have always cooked our squash this way, and it’s delicious.
I really enjoyed your thorough information about ways to cook butternut squash. I just baked one for the first time (diced-style) and it was really good! I also roasted the seeds according to your directions and they were delicious. I’ll have to get another butternut squash and prepare it the other way — cutting it lengthwise — and will see how that goes.
Great! 🙂
Thank you for the roasting instructions and the tip for baking the seeds. I roasted my very first butternut squash today. My toddler and I agree= IT’S DELICIOUS!! Just finished boiling my seeds, about to roast them up. I’m gonna need to buy more squash.
Delicious and so healthy too! Perfect for autumn. So glad you’re both enjoying it!
Hi thanks for these tips. I’m attempting a squash pie for the first time as this is my absolute favorite pie ever. I never knew how to peel it properly so you became very helpful. Thanks again
You’re welcome Debra 🙂
Thanks for all the pictures and easy to follow instructions! So helpful!!!
I have always bought prepared squash but it’s so much cheaper this way. Needed it for soup 2nd day Yomtov and the tutorial is brill and just what I needed!
thank you
You’re welcome Estelle, glad it was helpful 🙂
I found your tutorial extremely interesting and practical.
For about forty years I have had a less than easy time cutting squash. Now it will be much easier. I still have not yet done
the squash seeds as I am getting ready for a potluck. I would
love some ideas about seasoning other than the minced garlic and olive oil. No doubt the garlic and olive oil will be acceptable. I am particularly into vegan recipes.
Hi Jeanne! Here are few recipes to try:
https://toriavey.com/toris-kitchen/2012/11/maple-butternut-squash-puree/
https://toriavey.com/toris-kitchen/2013/10/maple-cinnamon-roasted-butternut-squash/
https://toriavey.com/toris-kitchen/2010/04/vegan-butternut-squash-soup-with-chickpeas-and-spinach/
https://toriavey.com/toris-kitchen/2013/03/roasted-butternut-squash-garlic-sage-pine-nuts/