A few months ago I wrote up a short post on a new food “trend” with ancient roots – fermentation. Many of you expressed interest in learning more about the process. I’ve never done any fermenting at home before, but your interest inspired me. For my first fermentation adventure, I decided to take a crack at homemade sauerkraut. Together with my kitchen assistant Gary, who happens to be a farm trained, do-it-yourself culinary school grad with lots of fermenting experience, we fermented a crock of cabbage to make homemade sauerkraut.

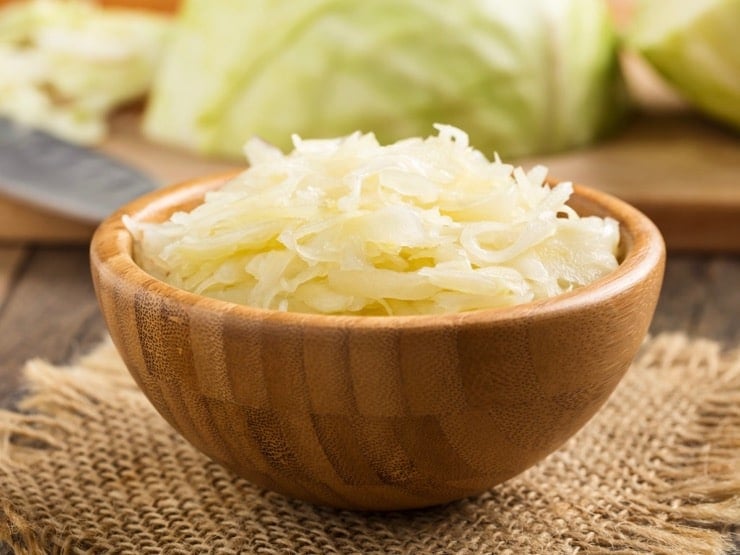
Sauerkraut, a combination of the southern German and Austrian words “kraut,” meaning cabbage, and “sauer” meaning sour, literally translates to sour cabbage. It is created by fermenting cabbage over a long period of time. There are several health advantages to homemade sauerkraut. It’s high in enzymes and vitamin C, both of which are lost during the heating and pasteurization of store-bought sauerkraut. It’s also low calorie and easy to digest.
As I was learning about the fermentation process, I became curious about the difference between fermenting and pickling. The most obvious difference is that fermentation creates acid, while pickling requires an added acid, for example vinegar. Both serve as a preservation technique, the science is just a bit different.
Sauerkraut takes about 4-6 weeks to make. Since it’s a “hurry up and wait” kind of thing, I am documenting the adventure here on my blog. I will walk you through what we did, step-by-step, so you can try it at home.
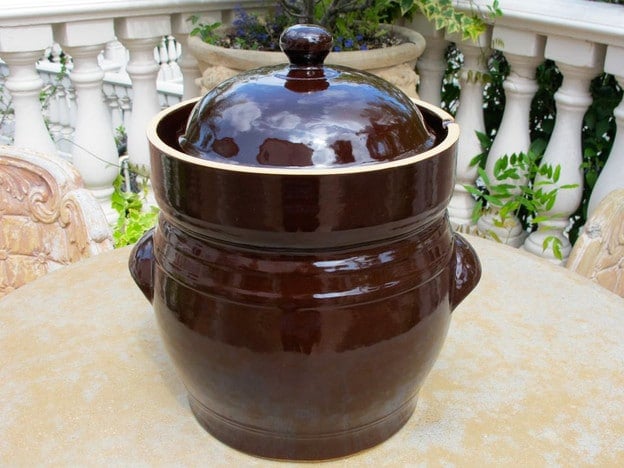
First thing’s first– I bought a crock. A big, honking fermentation crock. It really looked so much smaller online. At first, I was dismayed. After the initial shock wore off, I decided the size was a plus… it means you can make a large batch of fermented veggies at the same time. With the amount of time it takes to ferment, why not make a big batch that will last you several months? And I do mean a big batch. We sliced up enough cabbage to create a decade’s supply of sauerkraut. Seriously.
If you too would like to be the proud owner of a ginormous fermenting crock, here is the one I’m using. Keep in mind that it’s pretty heavy/substantial and kind of awkward to handle. It also comes in a smaller size, which is likely a lot more manageable. There’s an even larger size, but that would require some serious fermentation love. You will also need a set of weights to help weigh down whatever you are putting in the crock. We used 10-15 liter stone weights; for a smaller crock, use 5 liter weights.
Crocks can be a bit pricey, so if you’d rather not invest in one, there are some less expensive options. You can use just about any sterilized container, taller than it is wide, made from enamel, ceramic or food grade plastic.
Once you have chosen your vessel, find a plate that will cover the majority of the cabbage. To make sure that the cabbage stays submerged in the brine, a key component of fermentation, you will need to make a weight to place on top of the plate. The simplest option is to place plastic storage bags filled with salt water on top. You can then cover your container with plastic wrap or a lid.
Once we cleaned out the crock, we got to work. With Gary and Ashley’s help and experience, I felt more confident in outlining the process for you here. I’ll check back with you in a few weeks and let you know how our sauerkraut turned out. Meanwhile, here are a few books that helped us learn the basic fermentation process:
Preserving Food Without Freezing or Canning
Since I’m fairly new to fermentation, I decided to start with a basic sauerkraut, which only requires salt, cabbage, and water. Spices can be added to make a flavored sauerkraut or kimchi. If you feel like experimenting, the same method can be used for other vegetables, including cucumbers, onions, beets, carrots, kohlrabi, red cabbage, and rutabaga. You can even combine a variety of vegetables in a kraut medley if you’re really feeling adventurous.
We are a participant in the Amazon Services LLC Associates Program, an affiliate advertising program designed to provide a means for us to earn fees by linking to Amazon.com and affiliated sites. As an Amazon Associate I earn from qualifying purchases.
How to Ferment Cabbage and Make Sauerkraut

Ingredients
- Fermentation crock
- Cabbage - amount varies based on your needs we used 3 large heads
- Large mixing bowl
- Kosher salt
- Kitchen scale
- 2 fermentation weights
- Medium saucepan
Notes
Instructions
- Start by boiling 6 cups of water with 1 tbsp of kosher salt till salt is dissolved. Allow to cool.
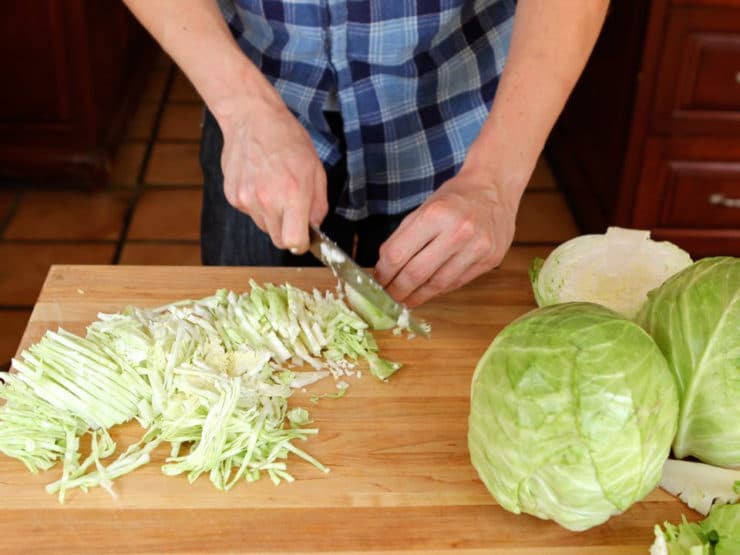
- Meanwhile, clean your cabbage and pull off 5-6 of the external whole leaves, set aside. Shred the remaining cabbage - for instructions on shredding cabbage, click here.

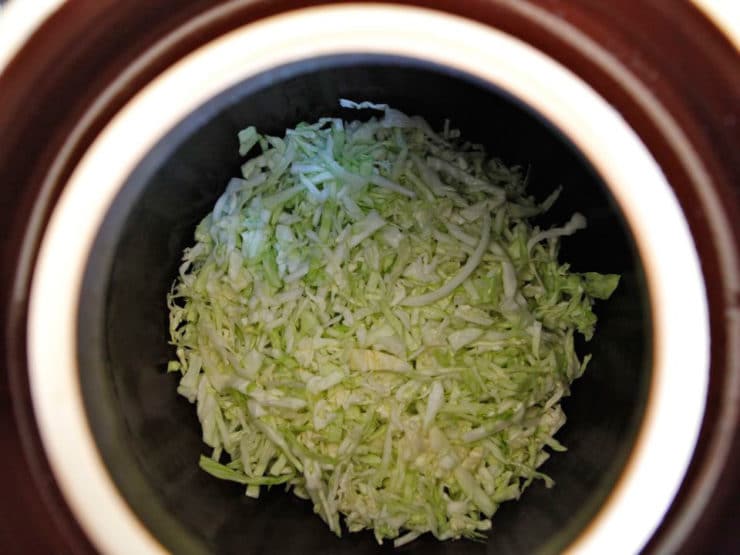
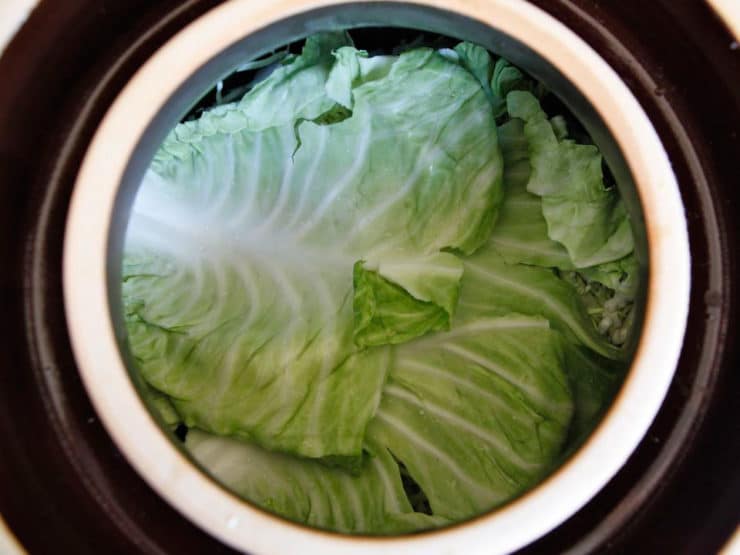
- Cover the bottom of your fermenting pot with 3-4 whole cabbage leaves. You will only need two layers of whole leaves in the crock, one on the bottom and one on the top.
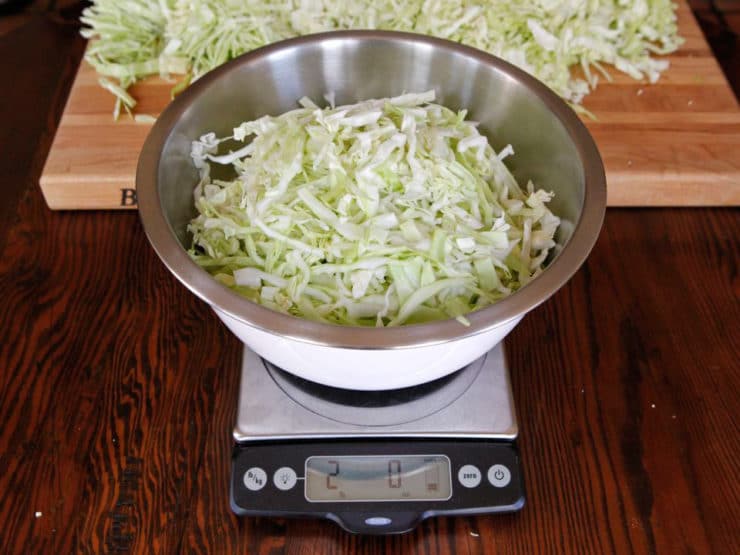
- You will need to salt the shredded cabbage before adding it to the fermentation pot. We found this is easiest to do in smaller batches, to keep the salting amount consistent and mixed throughout the fermentation crock. Measure out 2 pounds of shredded cabbage into a bowl (we zeroed our scale with the bowl on, then measured a 2 pound batch).
- Use clean hands to toss the shredded cabbage in the bowl with 1 tsp kosher salt.
- Place the salted, shredded cabbage into the fermentation pot on top of the whole leaves.
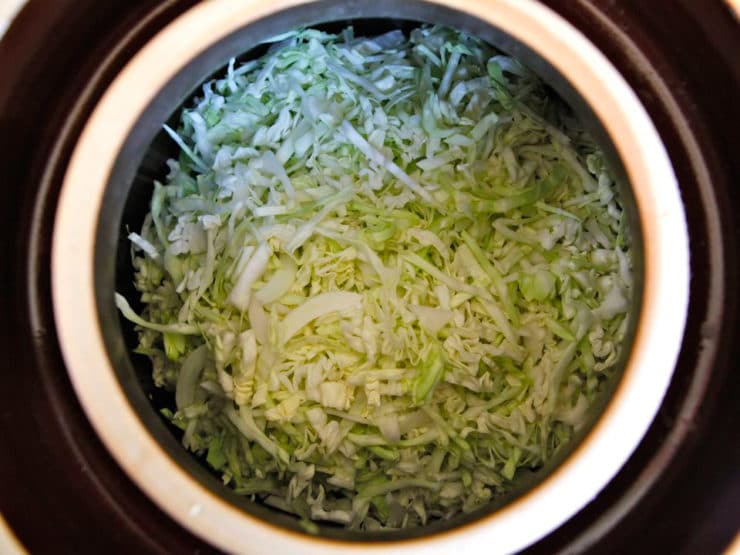
- Measure out another 2 pounds of the shredded cabbage and mix with 1 tsp of salt, then add to the fermenting pot. Repeat this process in batches until all of your shredded cabbage has been salted and added to the pot. Pack down the cabbage tightly, but do not crush the cabbage strips.
- Cover the top of your shredded cabbage with remaining whole cabbage leaves. These leaves will help to collect the yeast and mold that may accumulate at the top of the crock, and can easily be removed and discarded after the fermentation process is complete.
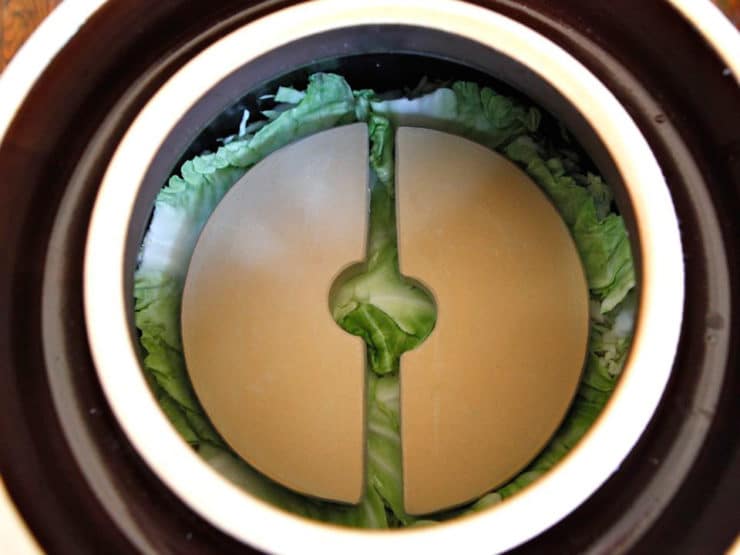
- Place stone fermentation weights on top of the whole cabbage leaves and press down, but not too hard. You don’t want to damage the cabbage.
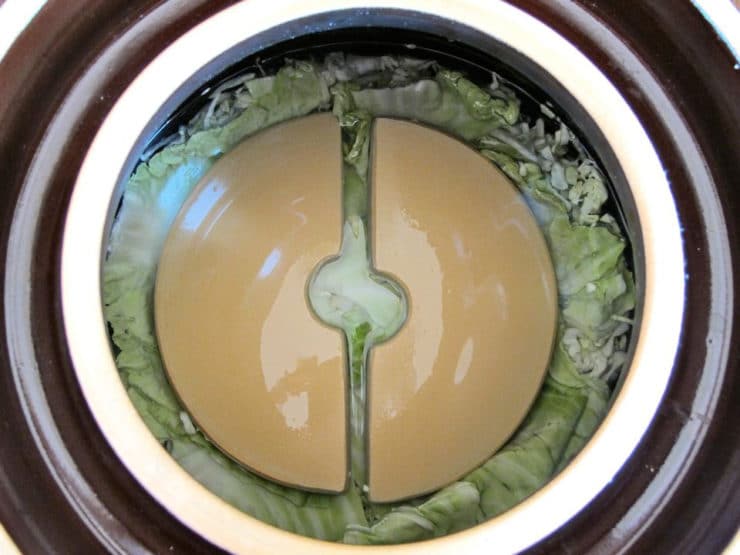
- Cover the fermentation crock with a lid. The salt will naturally draw some water out of the cabbage. After a few hours, check to see how much liquid has accumulated inside of the pot. It should be about 1-3 inches above the cabbage. If this hasn’t happened, add cooled, boiled salt water to the pot. We ended up needing about 3-4 cups of salt water. Pour it over the cabbage till it is submerged (you may not need to do this if your cabbage has created enough natural liquid). Reserve the remaining salt water.
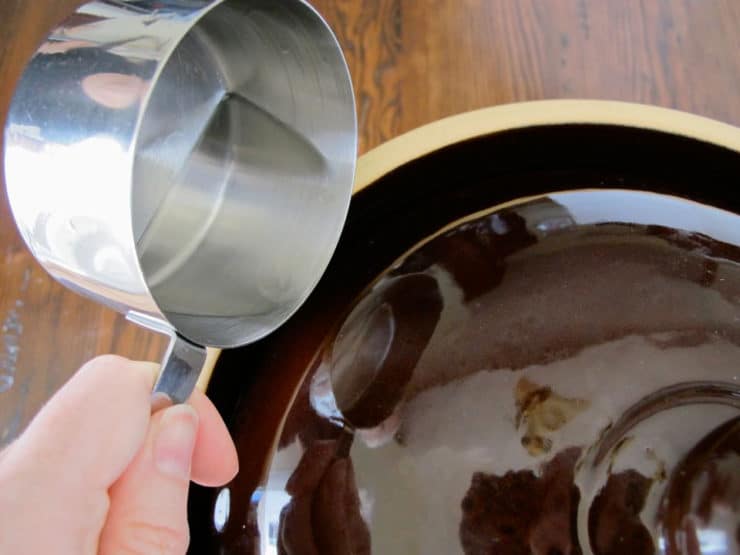
- Once the water level is where it should be, cover the pot and fill the channel around the lid with cooled salt water to create an airtight seal. This will keep oxygen out of the pot. Once this has been done, do not open the fermentation pot for at least 2 weeks. No peeking! Reserve the remaining salt water brine in a sealed container in the refrigerator; you will need it over the course of the next several weeks.
- For the first few days, store the pot in a warm place, between 68 and 72 degrees. After a few days have passed, listen for a fizzy, bubbling sound coming from the pot. This is good and means that fermentation has begun. If you don't hear anything, don't worry, it may just mean that the walls of your crock are too thick for sound to travel through. After fermentation has started, move the pot to a cool place, between 59 and 64 degrees, for the remaining fermentation time. If you don't hear anything after 1 week, go ahead and move the crock to a cooler location without waiting for it to sound bubbly.
- Check your water channel regularly to make sure that it's filled with salt water. At times, the pressure which builds up inside the crock can cause suction, which pulls the channel water into the crock (it happened to us a few days in). If this happens, pour more of the salt water into the channel to keep it full.
- After the first 2 weeks, check your sauerkraut’s brine level and skim off any mold or bubbles that have gathered near the top. Be sure that your cabbage is always submerged in the brine. Fermentation breeds strange sounds and smells, so try not to worry about those. Close the fermentation crock again and refill the channel with salt water.
- Your sauerkraut should be ready in about 4-6 weeks. You will know for sure once bubbles no longer appear in the liquid. The longer you allow the cabbage to ferment, the tangier the flavor will be.


UPDATE: Our kraut turned out great! It took about 5 weeks to achieve the flavor and texture I was going for. This sauerkraut was so much better than the store-bought kind… it was salty, pungent and the lactic acid made it tingle on my tongue. It’s delicious and way cheaper than store-bought probiotics. Good for your gut, good for your tastebuds… can’t beat that!
Have you tried fermentation before? Did it turn out the way you hoped it would? What is your favorite fermented food?


I make my own sauerkraut every year, whole heads, just water and salt, the old, traditional Serbian way:)
Have you tried making Kimchee?
grew up making sauerkraut, hate it, won´t eat it to this day.
my father used to make sauerkraut
Nice crock
I have and its delicious. Much healthier, too. 🙂
no
I adore sauerkraut, I’m waiting in anticipation to see how this works out!
I do it all the time. Best probiotic ever. Google the you tube video of Kimberly Snyder making it. Delicious. I use organic green cabbage, chopped fresh ginger, caraway seeds, and kosher salt. Fabulous. So good for your digestion.
I have made fermented dill pickles for years. Want the recipe, Tori?
I would love to get your fermented pickle recipe….:D
I would live your recipe mike for fermented pickles. What do they taste like?
I would like to give your recipe a try! Thank you kindly.
please,can I have you fermented pickle recipe thank you gerd
in israel, to make a jam of sorts, you can take kumquats – and it´s a one to one ratio of sugar and the fruit, and put it into a pot with a lid and let it sit out until the sugar has melted in with the fruit.. maybe a few days to a week. then cook it on simmer ..
Just discovered the site, love it! Daniella, you can do this with any fruit, providing has enough juice. It is the best way to preserve fruits.
Welcome Mara!
We did kimchi is school.
Not on purpose@0@
I have a small proofing box (used to proof bread dough) that I use to ferment with. I have Ball canning jars in 1/2 gallon size and I´ve been pretty successful. The proofing box allows me to control temperature and humidity. I´ve had some good luck with it.
Homemade sauerkraut is the best, Tori! Patience is the key, and keep a good water seal. I need to pull my crock out and make some more – thanks for the reminder! Happy fermenting!
Love the pot!
Made kimchee in Mason jars a few years back, result was quite good. Used to make dill pickles with my Dad years ago, quite easy as well. Sauerkraut couldn´t be to far off.
Oh boy did that kraut bucket stink up the cellar at my grandmother´s house. She eventually switched to canned sauerkraut, and no one could tell the difference except in being able to breathe freely. It´s all in what you add to it before cooking that makes the difference.
Canned Sauerkraut is dead Sauerkraut and has none of the probiotic goodness contained in the real deal.
No, but I´d love to!
I have indeed.