
Me and my challah on top of Masada in Israel.
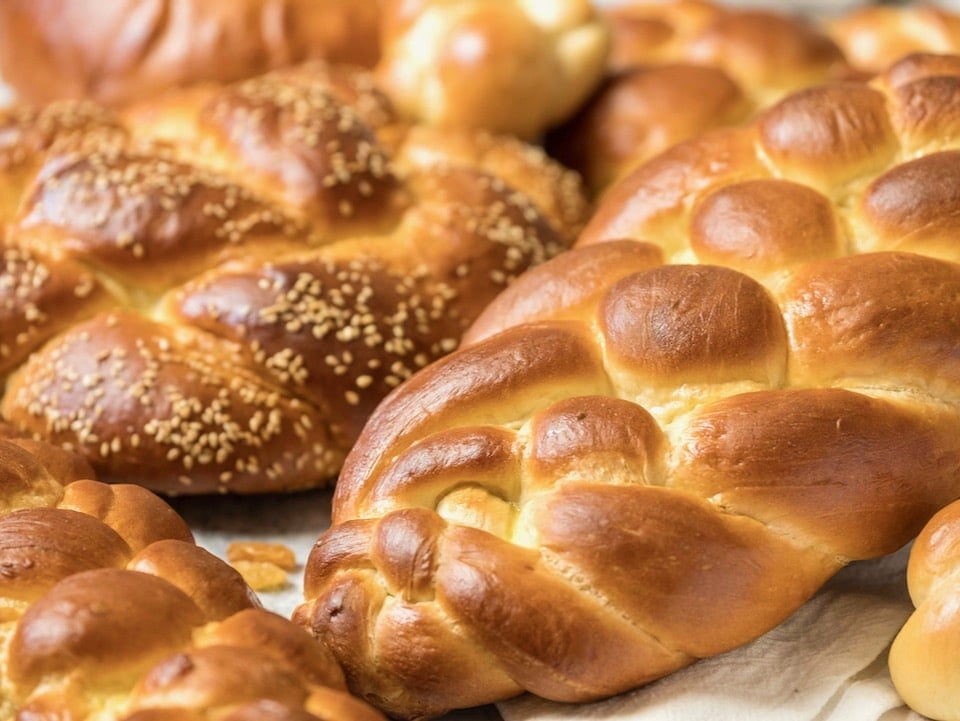
And now for my favorite part of baking challah— braiding!! Braiding challah is super fun. I know some of you are probably thinking “this is way too complicated for me.” But trust me, once you get a feel for the dough you’ll fall in love with the braiding process. I’ve listed every potential mistake I can think of in this blog to help you stay on track. So why not jump in and give it a try? All that work will result in a gorgeous challah that you can proudly display as the centerpiece for your dinner table. I feel such a sense of accomplishment when I create a beautifully braided challah– it makes my inner artist happy!
If you need a challah recipe, or want to learn more about the blessing of challah, click on the following link:
Challah Part 1: The Blessing and the Dough
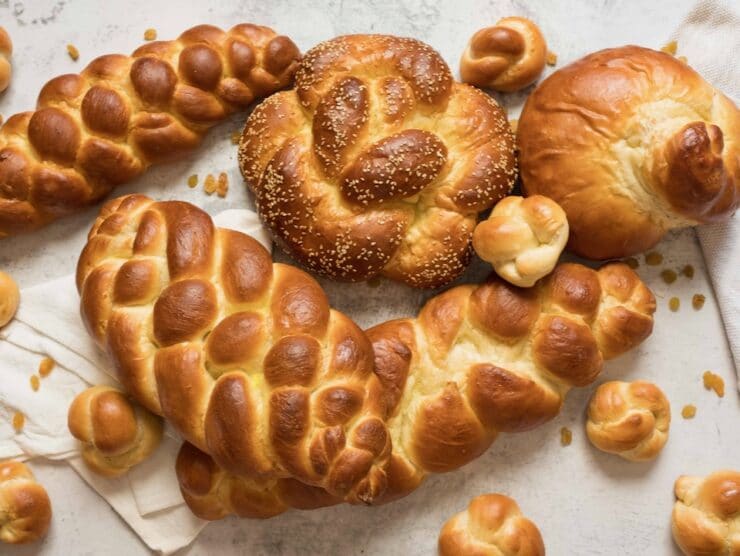
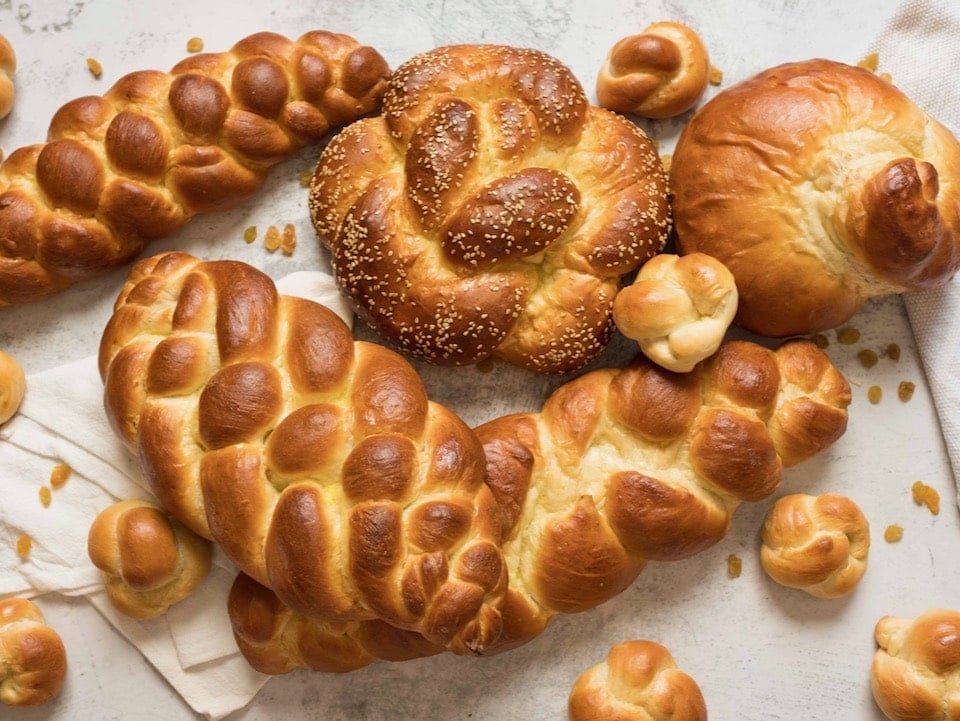
There are many different ways to braid a challah. I’m going to share my favorite ways with you here, including two ways to make a round loaf for Rosh Hashanah.
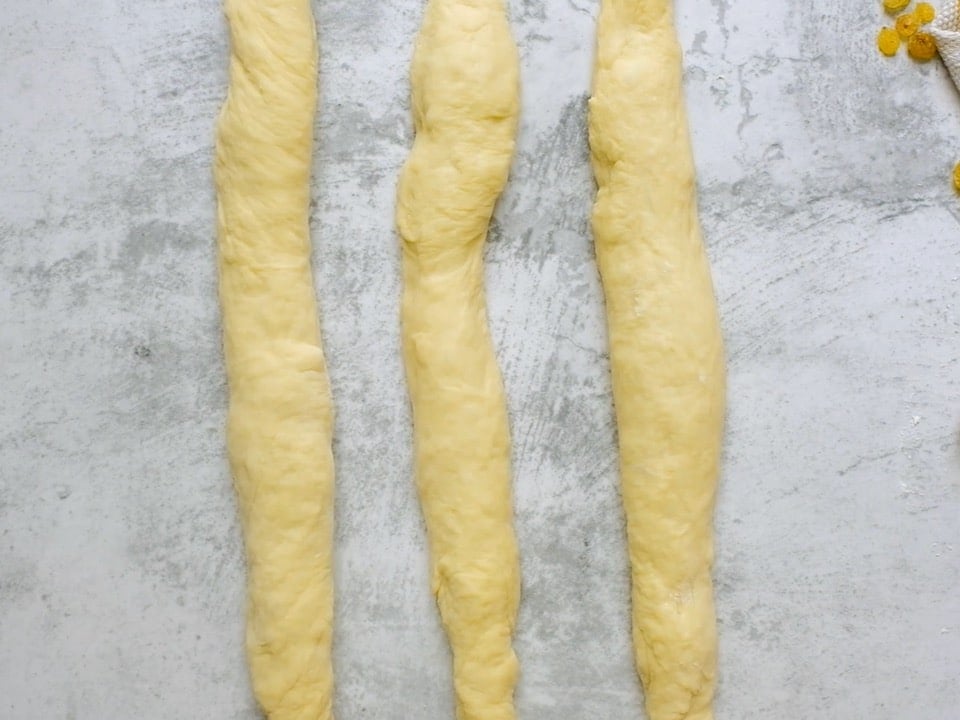
First, you need to learn how to make a nice even strand from the dough. All the braids are made from strands, so it’s important to know how to make a fundamental strand shape.
Recommended Products:
We are a participant in the Amazon Services LLC Associates Program, an affiliate advertising program designed to provide a means for us to earn fees by linking to Amazon.com and affiliated sites. As an Amazon Associate I earn from qualifying purchases.
How to Braid Challah
Ingredients
You will need
- 1 batch challah dough - link to recipe below
- flour for dusting your rolling surface
Instructions
HOW TO MAKE STRANDS
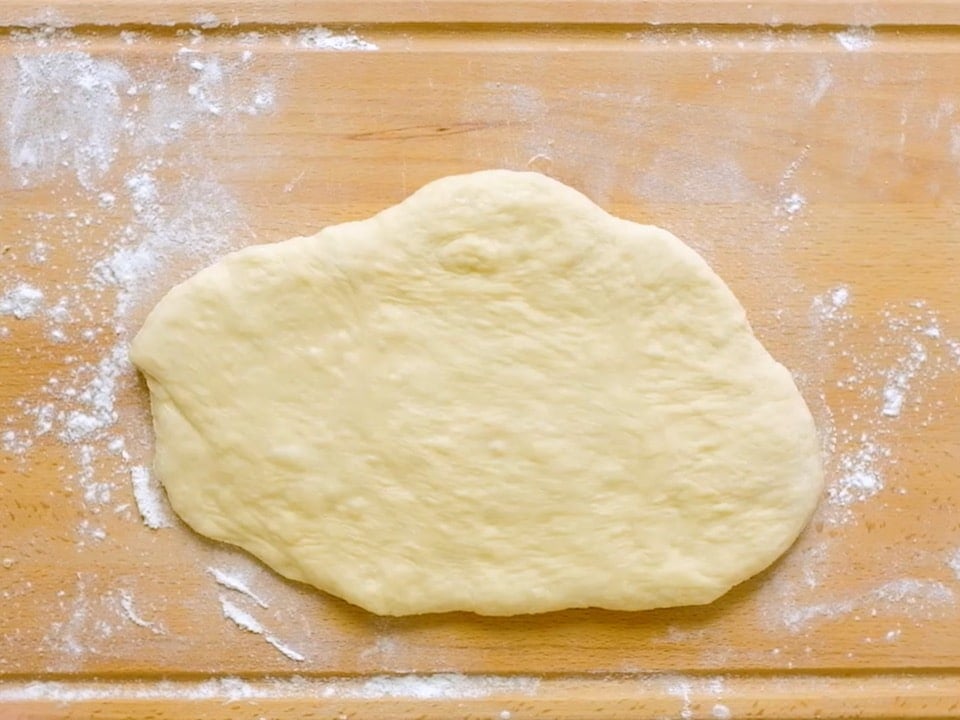
- Divide your dough into the number of strands you’ll need, making sure each portion is equal in volume. For example, if you’re making a three strand challah, divide your dough into three equal portions.Take one of the portions and roll it out with a rolling pin until it is flat and about 1/4 inch thick. Don’t worry about the shape of the dough, it doesn’t matter. Put the smaller part of the dough towards the top of your rolling surface, with the widest part towards the bottom.

- Begin rolling the dough into a strand. Start by rolling it back with your fingers from the top downward.
- Using both hands, put pressure on the rolling surface and pull the dough back towards you, rolling it back into a strand shape. Keep even pressure on the dough as you roll so that no air pockets collect in the strand.
- Once your strand shape is created, roll it back and forth with both hands to erase the seams and smooth out the strand. As you roll, angle your hands outward and apply gentle pressure to taper the dough on the outer edges. By doing this, your strand should end up slightly thicker in the middle and thinner on the ends. This will help make your braided challah tapered at the ends, which creates a beautiful shape.
- Further taper the strand by grasping one end between your two palms and gently rolling the dough back and forth. Repeat for the other end of the strand.
- That’s how you make a strand, which is the foundation of any challah braid! Simple, right? Now, before we start braiding, I want to share a few tips with you that I’ve learned from trial and error over the years.


THREE-STRAND CHALLAH BRAID
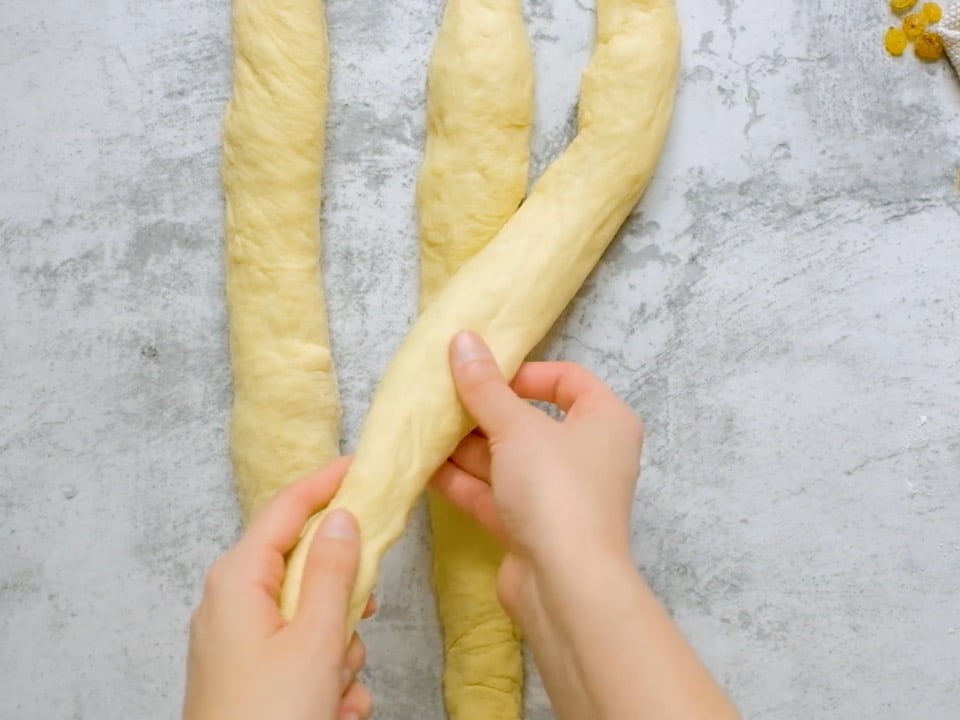
- This is the easiest way to braid a challah. For those of you who know how to braid hair, this should come naturally to you. I like to start the braid in the middle of the strands instead of the top because it gives the challah a more even, balanced shape. The important thing to remember when braiding a Three-Strand Challah is to be aware of your middle strand. Each strand of dough will take a turn being the middle strand; keeping your eye on the middle strand will help you stay on track as you braid.Create three equal-size strands. Lay the three strands side-by-side.
- Grab the center of the right strand and cross it over the middle strand, drop it in the center. The right strand is now your middle strand.
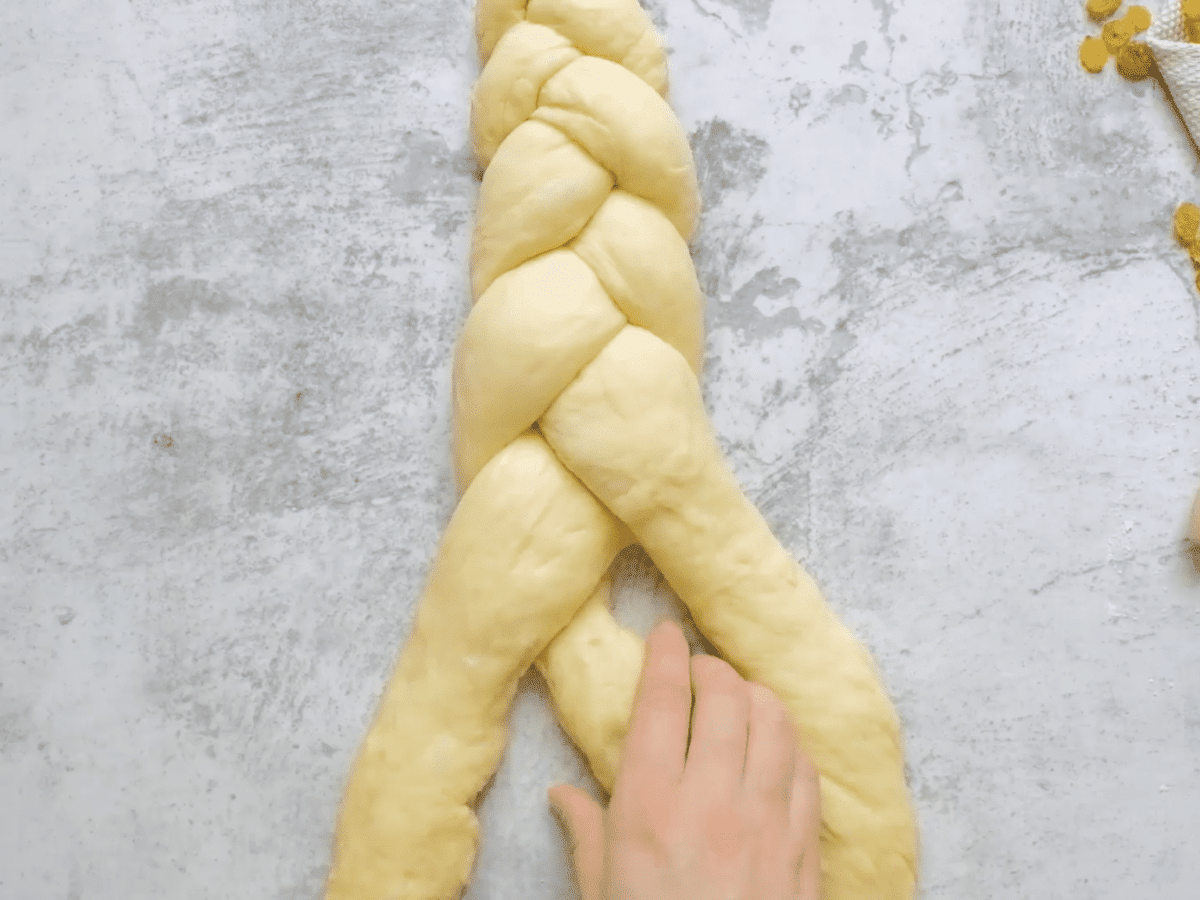
- Grab your left strand and cross it over the middle strand. The left strand becomes your middle strand.
- Repeat steps 2 and 3 (right strand to middle, left strand to middle) until you have braided your challah to the very end.

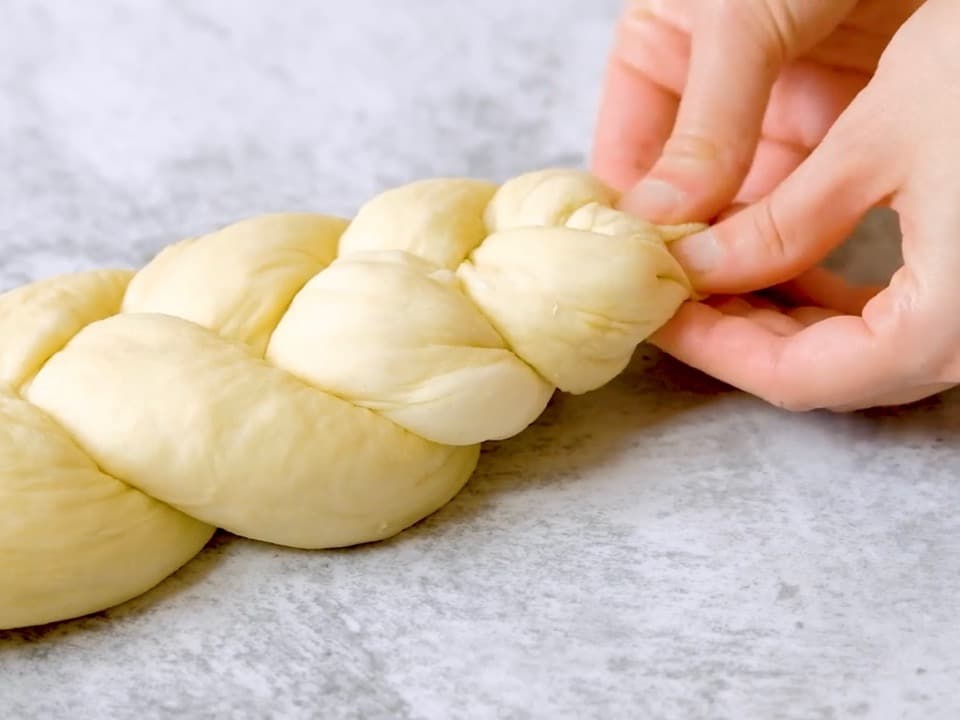
- Pinch the three strands together at the end.
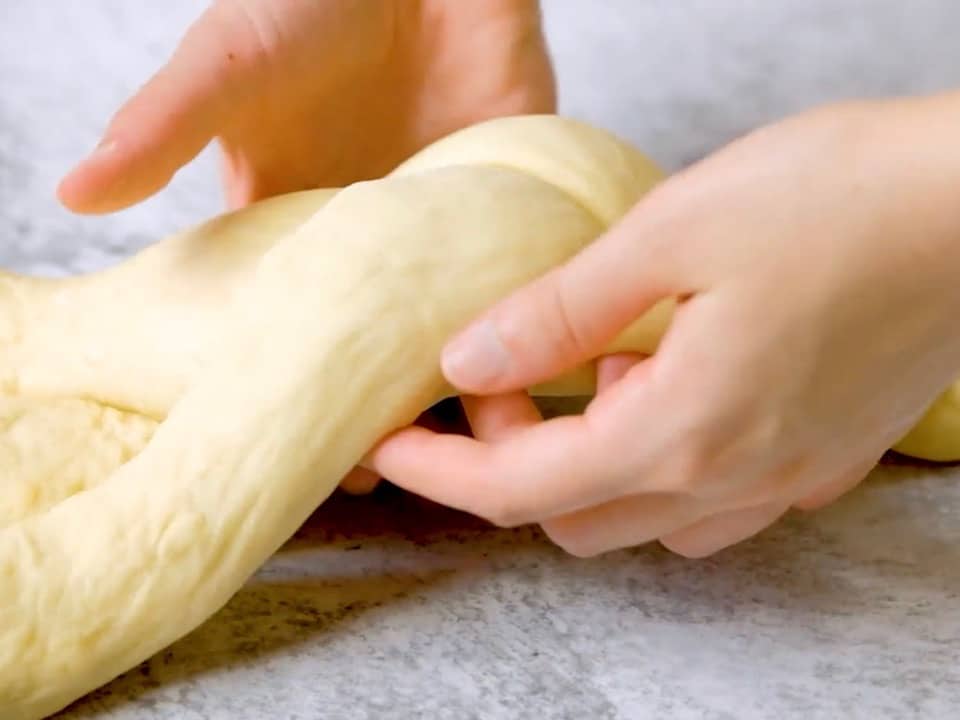
- Grab the challah in the center…
- and flip it towards you so the challah is now upside down and the unbraided strands are facing downward.
- Continue braiding. The left strand will either need to cross over or under the middle strand, depending on how your braid turned out. The left strand becomes your middle strand. Same with the right strand – it will either need to cross over or under the middle strand, depending on how your braid turned out. Either way, the same pattern applies – left strand to middle, right strand to middle.
- Repeat steps 6 and 7 (left strand to middle, right strand to middle) until your challah is fully braided. Pinch the ends of the loose strands together and tuck both the top and bottom tips of the challah under to create a nice rounded shape.
- Brush with egg wash, top if desired, then allow challah to rise. Bake according to your challah recipe’s instructions.

FOUR-STRAND CHALLAH BRAID
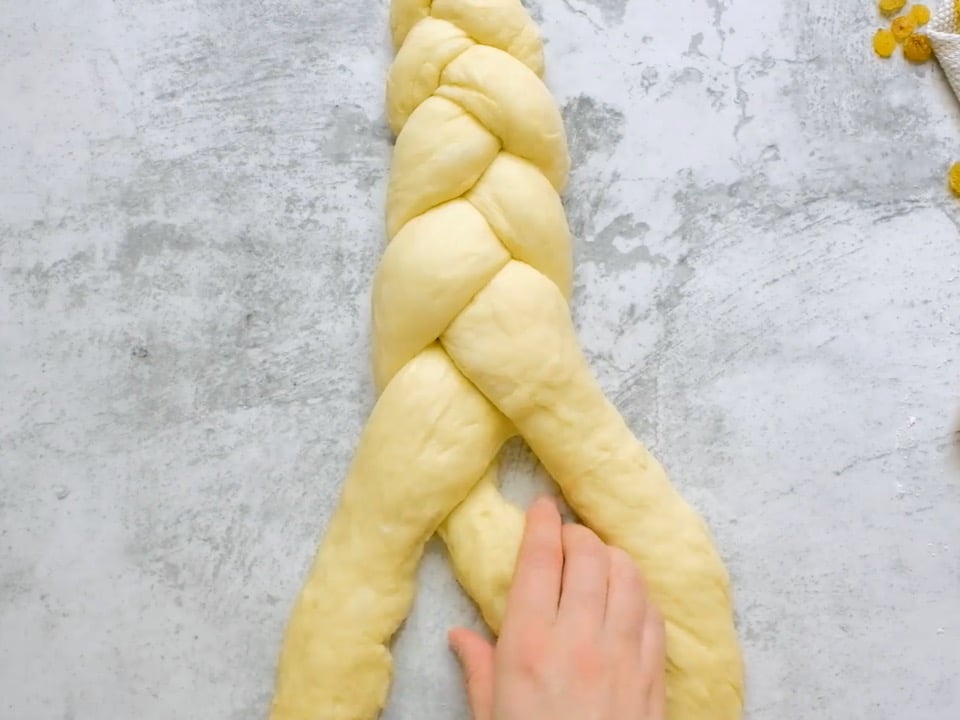
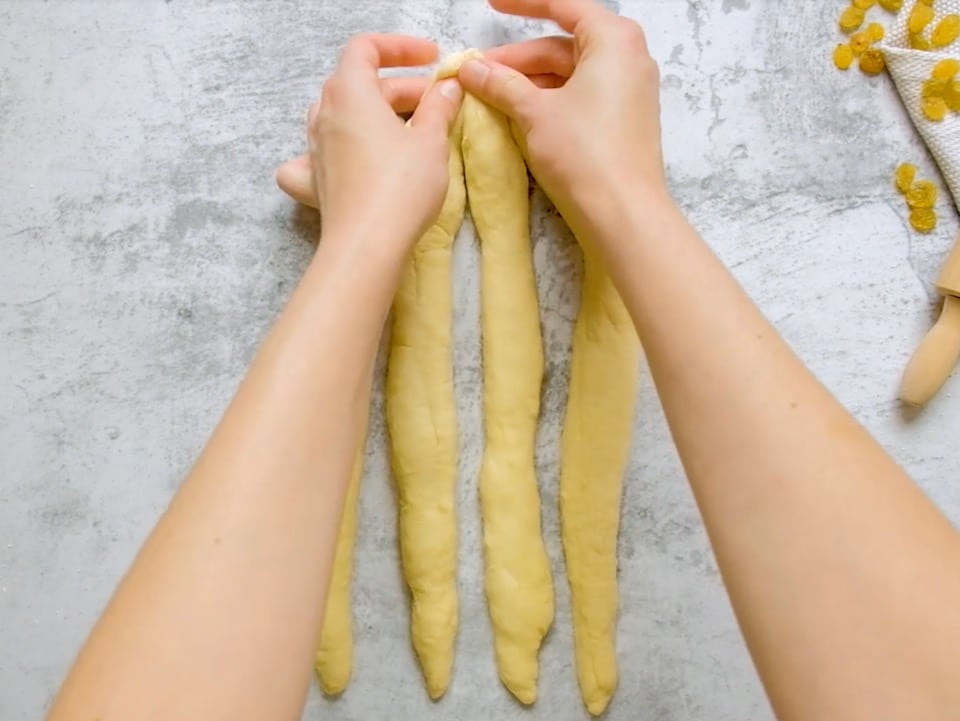
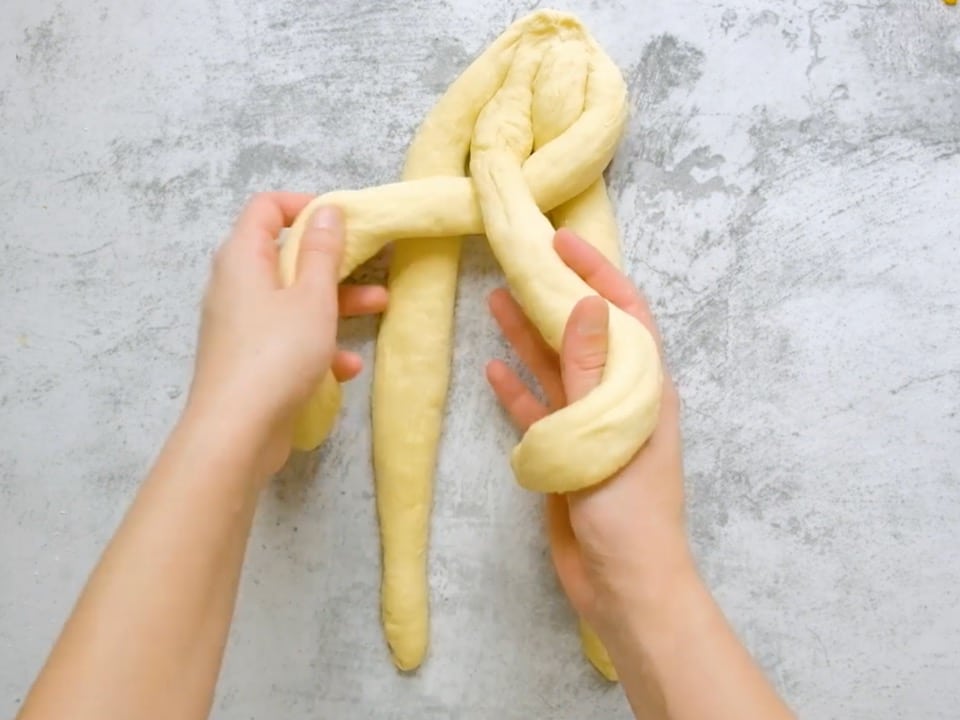
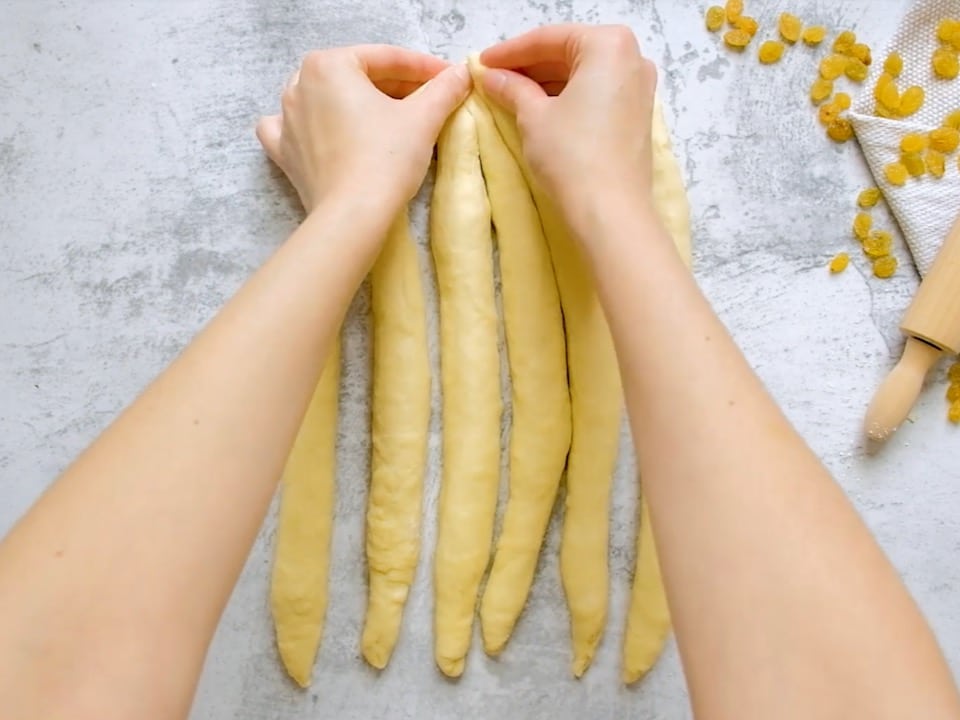
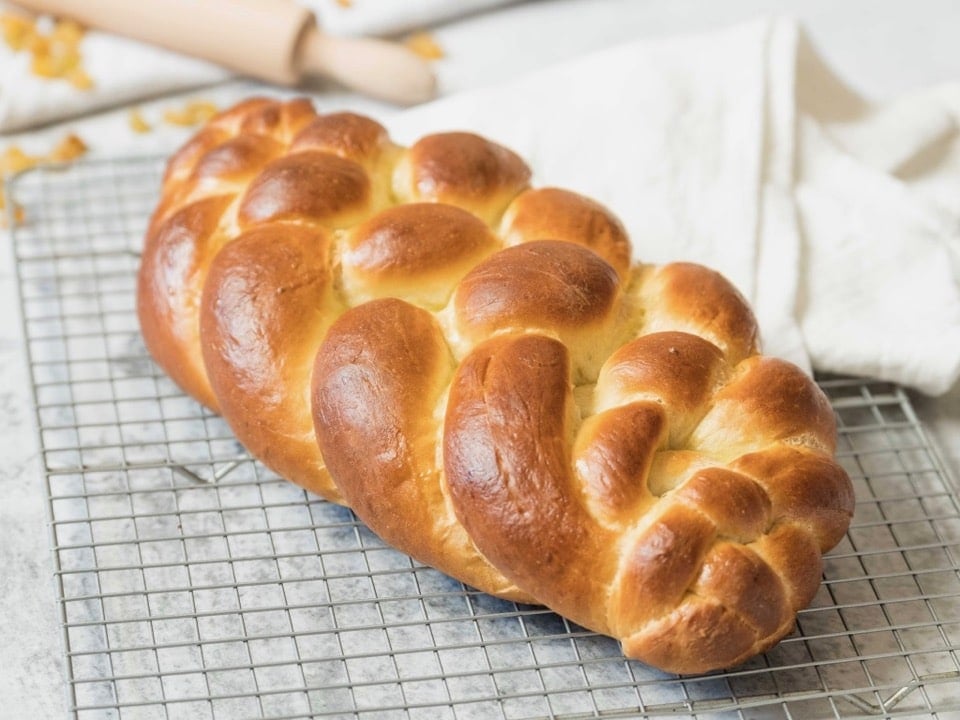
- The Four-Strand Challah is my favorite braid. I love the design it creates. When braiding a Four-Strand Challah it’s important to remember that you always start with the strand that is furthest to the right. Memorize the “over, under, over” pattern and say it out loud as you braid to keep you on track.Create four equal-size strands. Lay the four strands side-by-side, then pinch them together so they are connected at the top.
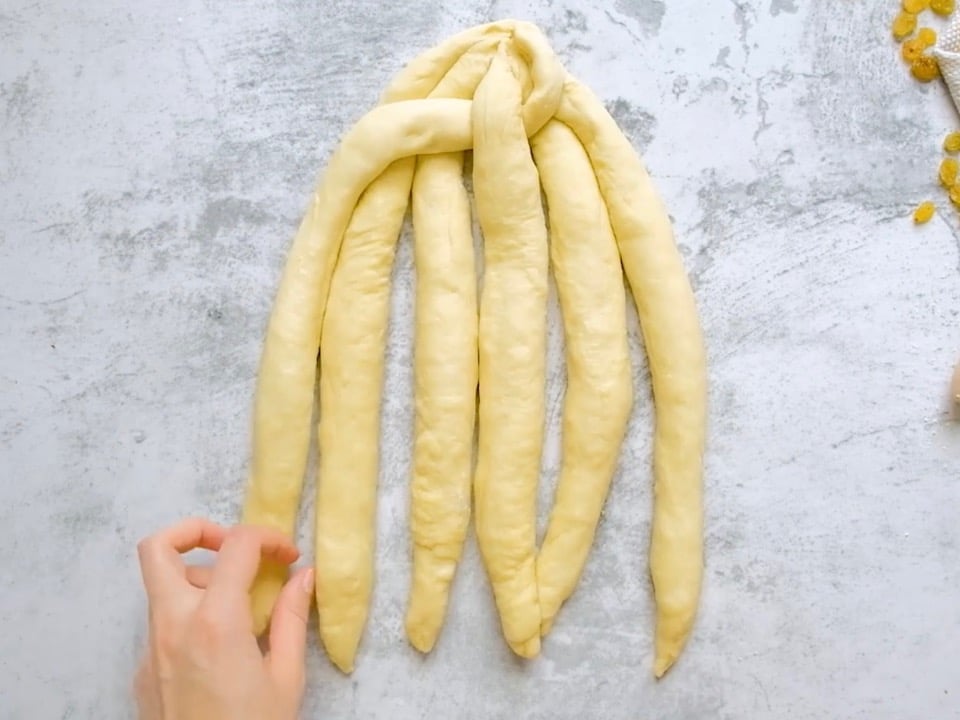
- Take the strand furthest to the right and weave it towards the left through the other strands using this pattern: over, under, over.
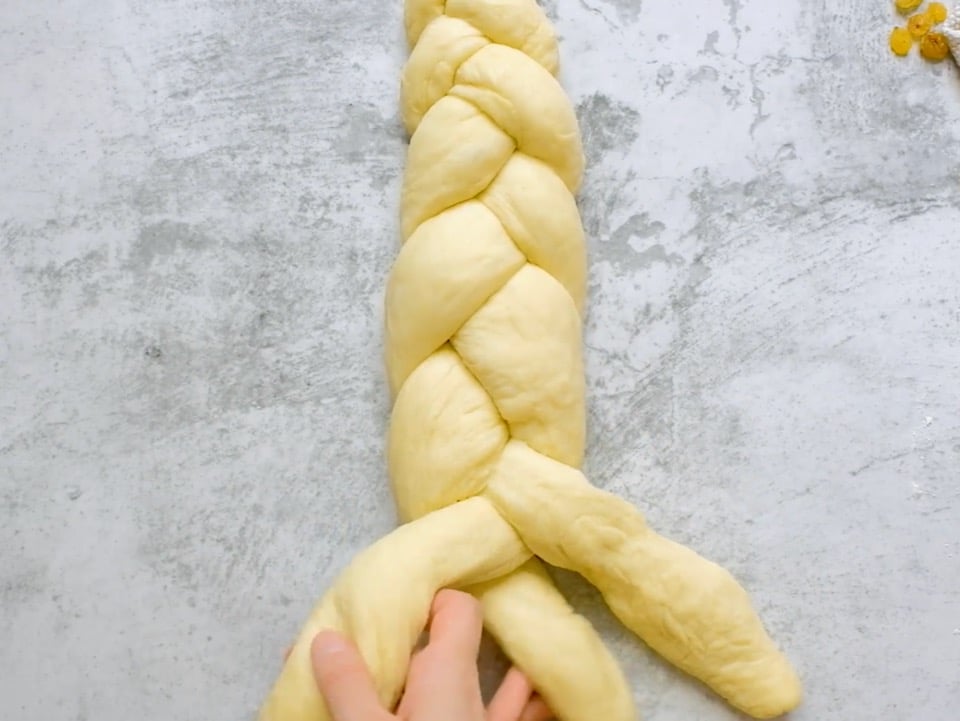
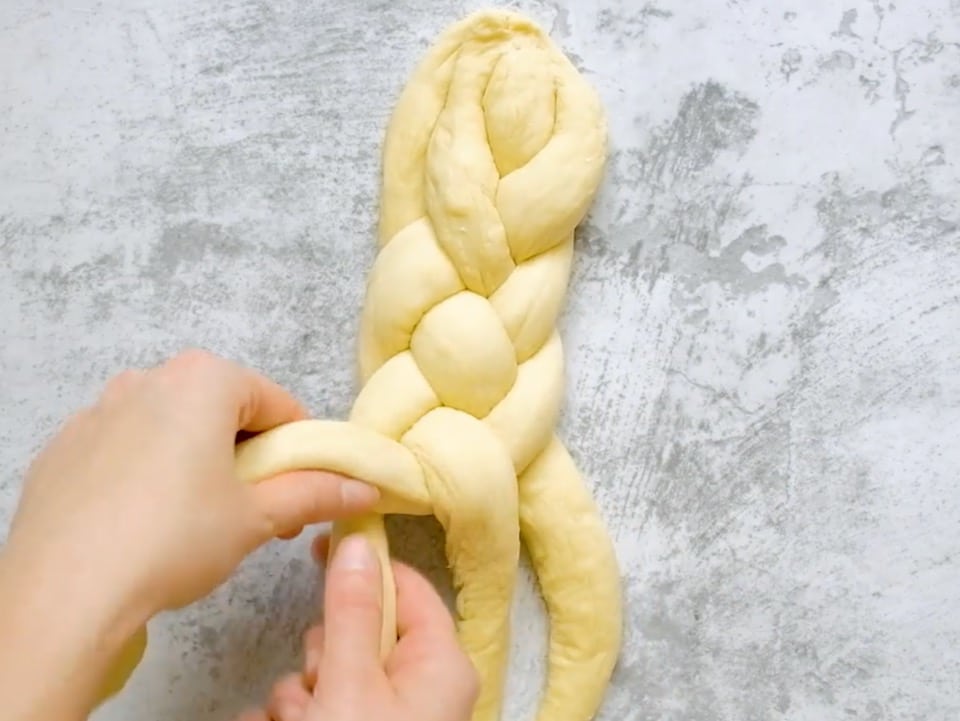
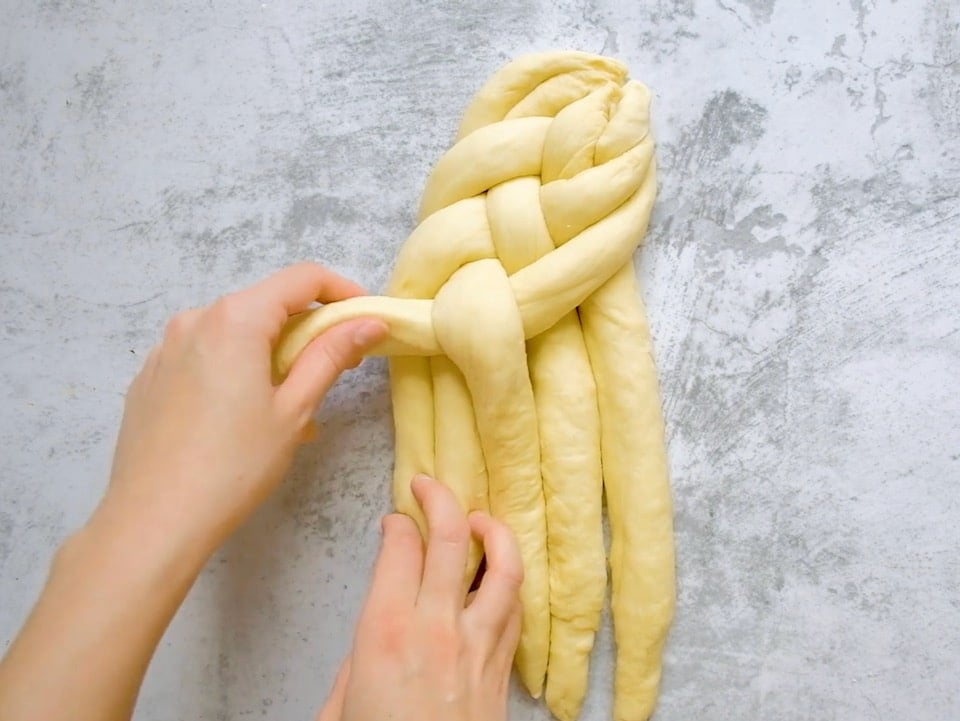
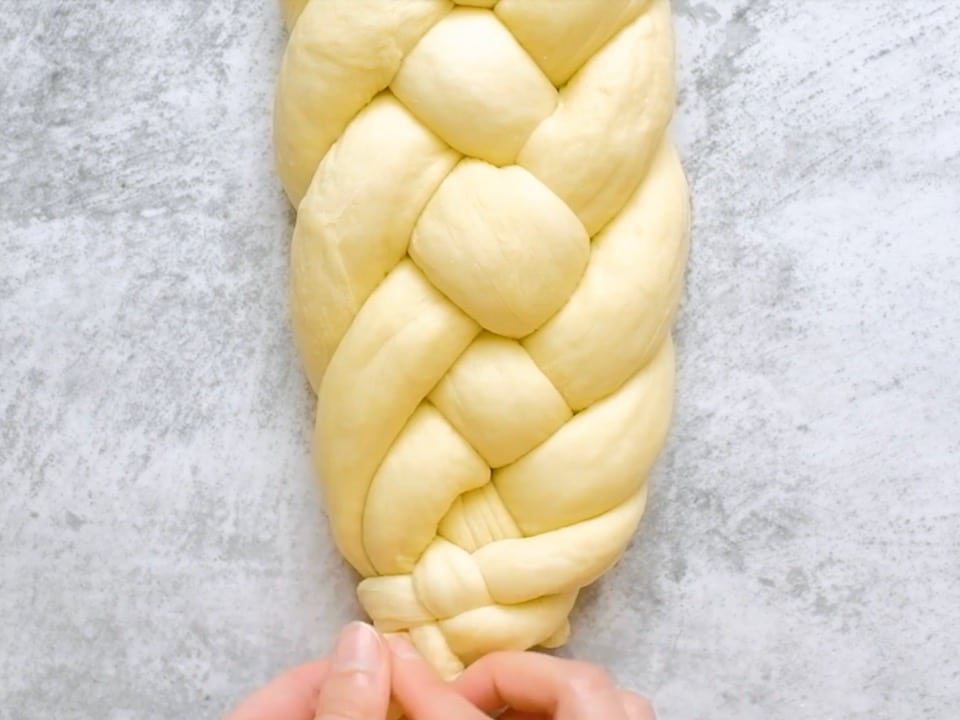
- Take the strand furthest to the right and repeat the weaving pattern again: over, under, over. Repeat this pattern, always starting with the strand furthest to the right, until the whole loaf is braided.
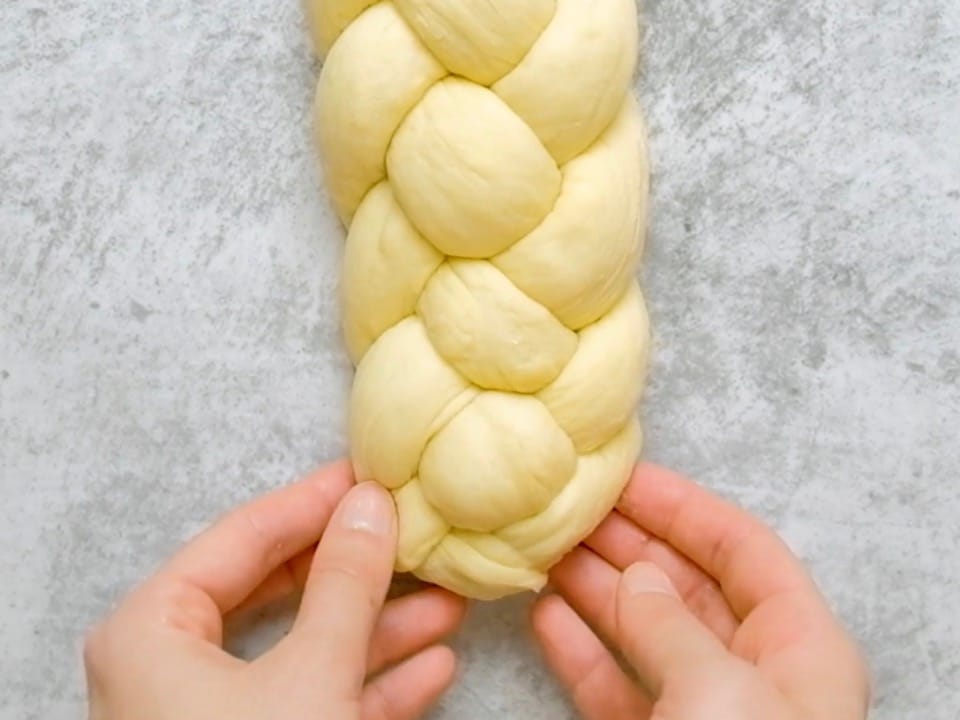
- Pinch the ends of the loose strands together and tuck them under on both ends of the challah loaf to create a nice shape.
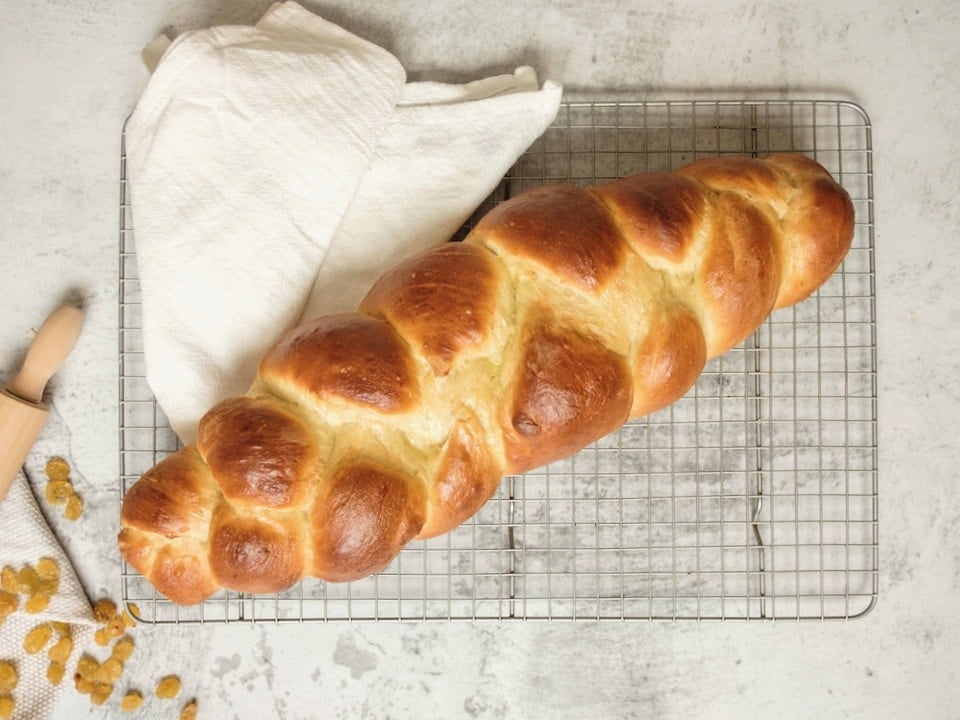
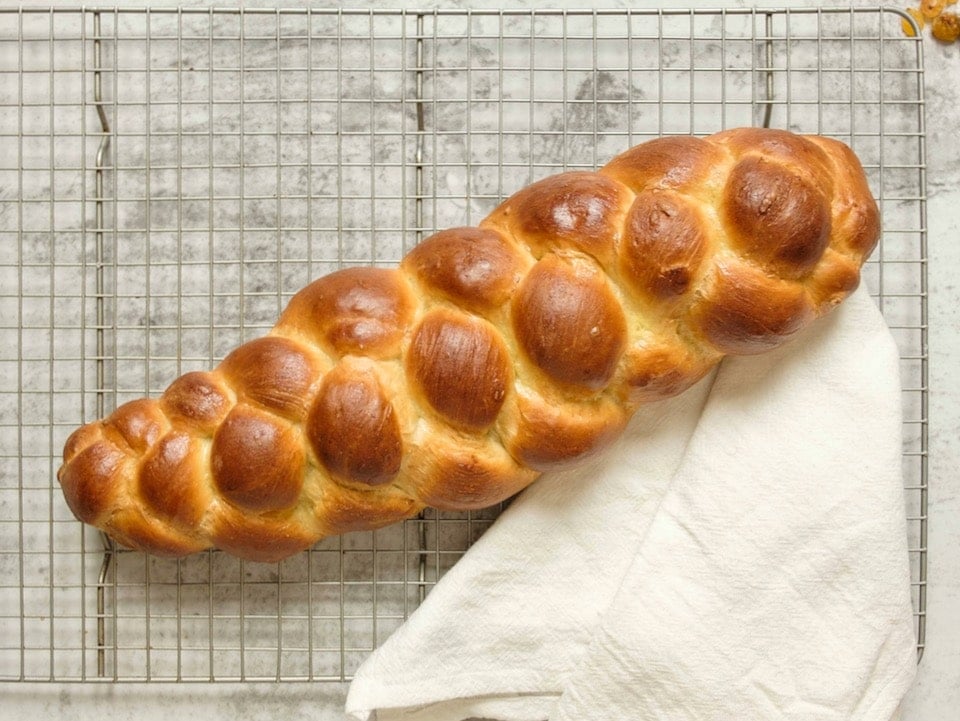
- Brush with egg wash, top if desired, then allow challah to rise. Bake according to your challah recipe’s instructions.
SIX-STRAND CHALLAH BRAID
- A Six-Strand Challah is somewhat more complex than the Three- and Four-Strand braids, but once you get the hang of it it’s actually pretty simple. This braid creates a thick, wide challah with a pretty design.Create six equal-size strands. Lay the six strands side-by-side, then pinch them together so they are connected at the top.
- When braiding a Six-Strand Challah, like with the Four-Strand, it’s important to remember that you always start with the strand that is furthest to the right. Memorize the “over 2, under 1, over 2” pattern and say it out loud as you braid to keep you on track.Take the strand furthest to the right and weave it towards the left through the other strands using this pattern: over 2 strands, under 1 strand, over 2 strands.
- Take the strand furthest to the right and repeat the weaving pattern again: over 2 strands, under 1 strand, over 2 strands. Repeat this pattern, always starting with the strand furthest to the right, until the whole loaf is braided.
- Pinch the ends of the loose strands together and tuck them under on both ends of the challah loaf to create a nice shape.
- Brush with egg wash, top if desired, then allow challah to rise. Bake according to your challah recipe’s instructions.
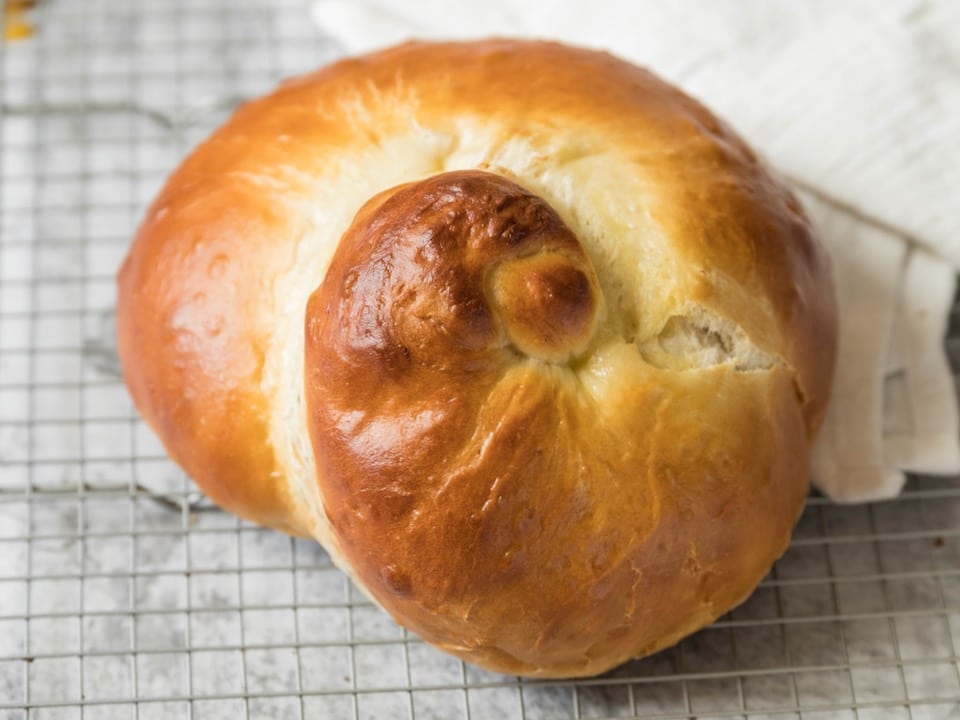
TURBAN CHALLAH
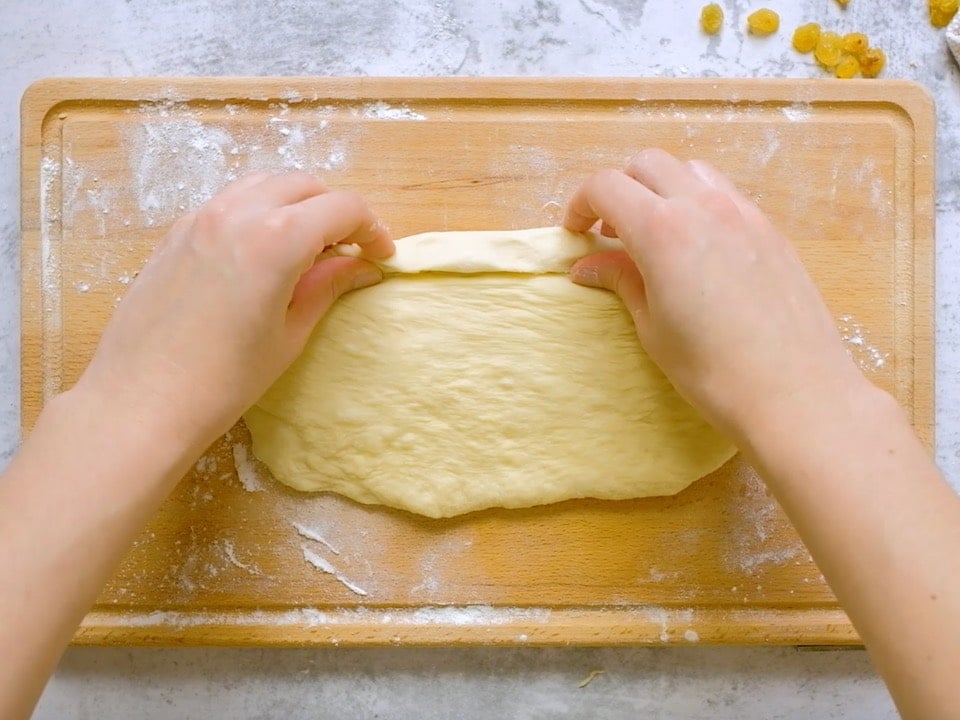
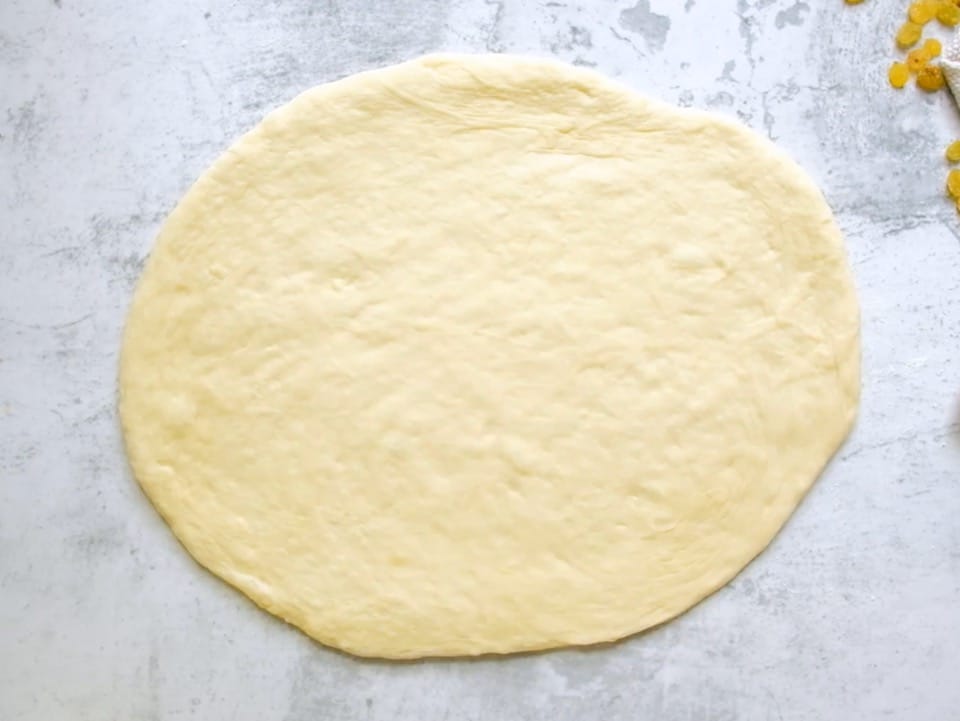
- For the Rosh Hashanah holiday, challah is baked into a round or spiral shape. The spiral (or snail-shaped) challah is sometimes called a “Turban Challah.” The shape symbolizes the cycle of a year coming to a close, and a new cycle beginning. This type of challah is usually baked with raisins in the dough to signify a “sweet” new year. Concealing the raisins inside the dough creates a prettier, more uniform challah.Knead and roll to flatten the dough into a rough rectangular shape, about a 1/2 inch thick.
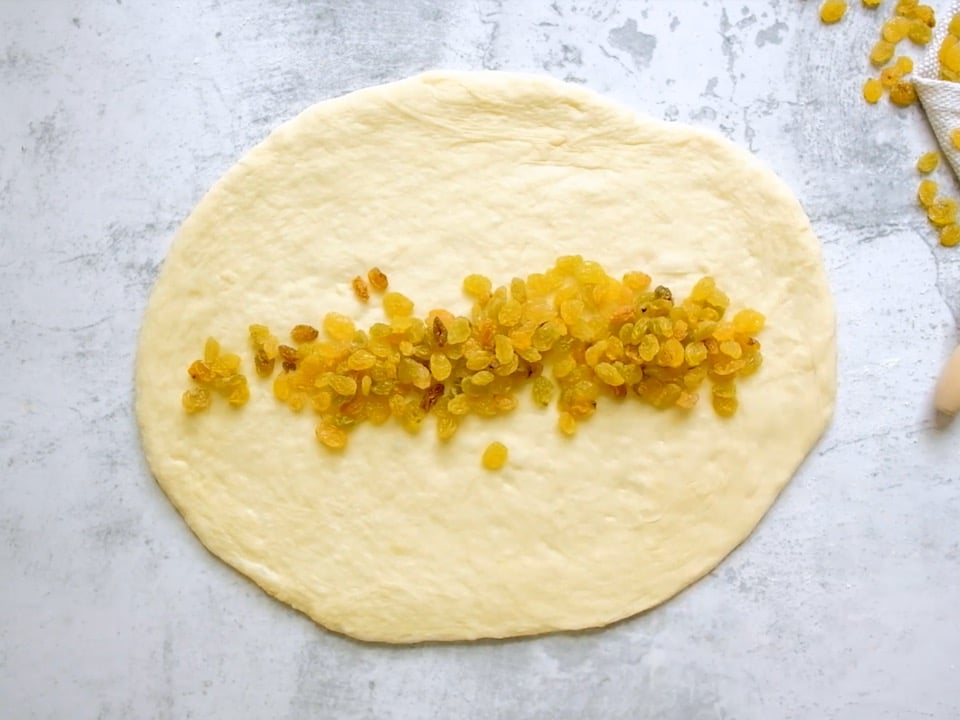
- If adding raisins, sprinkle them evenly across the center of the rectangle. Use either black or golden raisins, whichever you prefer.
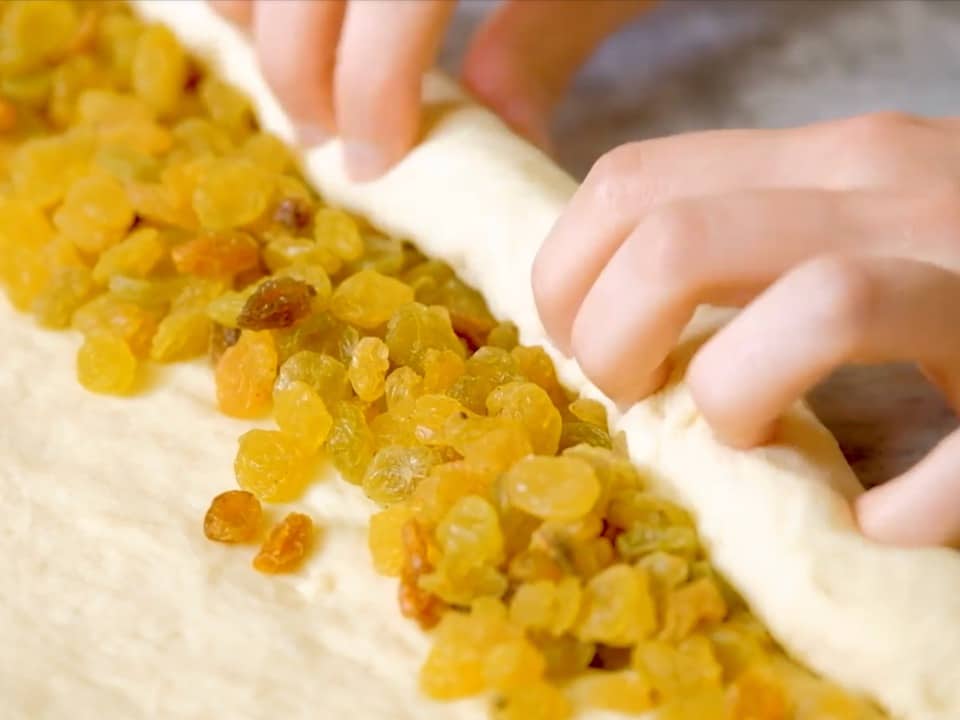
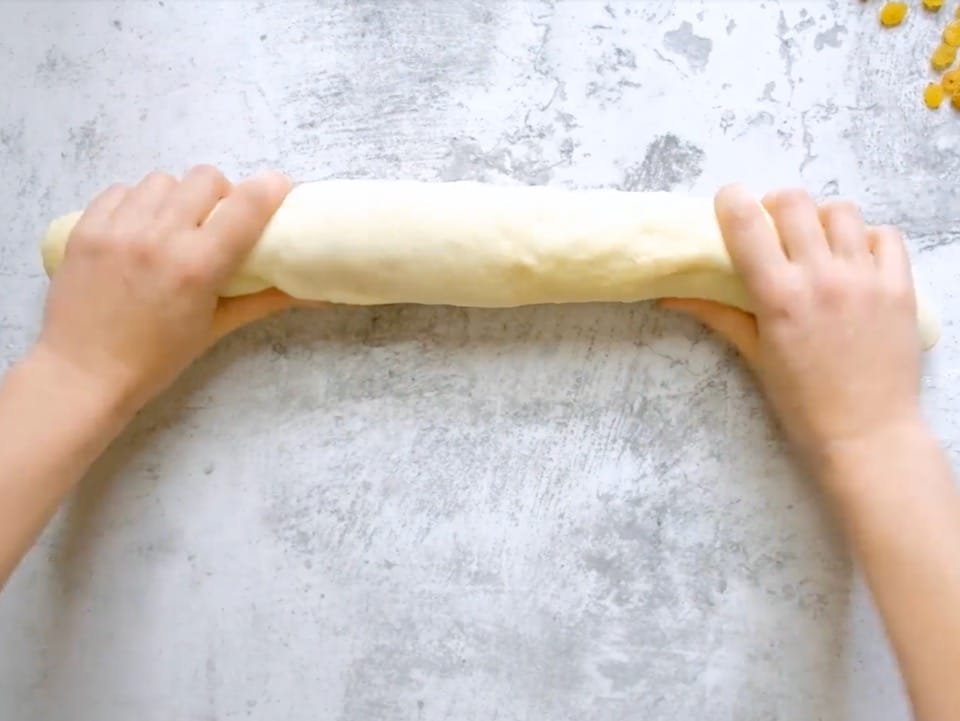
- Use your hands to rolls the dough from the bottom upward into one large, even strand, making sure to roll tightly to avoid air pockets. The raisins will be concealed inside the dough.
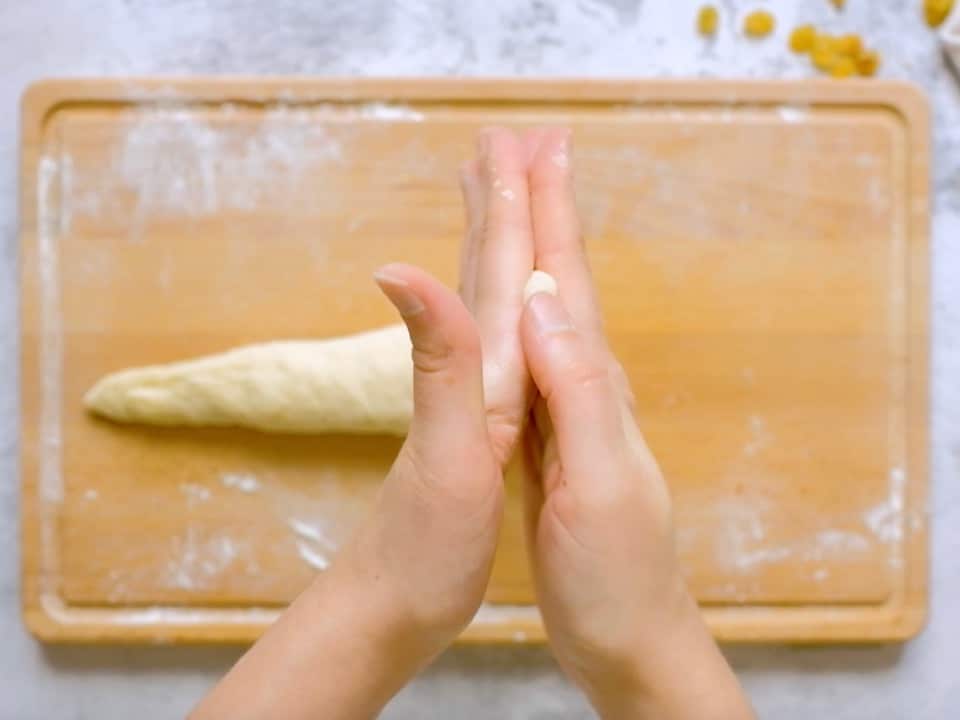
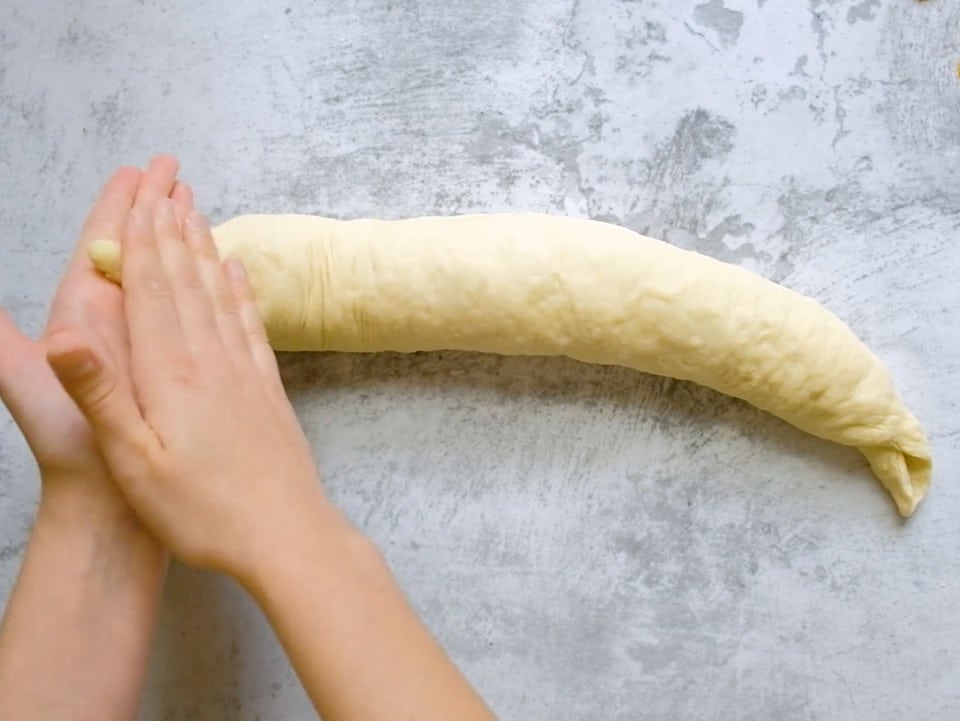
- Roll the dough using both hands to smooth seams and create one large strand.
- Taper the strand at the ends by rolling the dough between your palms.
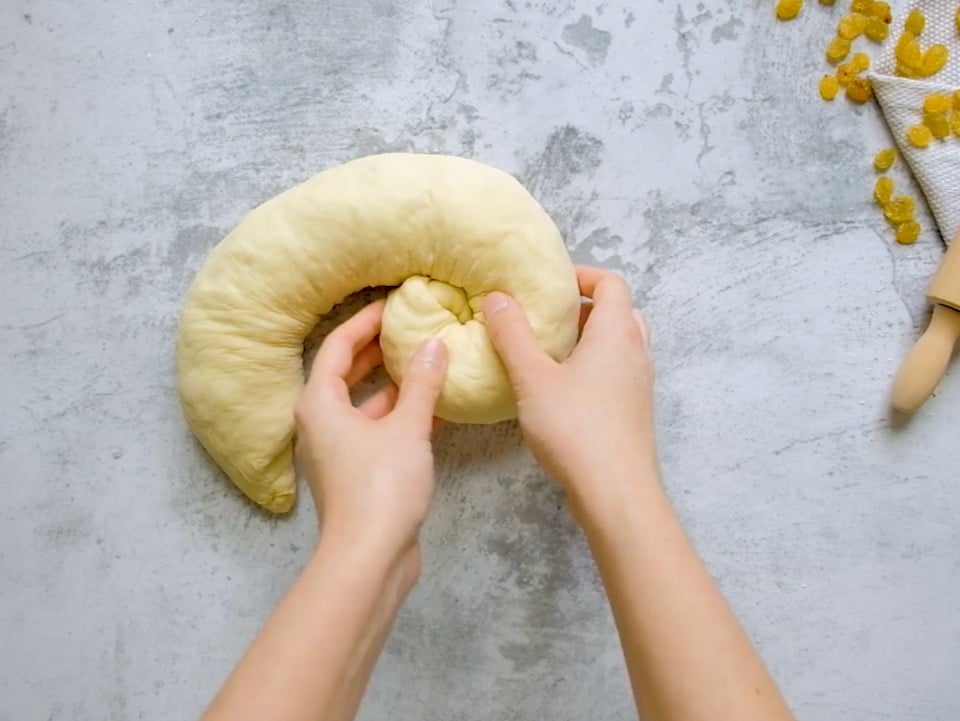
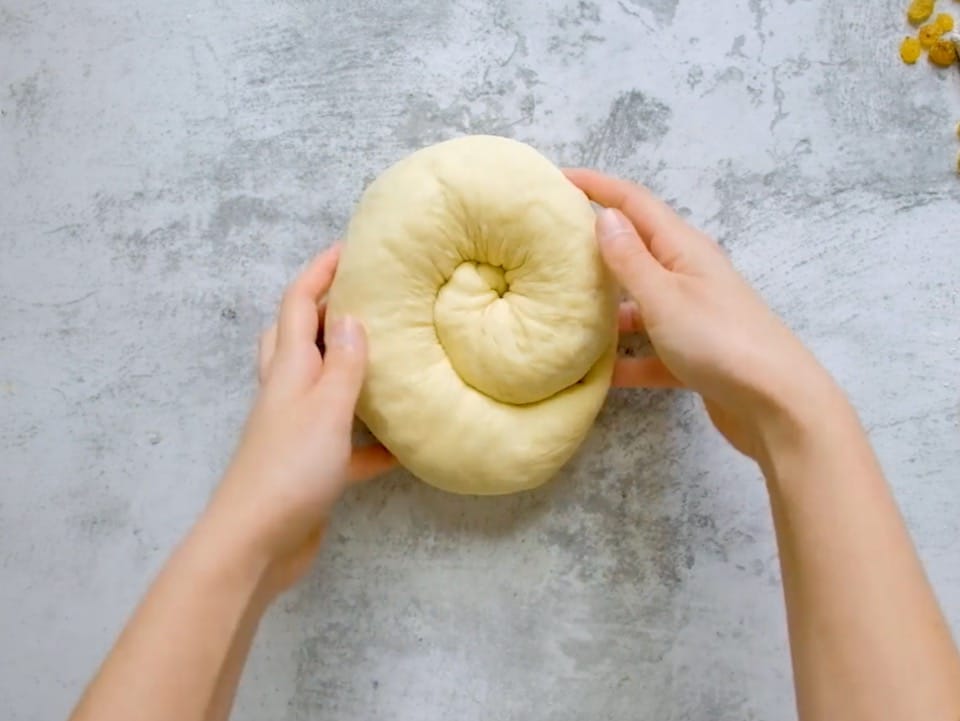
- Roll one end of the strand inward to create a spiral snail-shell shape.
- Continue rolling the strand in the same direction until the spiral is complete. Tuck the loose end of the spiral underneath the challah and pinch it tightly into the bottom, securing it.
- Brush with egg wash and top, if desired. Allow challah to rise for at least 45 minutes until you can press your finger into the dough and it doesn’t bounce back. The last rise is very important with this challah shape, since it is prone to splitting. Bake according to your challah recipe’s instructions. Note that this shape may require more baking time than a normal challah due to its bulk.
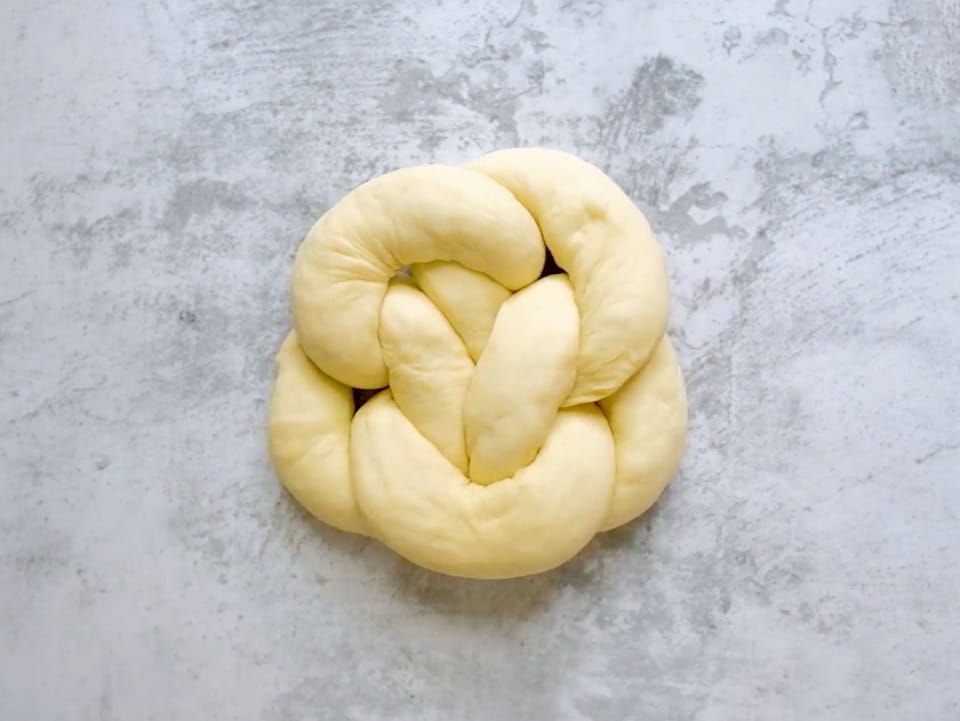
LINKED LOOPS CHALLAH
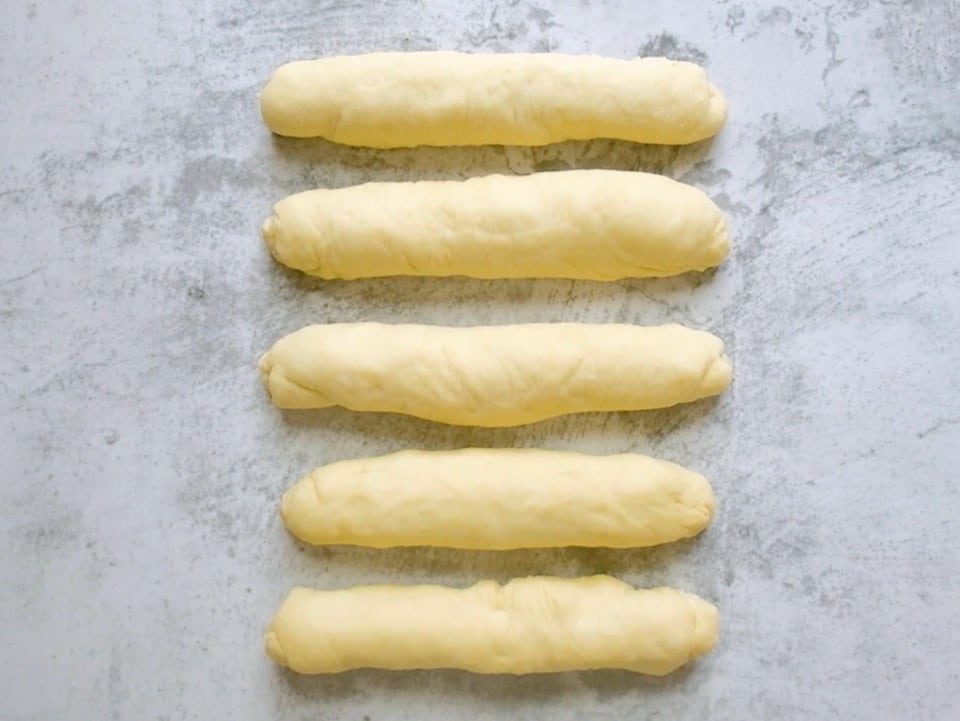
- This is an alternate way to make a round challah for Rosh Hashanah, or any time. The chain shape represents unity, strength, and togetherness. While the pattern looks intricate, it’s actually quite simple to make.Divide the dough into five thick equal-size strands. Don’t taper the strands as you would for a normal challah braid.
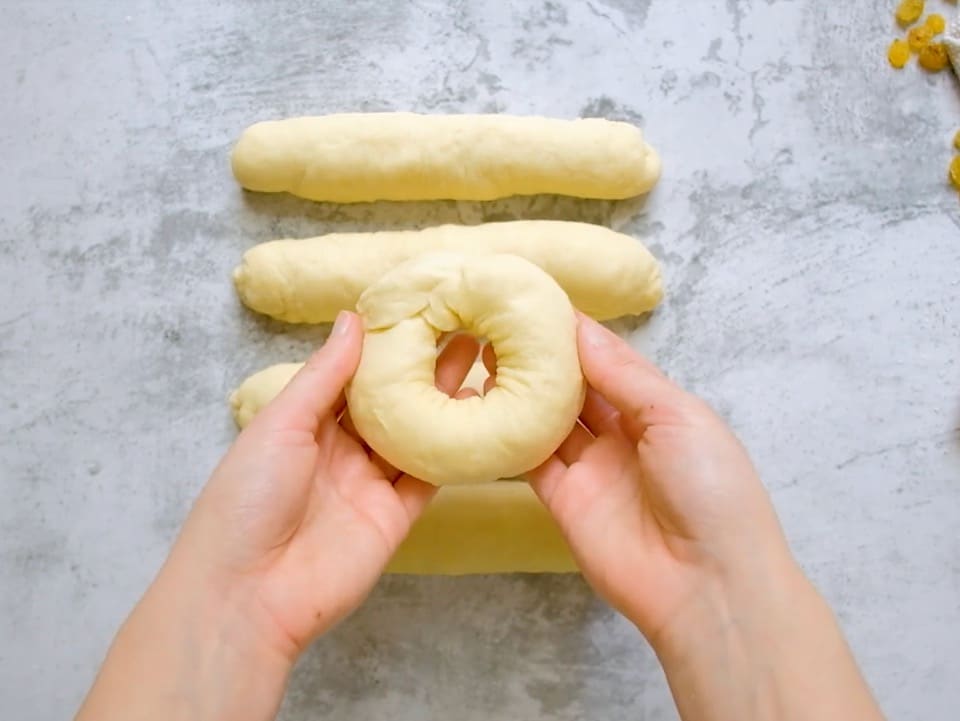
- Form one strand into a circle, pinching the ends together to create a ring of dough.
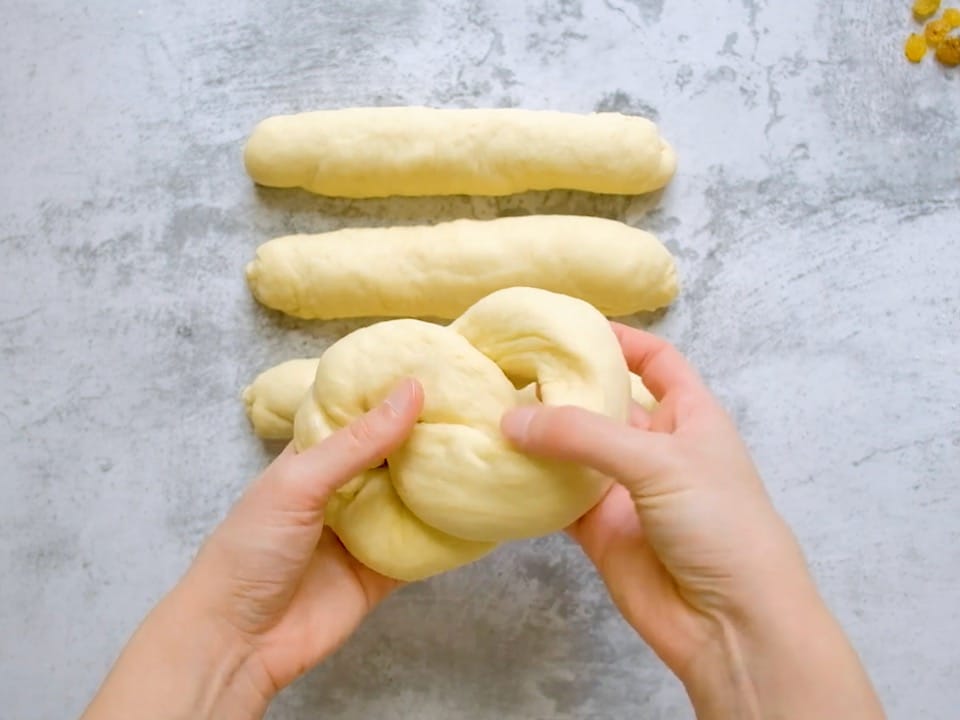
- Take another strand and connect it to the first circle as in a chain. Pinch the ends together to form a second circle.
- Repeat the process until all the strands form a complete chain. The final circle links to the first one to create a round challah shape.
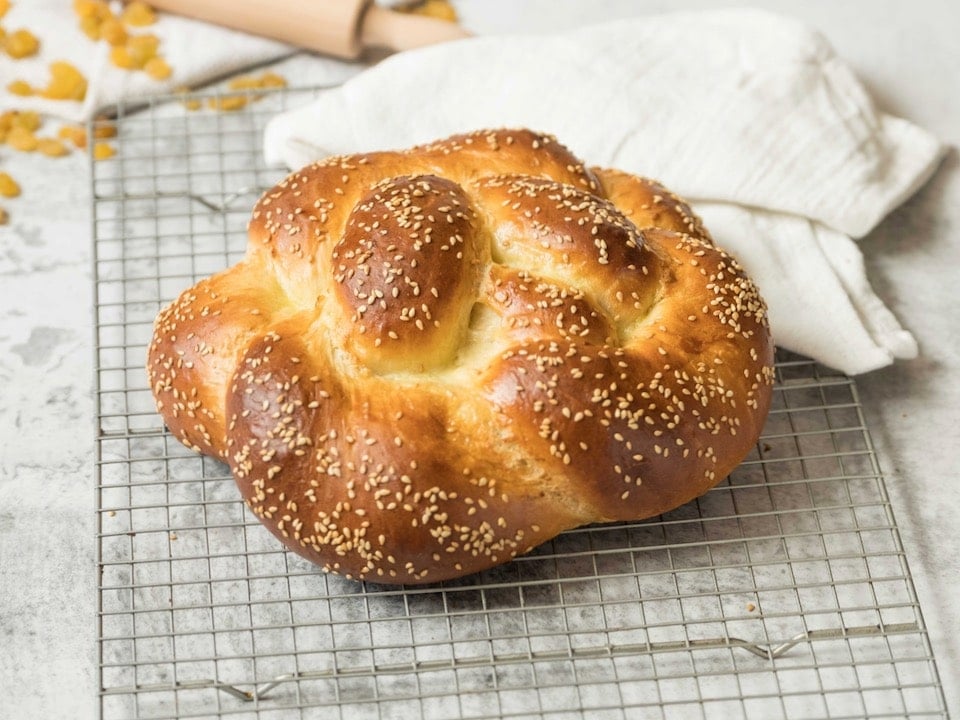
- Brush with egg wash, top if desired, and allow challah to rise. Bake according to your challah recipe’s instructions. Note that this shape may require more baking time than a normal challah due to its bulk. You may want to tent it with foil to keep it from burning on the outside as it cooks through. Use a thermometer to test for doneness in the center.
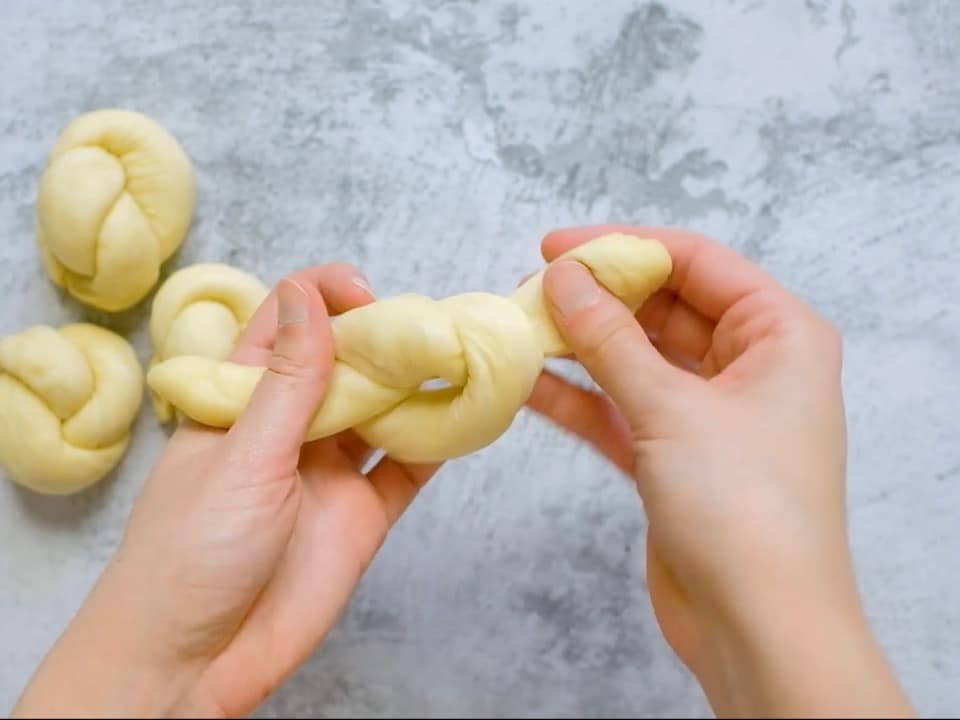
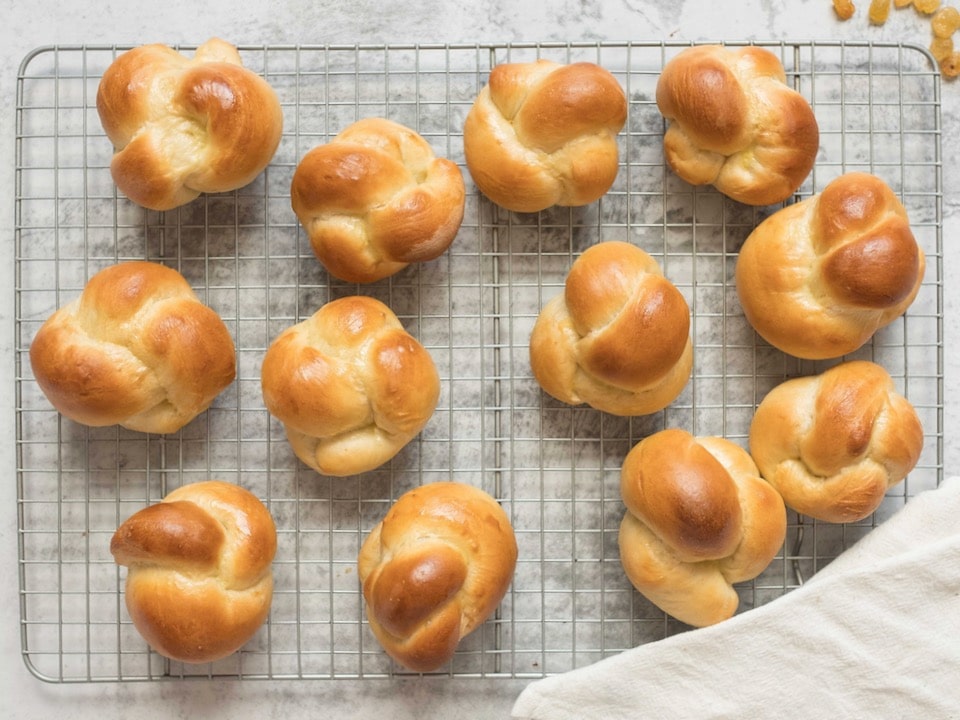
MINI CHALLAH ROLLS
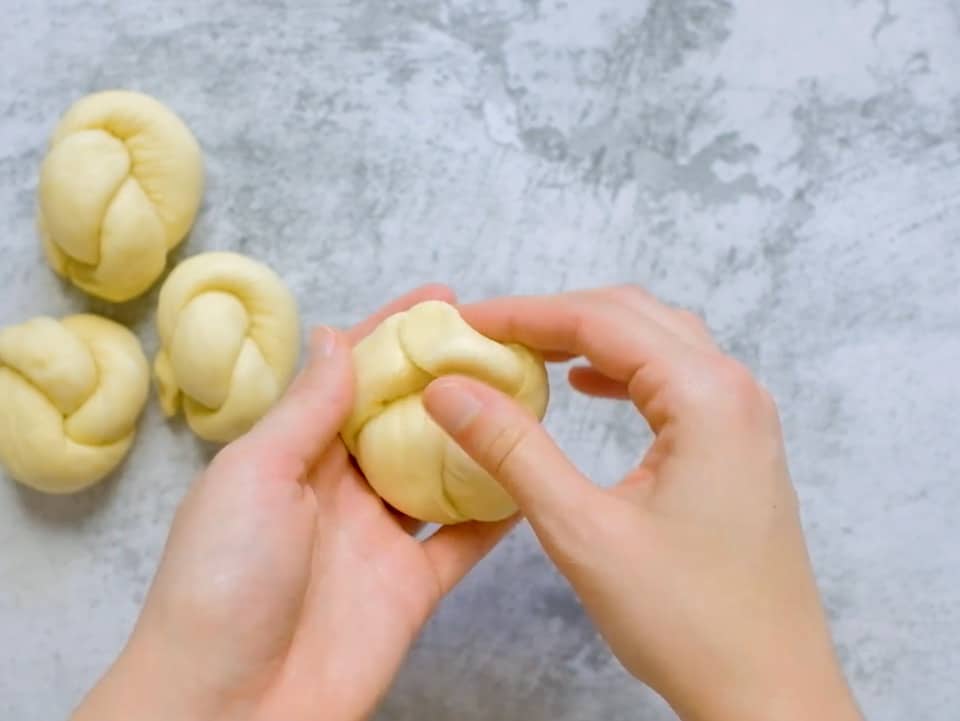
- Use your challah dough to make some pretty and delicious challah dinner rolls! They are so simple to make, and they’re sure to impress your dinner guests. To save time, I sometimes make these early in the morning and shape them into rolls, then cover the cookie sheet with plastic and place it in the refrigerator. I take it out of the refrigerator about 30 minutes before baking so the dough can return to room temperature.Roll your dough into several small equal-sized strands that are about 9 inches long. For each strand, start by tying a knot in the dough.
- Pinch the two loose ends together to create a roll shape.
- Place the seam side down on a greased cookie sheet. Brush with egg wash, top if desired, and allow to rise. Bake at the same temperature as you would a traditional challah braid. They will cook faster than a braid, so keep an eye on them towards the end of the baking process.
NOTES
Nutrition

tried this recipe?
Let us know in the comments!
Challah Braiding Tips
- Make sure your dough has completely risen using a two-rise process before you start to braid. If you don’t, your strands may rise and expand while you are braiding, leading to a misshapen and sloppy-looking braid. The challah will still taste good, but it won’t look as pretty.
- Once you start braiding, continue until you are finished. If you walk away from a half-braided challah, you might lose your place in the braid, which can make things a lot more complicated.
- For braids that start with the strands being pinched together at the top (four- and six-strand braids), pinch them somewhat loosely at the beginning of the braiding process. I’ve found that often I like to “unpinch” this top section when I’m finished braiding so I can re-braid the top of the challah into a tighter, neater braid. This gives a cleaner look to the challah overall.
- If your dough is sticking to the board, keep your surface lightly floured as you braid.
- Don’t get discouraged! Making even strands and pretty braids takes some practice. Follow the steps here carefully, be patient with yourself, and most importantly HAVE FUN!


Directions even I can understand. Made braiding a cinch. Thank you so much!
Ingrid
Excellent tutorial. Thank you!
This is a awesome site. Thankful for this. My husbands Jewish. I’m so excited to surprise him with your challah skills!
i love how you explain recipe directions especially w/ pictures. I’m a visual person so it really helps.
I’m glad it helps Nanci! I do that because I am a visual person too, and when I first started learning how to cook I wished that I had pictures of each step… it would have made the process so much easier!
Thank yo so much for the over under challah braiding instructions. I have been struggling with the numbered method. This is so much easier!
Hello Tori, I enjoy reading your blog and I have to say that I love love love Challah bread. I don’t consider myself an expert but my Challah comes out decent. I usually make the double braid (top/bottom) and my family love it. The last one I did it was HUGE (lol) barely made out of the oven. Thanks for sharing how-to guides to braid the bread.
I could not find the nutritional information on this site. Diabetics require this information if they are to enjoy your enticing creation. Please include the nutritional information with the recipe. Thank you.
Kermit, I don’t currently offer calorie breakdowns on my recipes. The nutrition calculators available online are not always reliable, and nutrition stats of various ingredients can vary from brand to brand (sodium content, calories, etc.). There are calorie calculators online you can use where you can plug in the specific brands you use. Just Google “calorie calculator” and you should get many results.
Excellent blog! I went to old town Israel and they served challah on the street with some type of green herb (pesto like) olive oil maybe dipping sauce. Do you have any idea what that was and how to make it?
A tablespoon of zatar with three tablespoons olive oil
looks awsome!! seems easy to make
Love your site. I’ve struggled with this typical 4 braid method. I found success with the British-US method.
Simply place the 4 strands like a star with ends pinched together in the center. Then criss cross the across strands with the strands passing on the right (like driving US). Then cross cross the up/down strands passing on the left (British driving). Repeat. Across passes on the right, up/down passes on the left. As the loaf gets longer, it forms a log.
Makes a nice high loaf.
So thankful I found this site. My daughter has to make challah for a class project. While I make bread often, the braiding part seemed daunting. I will be using a high altitude recipe I found as yeast breads act quite differently where I live. I’ll take a picture when we’re done.
thanks for your help
I have different way to do the 6 braid that I was taught by an old dutch baker, attach the 6 strands, take the left most all the way across the top, then take the second right most all the way across the top, these 2 become the “arms” and you then have 4 legs(inner and outer) the only legs you deal with are the outer. repeat until braid is complete:
take right arm to center
left outer leg is now moved over top to be right arm
take left arm to center
right outer leg is now moved over top to be left arm
this was my first attempt, so not as pretty as it should have been
Thanks so much for the tips…especially on braiding. Now I can expand beyond three!
What can you tell me about freezing the dough. At what point?
Thanks.
Cheryl
Hi Cheryl- you can bake, then freeze, or you can freeze the dough. To freeze after baking, place the bread while it’s still warm from the oven (not hot) in a plastic zipper bag. Squeeze as much air as possible out of the bag before sealing. When ready to warm up, put in a 300 degree oven till warmed through, just before serving– this will make the bread taste more fresh.
If you want to freeze the dough and bake later, allow the dough to rise and shape into loaves. Place the braided dough in the freezer until it gets hard. Wrap it in plastic wrap in three layers, then freeze until needed (no longer than 1 month, or you risk freezer burn). When thawing, remove plastic wrap, allow to thaw/rise for 2-3 hours until risen and a finger indentation stays in the dough rather than bouncing back, then bake as directed.
My challah turned out beautiful! I had made some before but your recipe was easier & tastier! The braiding was much easier than I expected! Thank you! We’re all looking forward to next Shabbat!
You’re welcome Michelle, congrats on your challah!
Every time I make challah and braid, the dough does not form together. The finish product ends up being separate strands, but nicely baked. I don’t know what I am doing wrong, and I can’t find any literature on it. Any help would be appreciated.
Hi Jenna, have you tried my recipe? It might be the fault of the recipe and not the form of the strands… also are you making sure to let the dough rise one more time after it’s braided? Those are the two areas I would troubleshoot first.
LOVE THIS SITE!
Hi Tori,
Your blog on Challah is helping me teach my classes and I wanted to say thank you. Also do you recommend any particular bread flour?
Carolyn
Wow…..thanks so much for sharing. I’ve made it a few times with just the three strand and found it to be complicated and it didn’t look pretty but did taste wonderful just like you mentioned. I never could figure out the four strand one and now with your great detail I can try.
Tori, your recipe is so good that I’m sure Kal used your basic Challah recipe to make different types of Challah !! I love the recipe and it will be the basic of many of my bread recipe, may be I will make them into Cinnamon Roll one day. In Penang the Bakeries seldom add in the melted butter or margarine before they sprinkle the cinnamon mixed with sugar or brown sugar but cook some syrup and pour over them that made them so soggy !! I tried to correct her but she insisted she got the real recipe. After 10 years that bakery closed down !! It was because this bakery started it and told people that she got the recipe from The Seventh day Adventist hospital, actually was not !! This recipe was given to the chef by Dr. “Ketting” a lady doctor from USA 40 years ago !! I knew the chef and saw him doing it, so I know the secret and now almost everyone who watch or collect recipe will know it too !! 40 years ago, no one knows the real recipe. Thanks to Internet and those willing to share their recipes !!