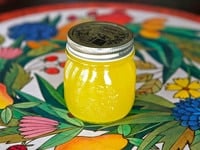
Clarified butter, also sometimes referred to as drawn butter, is a form of “clean” butter where certain solids are removed and only the pure butterfat remains.
Unsalted butter is slowly melted, allowing the milk solids to separate from the transparent golden liquid and for any water to evaporate.
Cooking with clarified butter has several benefits, particularly when frying. Milk solids are what cause butter to smoke and burn in cooking, so by omitting them, you are able to cook with butter at a much higher temperature and for a longer period of time.
Milk solids also cause the butter to spoil, or become rancid. Clarifying the butter ensures that when you use it to cook certain things they will have a longer shelf life.
The taste of clarified butter, though different and less rich than regular butter, is great for frying certain foods, like breaded eggplant, pancakes or blintzes.
It has a nice, subtle flavor that you won’t get when frying in animal fats or other types of oil. If you’re learning to cook kosher, clarified butter is useful in dairy and vegetarian dishes, but should not be used to cook meat.
Clarified butter does not become grainy when refrigerated and re-melted. It is a popular choice with certain baked goods.
It’s also helpful when creating a smooth hollandaise sauce. Because most of the milk solids are removed, clarified butter is also a good choice for people with lactose intolerance.
Those who have milk allergies, however, should steer clear because of the small amount of milk solids that may remain.
Making your own clarified butter is very simple. I will walk you through the process here.
I’ve written the tutorial for 1 cup of butter, which produces between 2/3 cup and 3/4 cup clarified butter. You can easily double or triple the recipe to make more at a time.
I like to make 2 or 3 cups and store in the refrigerator, so I always have some on hand. It will last you several months.
Next week, I’ll share a recipe where you’ll need to know this process… so study up! 🙂
Recommended Products:
We are a participant in the Amazon Services LLC Associates Program, an affiliate advertising program designed to provide a means for us to earn fees by linking to Amazon.com and affiliated sites. As an Amazon Associate I earn from qualifying purchases.
How to Clarify Butter
Ingredients
- 1 cup unsalted butter (2 sticks)
- Small saucepan
- Mesh strainer
- Several layers of cheesecloth
- Heat-safe bowl
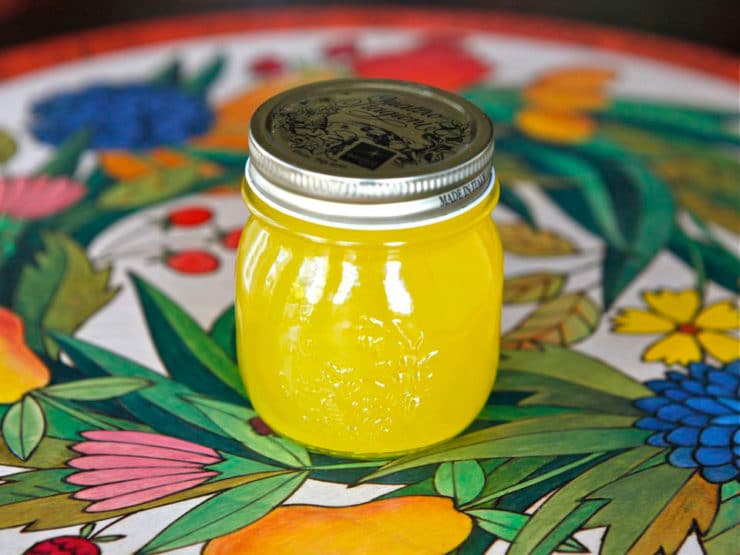
- Sealed container for storing the clarified butter (I use a small mason jar)
Instructions
- Place butter into a small, heavy-bottomed pan. Turn heat to medium-low. Let the butter melt slowly. This will take a few minutes-- don't rush it by raising the heat. Low and slow is the way to go! Don't stir the butter as it melts, just let it be.

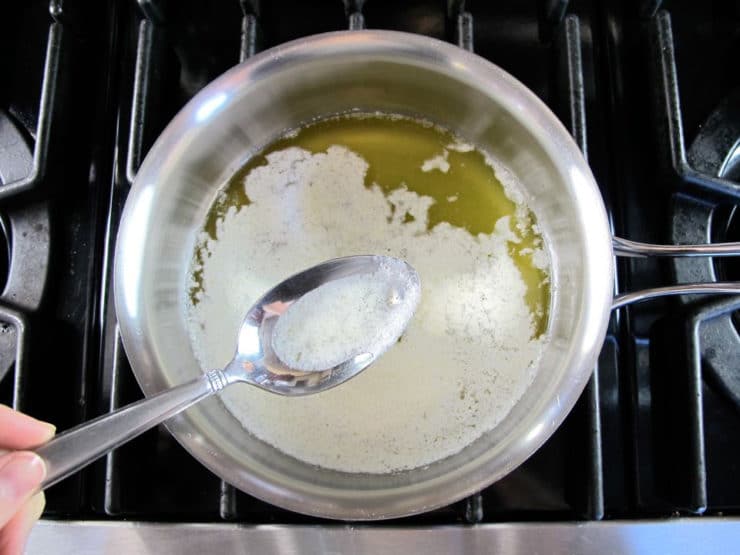
- Once the butter is completely melted, you'll notice a foamy white layer has formed on the top. Use a spoon to skim that foam from the surface of the butter, being careful to leave behind the golden butterfat.
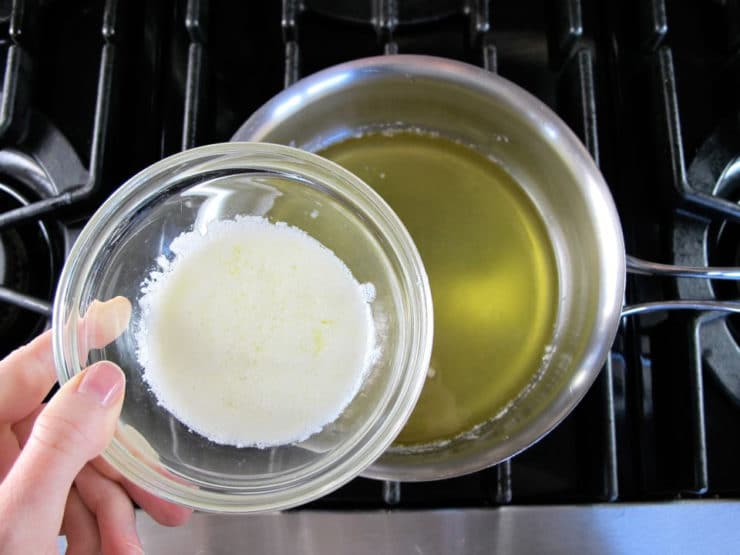
- Skim as much of the foam as possible from the surface. Don't worry if a few specks are left behind, you will strain those away later. If you'd like, you can use the solids you have skimmed in another dish to add flavor-- it can be tossed with warm pasta, on rice, or on fresh hot popcorn.
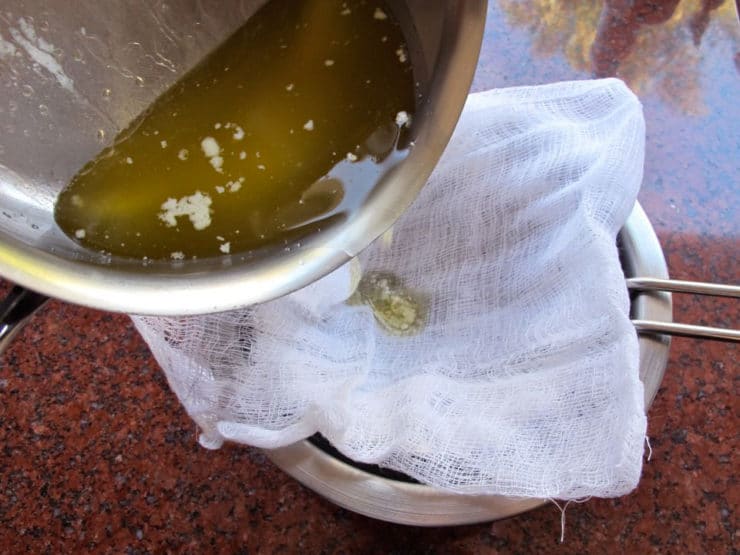
- Remove the butter from heat and allow to rest for 5 minutes. Meanwhile, place a wire mesh strainer over a heat-safe bowl. Line the strainer with several layers of cheesecloth. If you don't have cheesecloth on hand, use a coffee filter-- it will take longer to strain through, but it's just as effective.
- Tilt the pan gently and slowly pour the melted butter through the cheesecloth. You only want to pour the golden fat through the cheesecloth, skimming away the leftover bits of foam.
- When you get to the bottom of the pan, you'll notice more milk solids. Do not pour those through the cheesecloth-- stop when you run out of butterfat and only the solids remain.
- Pour clarified butter into a container and seal. Store in the refrigerator. Butter will solidify at cooler temperatures, but can easily be returned to liquid by warming.


Nutrition


I am not a restaurant chef but rather an elderly home cook but I clarify 3 to 4 lbs. of unsalted butter at a time. When the butter has been clarified and filtered, I store it in the refrigerator in an old heavy duty Tupperware container with a snap on lid. I use my clarified butter for everyday frying and as a dipping liquid for seafood. In addition, it works perfectly for popping popcorn. Another advantage to clarifying is you can buy cheaper grades of bulk unsalted butter, you will just a little more milk solids in the bottom of the saucepan.
Tried your recipe, works well. Do you have any information on what pore size (hole diameter) works best when filtering the clarified butter through a paper filter?
I’m sorry, I do not.
How can I make (and keep my clarified butter form setting up? Thanks
Exactly like I was taught over fifty years, working in a French restaurant. We used it in everything seafood. Makes for a great compound butter.
Nice
In theory, from what I know, it’s one of two answers:
Either clarified butter IS shelf-stable (since it doesn’t become rancid, if Tori is correct), or you just need to isolate it from air, like most other oils.
So realistically – in theory, if you just put it in a sealed jar, it should be shelf-stable for a long time.
If you have the equipment and the patience, you could also freeze portions then vacuum-seal them. You want them frozen to make sure they’re solid enough to not interfere with the vacuum sealing process, and you’ll want to at least refrigerate them before re-opening to make sure that it doesn’t cling to the vacuum bag too much. Vacuum-sealed clarified butter is almost definitely shelf-stable for a pretty long time.
Yet another way: since you’re already heating it up, putting them in sealed mason jars with the double bath method would also work.
Is there a way to make clarified butter shelf-stable?
I bought a bottle of clarified butter from the stoe.I can’t wait to try to make it at home.Thank’s for the recipe.
Thanks for clarified butter recipe… Can’t wait to try it!!!
Thanks!
I tried the coffee filter which did not work at all. I wound up punching three holes in the filter with a toothpick and the clarified butter drained out. The unwanted solids were left behind. As the level dropped, the solids clung to the filter and did not slide down to clog up the holes.
All’s well that ends well! 🙂
I have discovered a number of your recipes and techniques and have never been disappointed. I’m thankful for your contributions. Today, I’m playing in the kitchen using my buffalo chicken dip recipe to make buffalo chicken bites in fillo hence the need for clarified butter. I’m certain they’ll be great and eliminate the need for extra calories and carbs in crackers.
Happy you’re enjoying the site Lana!
Thanks for the instructions and photos. I just made clarified butter for a dish and wanted to make sure I did it right. Thanks for helping me confirm this.
Can I use salted butter? It’s what I have on hand.
Yes, just know the end product will have a salty flavor and uses for the clarified butter will be more limited because of that.
Spot on instructions. Have tried many different online sources for clarified butter and this is the most complete set of instructions without going over board. The Alton Brown style is fun and informative but way too much info for my purposes of justgetting it done.
Spooning Help
-When skimming off, take small portions of the foam into teh spoon instead of trying to be really efficient by filling the spoon every time. Taking a little longer can help you get mostly foam without getting the clarified butter into the spoon.
-Use the shallowest spoon you have. You can also try this, get a really broad frosting spreader and use that instead of a spoon. After each scoop into the foam, allow it to drip for 10 seconds or so before emptying the foam off.
Is there anything I can use the milk solids I skim off the top for?
That was already stated in the Beginning. You can use the milk fat solid particles to use on pastas, fresh hot pop corn , a rice dish -just NOT to be used for meats
I am anxious to try this — and I am hoping that clarified butter is the same thing as “purified” butter ??
that is called for in a recipe for flat bread (paratha) that I am planning to try as soon as I get to the grocery store. =)
Hi Michelle, paratha is typically made with ghee– which is clarified butter, like you see in this post, that is cooked slightly longer so the milk solids “caramelize” which gives the clarified butter a nutty flavor. You can use the same process as above, but just let the solids get toasty brown in color before separating them from the butter. You can also use clarified butter and ghee interchangeably, they have just a slightly different flavor. Good luck!
This was very helpful, thank you. Can you leave the clarified butter out at room temperature? And how long will it last at room temperature? Or should you keep it refrigerated?
Hi Reiger, Tori’s assistant Ashley here. It should be refrigerated.
Actually, as with any other oil, it does not need refrigeration
I use the leftover cheesecloth as a way to draw out dirt from my pores by placing the cloth on my face shortly after the butter is strained through it. Best to work quickly while the cloth is still warm for best effectiveness.