
Making pie crust for the first time might seem scary, but it doesn’t have to be. I learned how to make from-scratch pie crust the old fashioned way– the really old fashioned way– by studying vintage and antique cookbooks.
Over time I learned how to make a flavorful, flaky pie crust from scratch. With a little patience and a bit of practice, you too can make an old fashioned all-butter pie crust.
Vintage volumes like “Pie Marches On” by Monroe Boston Strause (1939), “Good Housekeeping’s Party Pie Book” (1958) and “250 Superb Pies and Pastries” by Ruth Berolzheimer (1950) taught me the basics—fat to flour ratios, how to roll out the crust, how to elegantly flute or scallop the edges.
Modern cookbooks like Bubby’s Homemade Pies (2005) and Mrs. Rowe’s Little Book of Southern Pies (2009) gave me updated pointers, like how to use the refrigerator and freezer to keep your fat cold as you assemble your dough (refrigerators were a relatively new invention in 1939).
For the best pie advice of all, I have to give credit to Aunt Chick. A small, thin paperback volume from 1942 by Nettie McBirney, titled “Aunt Chick’s Pies,” really gave me a solid foundation for crust making.
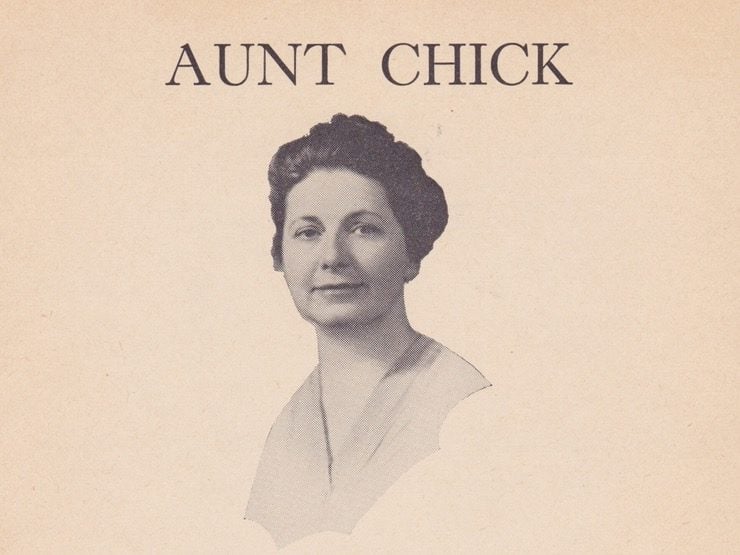
“Aunt Chick’s Pies” is an unassuming little volume– a simple red paperback with no picture on the cover. It was published in Tulsa, Oklahoma. I picked it up at a flea market one Sunday afternoon from a box of old cookbooks.
I never learned to make pie crust from scratch growing up; it was one of those cooking techniques that always made me nervous. It seemed really hard.
I bought “Aunt Chick’s Pies” because the smiling woman on the first page gave me confidence. She seemed wise, secure, self-assured… she knew the secrets of a great pie crust, I just knew it. So I brought it home and started teaching myself to make pie crust.
And guess what? Pie crust is not as difficult as it seems. Really! And it gets a LOT easier with practice.
Most pie crusts are made by combining flour and water with shortening, butter, lard, or any combination of those fats. Me? I prefer butter… plain, simple butter, the most delicious of fats.
It’s not easy to work with—in fact, it’s probably the most finicky of fats—but the flakiness and flavor that results from an all-butter crust is out of this world. It’s worth the fuss.
For kosher cooks, butter crusts are not ideal because they can’t be served with a meat meal. In a future blog I will talk about how to achieve a tasty pareve crust using dairy-free shortening. But today, it’s all about the butter.
I originally found the ratio for my all-butter pie crust in Aunt Chick’s Pies—3 cups flour, 1 cup fat, 2 tsp salt, ½ cup liquid. This combination makes enough dough for a deep dish double crusted 9 inch pie.
The ratio actually works for any fat, whether you’re using shortening, lard, butter, or any combination of the three (obviously you wouldn’t want to use a combination of lard and butter if you’re keeping kosher!).
The ratio has provided me consistently good results, and I’ve made many lovely and scrumptious pies using it. If you prefer a less salty crust, cut the salt in the recipe to 1 tsp. I think a little saltiness plays nicely with a sweet pie filling.
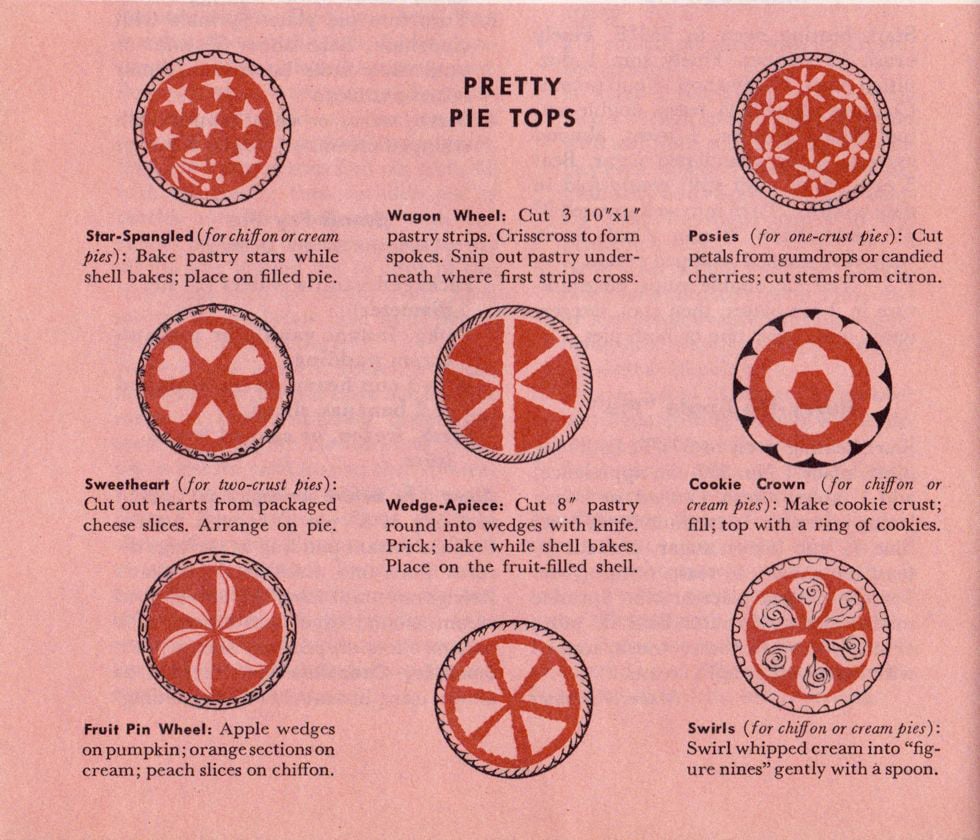
There are many ways to assemble a double-crust pie… you can lattice the top, decorate it with crust shapes, or make a wagon wheel design (illustration above).
If this is your first time making pie crust, I recommend following the steps on this blog till you’re comfortable making a simple double-crusted pie. Creating lattices and other techniques can be tricky, but fun… I’ll cover those kinds of design techniques in a future post!
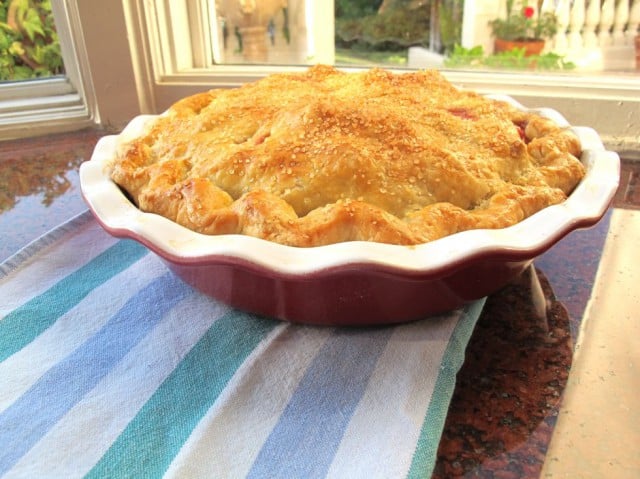
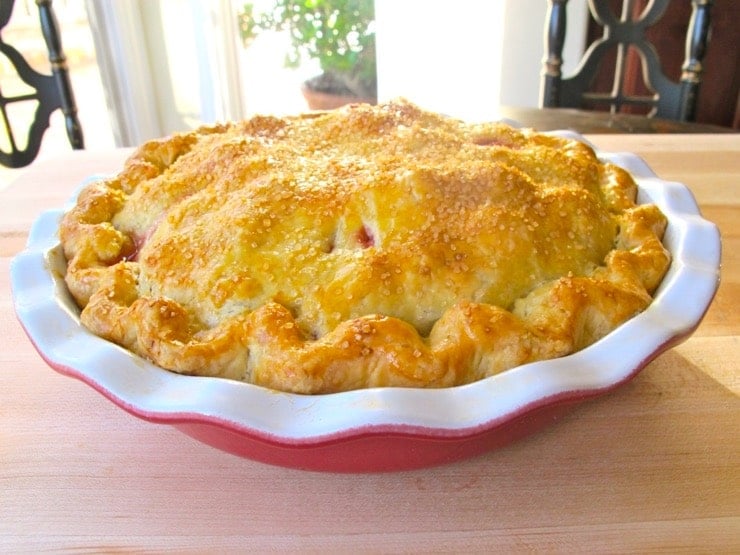
The pie I made for this blog is a Strawberry Rhubarb Pie, an old fashioned summer favorite. To learn a bit about the history of pie in America, click here.
Pie crust is one of those things that can leave a new cook frustrated. It takes time and practice to get the method right. Repetition is key… the more you make it, the better you’ll understand it.
I’ve posted lots of pictures in this blog and very clear steps to keep you on track. For those of you who are worried about messing up, I leave you with a few words of wisdom from Aunt Chick herself—
Don’t be scared. It is just pie crust.
Recommended Products:
Old Fashioned All-Butter Pie Crust
Ingredients
- 1/2 cup cold water
- 4 ice cubes
- 3 cups all-purpose flour
- 2 teaspoons salt
- 1 cup very cold unsalted butter (2 sticks)
Instructions
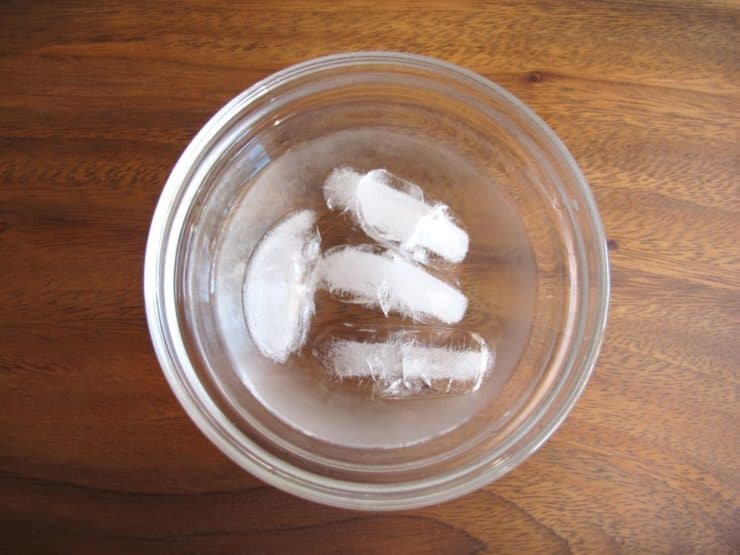
- Pour cold water into a small dish with a few pieces of ice to chill.

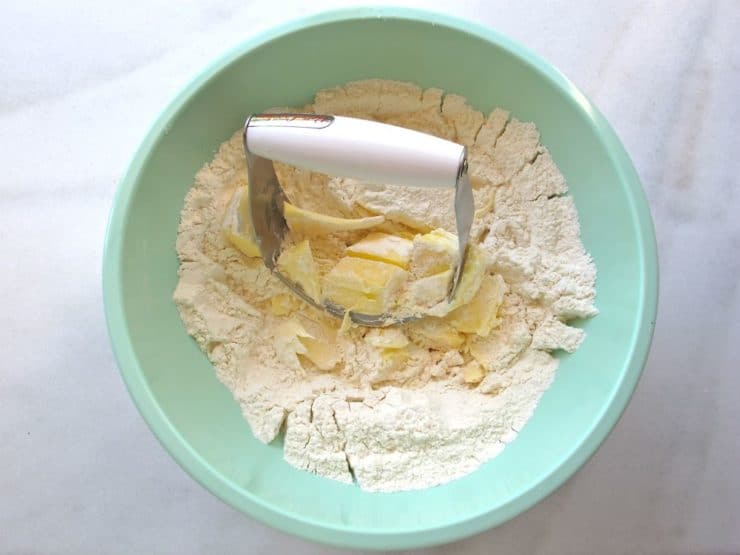
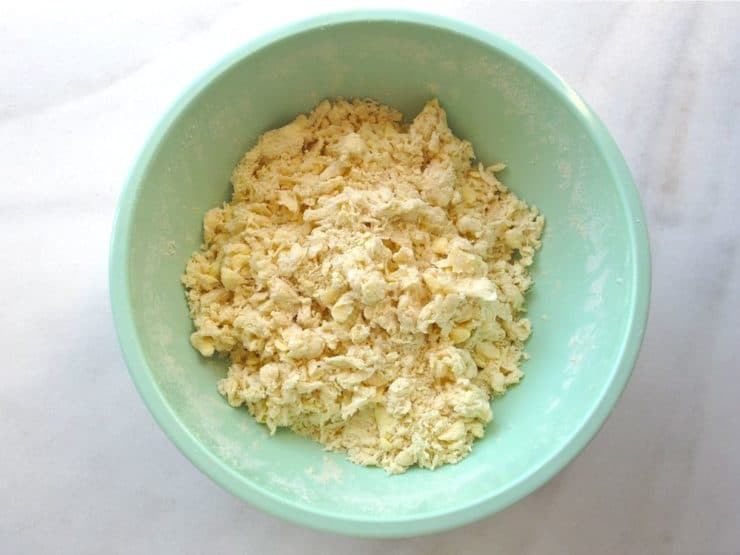
- There are two ways to integrate the butter into the dry ingredients… by hand mixing or with a food processor. In my experience, both methods work equally well as long as you mix the water in by hand. Don't process the water into the dough, or you'll end up with a tough crust.BREAK UP BUTTER BY HAND: Add flour and salt to a large mixing bowl, stir with a fork to blend. Take cold butter out of the refrigerator and add it to the bowl. Use a pastry cutter to cut the cold butter into the flour, using firm pressure and pushing down repeatedly to break the butter into small pieces.
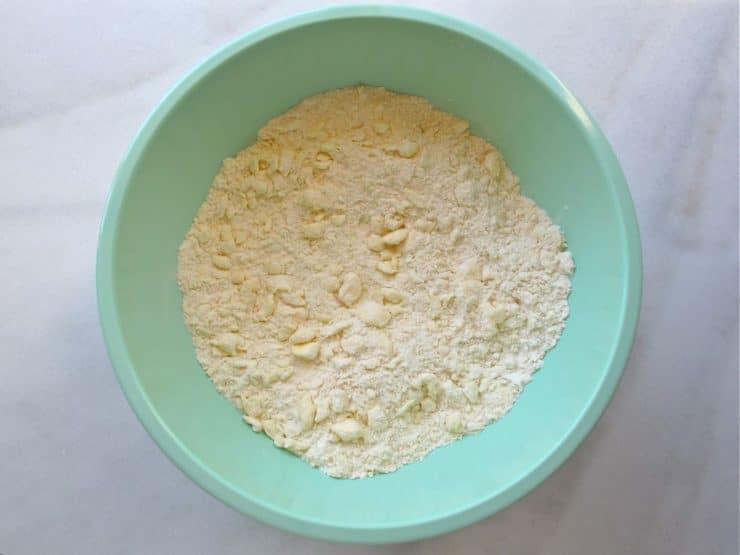
- Work as quickly as you comfortably can. Stop when the flour and butter mixture looks like large-curd cottage cheese. There should be a variety of sizes in the butter pieces… the largest should be about the size of a pea. Place flour and butter mixture in the freezer for 2 minutes before proceeding.
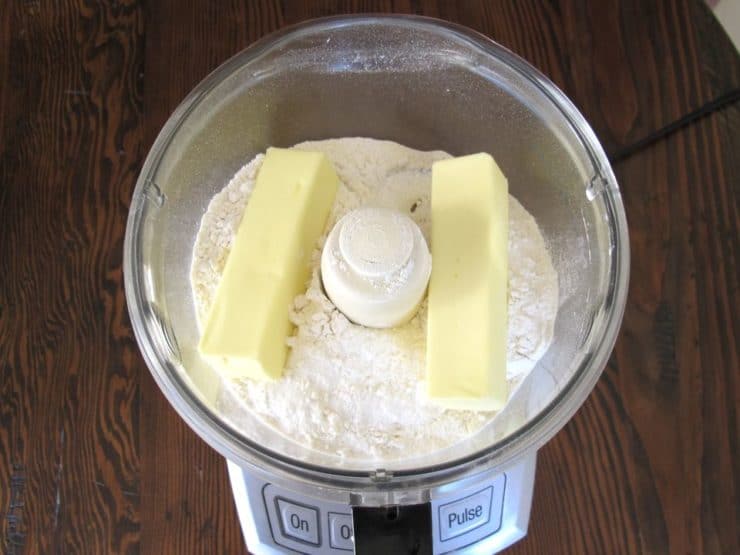
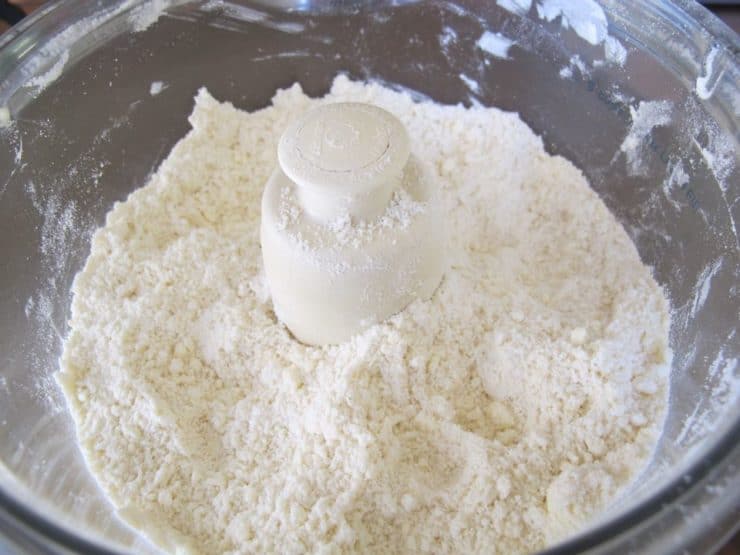
- MIXING DOUGH WITH FOOD PROCESSOR: Fit your processor with a blade attachment. Add flour and salt to the food processor.Take cold butter out of the refrigerator and add it to the processor.
- Pulse the processor in 3-second bursts to break up the butter. Stop when the flour and butter mixture looks like large-curd cottage cheese.
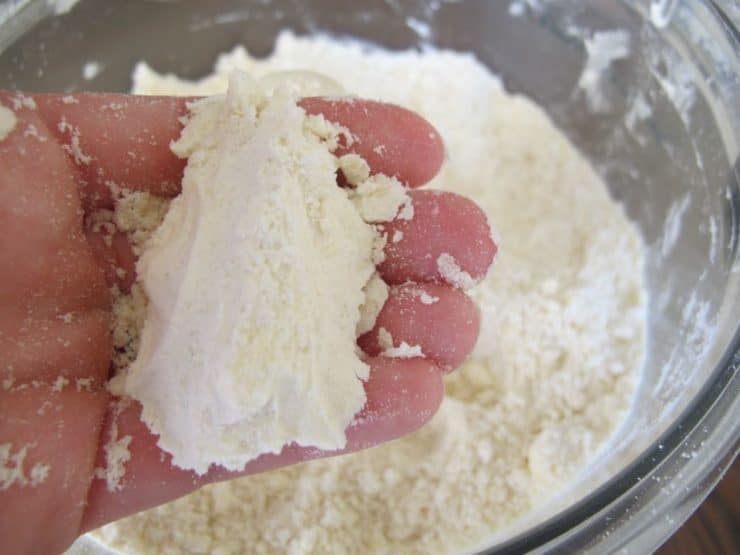
- There should be a variety of sizes in the butter pieces… the largest should be about the size of a pea. It should only take 10-12 pulses to get the right consistency; start checking consistency after 8 pulses. Make sure you don’t over-process… having a variety of sizes in the butter chunks will make a flakier dough. Mixture should hold together when squeezed in your hand. Pour mixture into a mixing bowl. Place flour and butter mixture in the freezer for 2 minutes before proceeding.
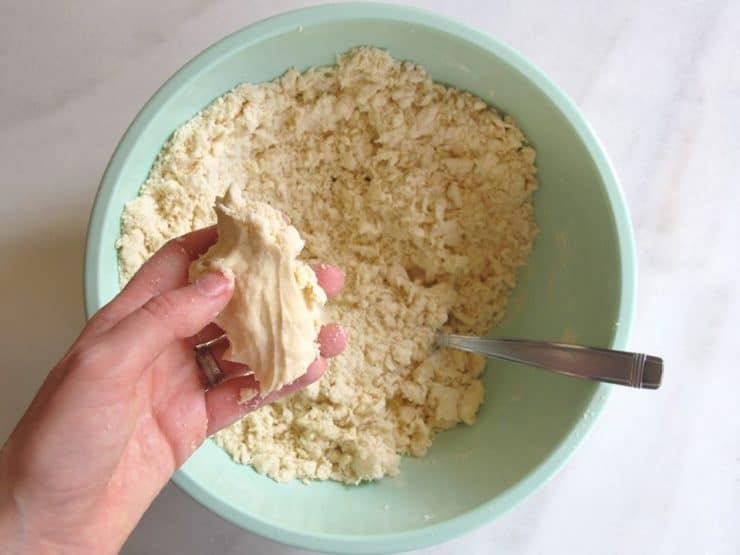
- Take ice water out of the refrigerator. Add water to the flour mixture one tablespoonful at a time, using a fork to lightly toss the liquid into the dough. Try not to touch the dough as you mix; you want the mixture to stay as cool as possible. You may not need all the liquid to bring the dough together, so add slowly… the dough can easily turn wet and sticky if you’re not careful. By the same token, you may need a bit more liquid. Pie dough is not an exact science; every batch of dough will be different.
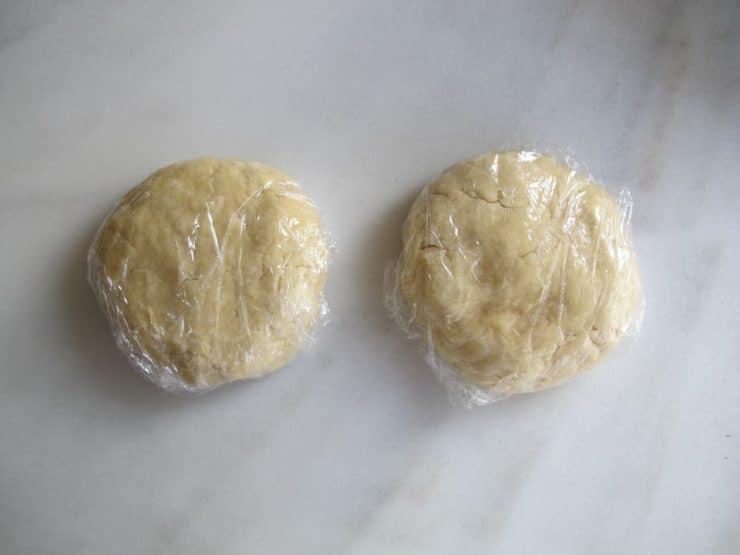
- When the dough begins to look stringy and larger lumps begin to form, take a fistful of the dough and squeeze it in your palm. Open your palm. If the dough holds together well and is just slightly tacky, it’s ready to pull into a dough ball. If the dough easily crumbles in your hand or falls apart, it is still too dry… add a little more liquid.When dough is ready, pull it together with your hands into two balls, one slightly larger than the other. Flatten the balls into disks that are 7-8 inches across.
- Cover the disks tightly in plastic wrap and place in the refrigerator immediately.The dough should be refrigerated for at least 1 hour, and up to 48 hours. I prefer to make the dough a day ahead and refrigerate it overnight. You can also freeze the dough for up to 3 months. If you freeze the dough, allow it to thaw and soften a bit before rolling out.
- TO ROLL OUT CRUSTS: Any large, smooth surface will work, as long as it is in a cool dry area. Marble is ideal. You will need to work quickly to roll out the dough– again, you want it to stay cool, so have any tools you need nearby and ready to go: rolling pin, flour, pastry scraper, 9” pie plate or dish, a sharp knife, and a baking sheet (as needed).Lightly flour your rolling surface. Take the larger of the two dough disks out of the refrigerator and discard the plastic wrap. Place it in the center of your rolling surface and sprinkle the top of the disk lightly with flour.Use your rolling pin to roll out the dough. I like to roll it from the center outward, a roll in each direction, as though I’m rolling around the face of a clock (12, 3, 6, 9, 12). You want the dough to expand evenly in all directions, so that it forms a large circular shape. Use more pressure in the center of the dough, and less as you near the edges. Don’t roll past the edge of the dough.
- As you roll, you may notice cracks forming on the outer edges. If any large cracks develop, pause and pinch the dough together to mend them before rolling again.
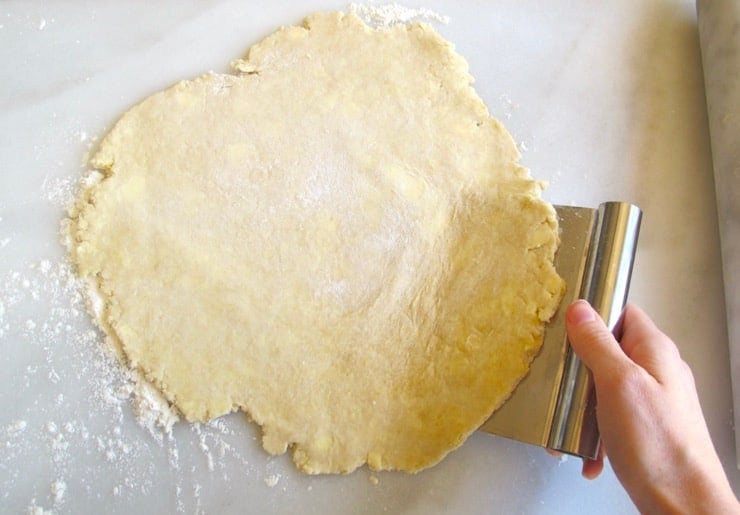
- If the dough becomes sticky as you roll, lightly re-flour the surface of the dough before proceeding. When the dough is about halfway rolled out, use a pastry scraper to loosen the dough from the board and flip it over.

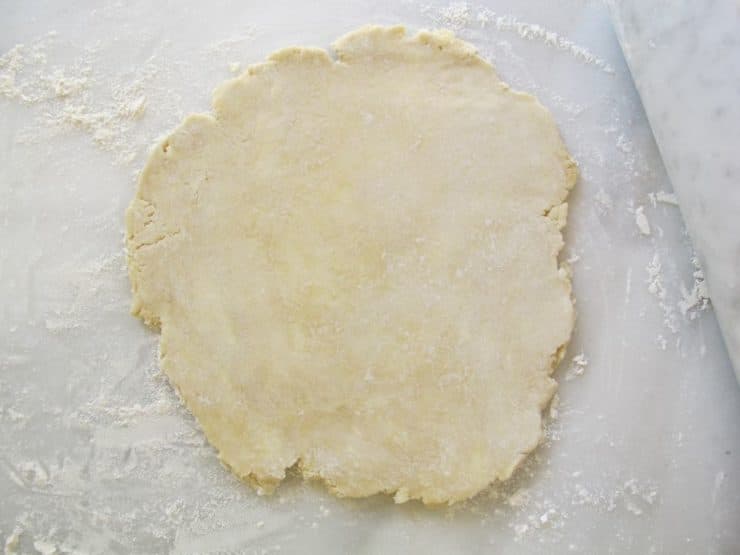
- Re-flour the board before positioning the dough in the center again. Continue to roll out the dough in the same way as before.You want the dough to end up about 1/8” thick, and as round as possible. As you roll it out, you should see a marbled effect to the dough where patches of butter have formed. This is a good thing—those pockets of butter are what make the crust flaky.
- Rolling out pie dough swiftly and efficiently takes practice. You may find that your dough is getting too soft, or the butter pieces are melting, as you roll. A little stickiness can be remedied by a sprinkle of flour, but if the dough is getting warm or the fat is melting you’ll need to re-chill the dough before proceeding. Use the pastry scraper to loosen the dough from the board and place it on a baking sheet. Place the baking sheet in the freezer for 1-2 minutes to re-chill the dough. Continue rolling out.When the dough is about 1/8” thick all the way around, take your pie dish or plate and center it in the middle of the dough. The dough will need to extend about 2 inches past the edge of the dish. Use a sharp knife to cut any rough edges off to form a smooth 2-inch circle around the outer edge of the pie dish.Unfold the dough and let it gently settle into the pie dish, lifting the edges of the dough and letting gravity pull it down into the corners. Do not stretch the dough to fit the plate; let it settle naturally, or you’ll end up with a leaky bottom crust. Adjust the dough as needed to keep it as centered as possible in the dish.Alternatively, you can transfer the crust to the dish by rolling it around the rolling pin and unrolling it over the pie dish. I prefer folding it, since it’s easier for me to center in the dish that way, but either method works.When the pie dish has been lined with dough, place it in the refrigerator to chill.Take the smaller of the two dough disks out of the refrigerator and roll it out the same way as you did the first. When trimming the edges, the dough only needs to extend about 1 inch beyond the edge of the pie dish. Re-chill on the baking sheet after rolling out, if necessary. This will be your top crust.Assemble your pie by filling the lower crust with your filling, dot the filling with butter, if the recipe requires it, then lay the top crust gently over the top of the pie. Center the top crust as much as possible over the top of the dish.Trim the edges of both crusts so that they are a little less than 1/2 inch beyond the rim of the pie dish.Roll the lower crust over the top of the upper crust and pinch gently to form a lip or edge to the crust. Work your way around the pie, rolling and pinching, until the circle is completed.Finish your edges by scalloping or crimping them with a fork. I like to scallop the crust by using the forefinger of one hand to make a crease, then pinching around the crease with the thumb and forefinger of the other hand.I work my way around the inner edge of the pie first making creases, then I finish it by working around the outer edge, scalloping in the opposite direction.Chill the fully assembled pie for at least 10 minutes before baking. Make an egg or milk wash and brush on the upper crust for a nicely browned finish (optional). Milk washes can be a bit uneven, so I prefer an egg wash– use an egg yolk whisked together with 1 tsp of water. This will give it a nice golden sheen.Cut slits in the upper crust to vent (after the wash, not before), and sprinkle the top of the pie with sugar, if desired. I sometimes like to sprinkle it with turbinado sugar to add a light candy-like crunch and a little sparkle.Bake pie according to recipe directions. During the baking process, I usually turn the pie 180 degrees about halfway through the cooking time to make sure the crust browns evenly (ovens can be hotter in the back than in the front– this allows for more even heat distribution).If these instructions are followed carefully, you should end up with a flavorful, flaky pie crust! Happy baking. 🙂


NOTES
Nutrition

tried this recipe?
Let us know in the comments!


Wow lady! You convinced me to work on my pie skill (or lack thereof!)
Love the golden crust!
It certainly looks like the perfect crust! Such a great post, especially for the pastry lame like myself 🙂
Thank you sooooo much for this post, Tori. And your step by step pictures ROCK! I didn’t realize that adding the water into the food processor results in a tougher dough. I’ll try adding it by hand next time after I cut my butter in with the food pro. I’ve been using an awesome pie dough recipe over the past week for turnovers and chicken pot pie. It’s absolutely fabulous but I was wondering why it didn’t poof up that much. Maybe it’s the water thing! But yours looks absolutely magnificent and I want to give it a try 🙂 Hope you had a great weekend!
I am scared, but I really want to make a pie crust!!! thanks for the fantastic tutorial
You are the pie goddess! I’m a total pie adventurer and will try the corn syrup and instant tapioca, thank you! My granddaughters, who will be here for BBQ and pool party this weekend, accept that I “show love” with food and beg me for “can we get some more love, Nonna?” They will be delighted! I don’t know why or how you do this, but I am inspired by your blog!
This is a gorgeous pie crust! I just made an all butter pie crust a few weeks ago for the first time. I’ve typically made the all shortening crust. I love, love, love making pie crusts. I love your tutorial as well. The photos are fantastic.
Tori, if you google Aunt Chick’s Pies and click on the Wikipedia site you will find some very interesting information about the lady known as Aunt Chick, if you haven’t already done so. Also very interesting is the interest in the book that has raised the price to $35 at some sellers.
I love reading your blog and even tho I am old enough to be your Jewish grandmother, I learn something each time – today the trenchers a word I had seen in many books over the years but didn’t associate with predecessor of plates.
Thanks for the pleasure you give.
Elle, on your advice I Googled Aunt Chick– what a fascinating woman! I had no idea I was harboring such a little treasure on my cookbook shelf. I’m not surprised, though, it’s a great little book that has taught me quite a lot about pie making! Thank you so much for reading my blog, and for taking the time to comment. It’s comments like these that help keep me motivated to create fun and engaging posts. I really appreciate the time you took to write in. 🙂
Tori…I am going to use fresh peaches for my pie this weekend. I only sprinkle them with a little bit of sugar and nutmeg. Any suggestions?
Try 5-6 cups of fresh peaches, 3/4 cup of sugar, 1/4 cup of tapioca and 1/2 tsp of salt. A sprinkle of nutmeg is nice. Maybe a touch of cinnamon, too? And make sure you dot the top of the peach filling with 1-2 tbsp. of unsalted butter, it adds a lovely richness to the filling. Personally, I like to keep summer pies more simple, less spiced… the fruit is so naturally sweet and wonderful, I like to let it take center stage! Try brushing the bottom crust with a thin layer of corn syrup (if it doesn’t scare you– I know a lot of people hate corn syrup). It will help seal the bottom crust and keep it from getting soggy (along with the other tips I gave you). Let me know how it turns out!
Lisa,
I had a good experience adding fresh lemon juice and some tapioca flour to the peach + sugar mixture. It was juicy and zesty.
I admit, I am petrified of making pie crust. But my mother does it all the time! Her secret is some ice cold vodka. Not sure how it works but it does…. her crusts are TO DIE FOR. This one is gorgeous, nice job;)
Vodka is a great crust-making tip! The alcohol adds moisture to the dough without adding to the gluten formation, and it burns off in the oven, leaving behind a nice flaky crust. Your mom definitely knows what she’s doing! 😉
Looking forward to your strawberry rhubarb pie recipe tomorrow. Could you discuss ways to avoid “mushy bottom” pies when filled with soft fruit? I’ve heard that adding corn starch can help, and I think my mother poured a little beaten egg with a sprinkle of sugar into the crust before adding the fruit. I’m making peach pies this weekend and using your crust recipe.
Lisa, try baking the pie on the lowest rack of your oven, and use a glass or ceramic pie pan (more even heat distribution). Also, make sure you’re cooling the pie on a wire rack. Let the pie settle for 2-3 hours before cutting and serving; cutting while the pie is still hot from the oven can create a soggy crust. I have also heard that sprinkling the bottom crust with a dusting of sugar and flour can help– I’ve never tried it, though. There are some other techniques I can share, but I would have to know the specifics of your filling recipe before recommending any other fixes. Good luck!
Okay, you had my attention with butter. And pie. Your step-by-step tutorial makes this look so easy. It looks absolutely perfect.
Thanks so much Faythe! I could have used a tutorial like this when I learned to make pie crust, so I’m really hoping it will help others who are new to the process. 🙂
I love it! I’m a fan of making pie crusts…like you, I got it from vintage cookbooks!
I make them both in the processor and by hand…depending on my mood. I know that handling it less is best for a crust – which I tend to do in the processor. But I enjoy the connection with the food by making it by hand….
Your crusts – and pie – are absolutely lovely. I’ve buzzed this one…
Aww, thanks Ann! In my experience there doesn’t seem to be a big difference between the two methods, as long as the ice-cold water is mixed in my hand. Food processor is certainly easier. I guess it just depends on how much time you want to spend in the kitchen. It’s my favorite room in the house, so I don’t really mind spending the extra time to cut in the butter by hand. Either way, it’s a tasty crust! 🙂
Tori, this is amazing. I love butter pie crust. I may give yours a whirl soon. Lots of helpful tips. I love your pie dish, it’s gorgeous.
Kim, the pie dish was one of my best investments ever! It’s an Emile Henry. I like it so much that I’m going to carry them in my store that’s launching this fall, in all kinds of colors. So excited!
Butter, butter, butter!! Yum!! Rose Levy Berenbaum has all kinds of tips on keeping things cold, put your flour and bowl in the freezer before you begin…chop the butter into cubes and stick it in the freezer for a few minutes, etc. I guess the key is to keep everything as cold as possible to achieve the flakiness we all prize. I agree with you whole-heartedly, it’s not hard, don’t be afraid! Your pie is stunning!!
Janelle, you are so right! Keeping it cold is key. The freezer is a big help in this area. I can’t imagine how Aunt Chick did it in the early 30’s with no refrigerator or freezer to help her along…
Nice instructional post here! Based on these pictures, you really are at ease with making pies. I wonder if Aunt Chick ever dreamed that her cookbook would still be in use today? Well done!
Thanks Tina! That means a lot coming from a baking wonder like you. 🙂
Great Pie!!! I love this post. Aunt Chick looks pretty bad ass 🙂
She really does, doesn’t she?? LOL
Amazing! I love the way you roll the edges. I will have to try that soon. Thanks for the great post and pics!
You’re welcome Monica, glad you enjoyed it! 🙂
Great post! I am looking forward to trying your pie crust on Friday…making a peach pie with fruit from our orchard. Great tip on the turbinado sugar!
The turbinado really gives it a lovely finish.
Very pretty little pie! Great tutorial….I love anything that gets people to get their hands in the dough and make pies…people tend to be scared to do it…yours looks delicious!
Once upon a time, I was scared, Linda… but it’s just flour, water, and fat. How scary can that really be? 😉
Holy moly.
Stella, I thought I was the only one who still says holy moly! Love it!