
Making pie crust for the first time might seem scary, but it doesn’t have to be. I learned how to make from-scratch pie crust the old fashioned way– the really old fashioned way– by studying vintage and antique cookbooks.
Over time I learned how to make a flavorful, flaky pie crust from scratch. With a little patience and a bit of practice, you too can make an old fashioned all-butter pie crust.
Vintage volumes like “Pie Marches On” by Monroe Boston Strause (1939), “Good Housekeeping’s Party Pie Book” (1958) and “250 Superb Pies and Pastries” by Ruth Berolzheimer (1950) taught me the basics—fat to flour ratios, how to roll out the crust, how to elegantly flute or scallop the edges.
Modern cookbooks like Bubby’s Homemade Pies (2005) and Mrs. Rowe’s Little Book of Southern Pies (2009) gave me updated pointers, like how to use the refrigerator and freezer to keep your fat cold as you assemble your dough (refrigerators were a relatively new invention in 1939).
For the best pie advice of all, I have to give credit to Aunt Chick. A small, thin paperback volume from 1942 by Nettie McBirney, titled “Aunt Chick’s Pies,” really gave me a solid foundation for crust making.
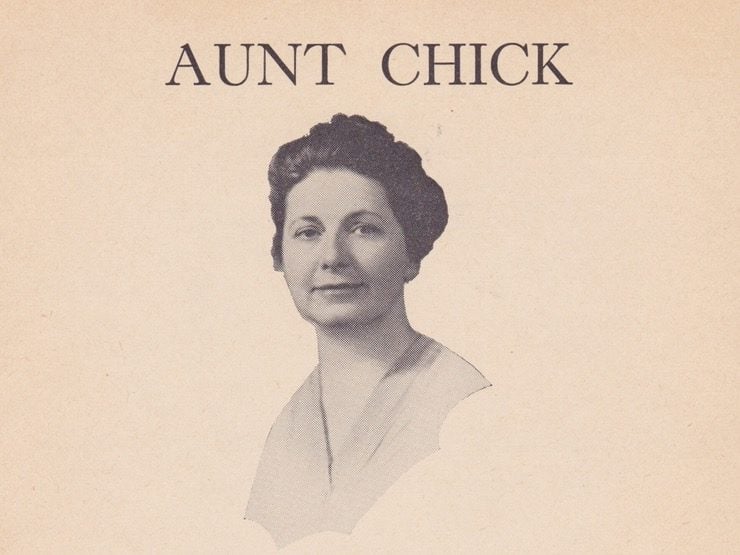
“Aunt Chick’s Pies” is an unassuming little volume– a simple red paperback with no picture on the cover. It was published in Tulsa, Oklahoma. I picked it up at a flea market one Sunday afternoon from a box of old cookbooks.
I never learned to make pie crust from scratch growing up; it was one of those cooking techniques that always made me nervous. It seemed really hard.
I bought “Aunt Chick’s Pies” because the smiling woman on the first page gave me confidence. She seemed wise, secure, self-assured… she knew the secrets of a great pie crust, I just knew it. So I brought it home and started teaching myself to make pie crust.
And guess what? Pie crust is not as difficult as it seems. Really! And it gets a LOT easier with practice.
Most pie crusts are made by combining flour and water with shortening, butter, lard, or any combination of those fats. Me? I prefer butter… plain, simple butter, the most delicious of fats.
It’s not easy to work with—in fact, it’s probably the most finicky of fats—but the flakiness and flavor that results from an all-butter crust is out of this world. It’s worth the fuss.
For kosher cooks, butter crusts are not ideal because they can’t be served with a meat meal. In a future blog I will talk about how to achieve a tasty pareve crust using dairy-free shortening. But today, it’s all about the butter.
I originally found the ratio for my all-butter pie crust in Aunt Chick’s Pies—3 cups flour, 1 cup fat, 2 tsp salt, ½ cup liquid. This combination makes enough dough for a deep dish double crusted 9 inch pie.
The ratio actually works for any fat, whether you’re using shortening, lard, butter, or any combination of the three (obviously you wouldn’t want to use a combination of lard and butter if you’re keeping kosher!).
The ratio has provided me consistently good results, and I’ve made many lovely and scrumptious pies using it. If you prefer a less salty crust, cut the salt in the recipe to 1 tsp. I think a little saltiness plays nicely with a sweet pie filling.
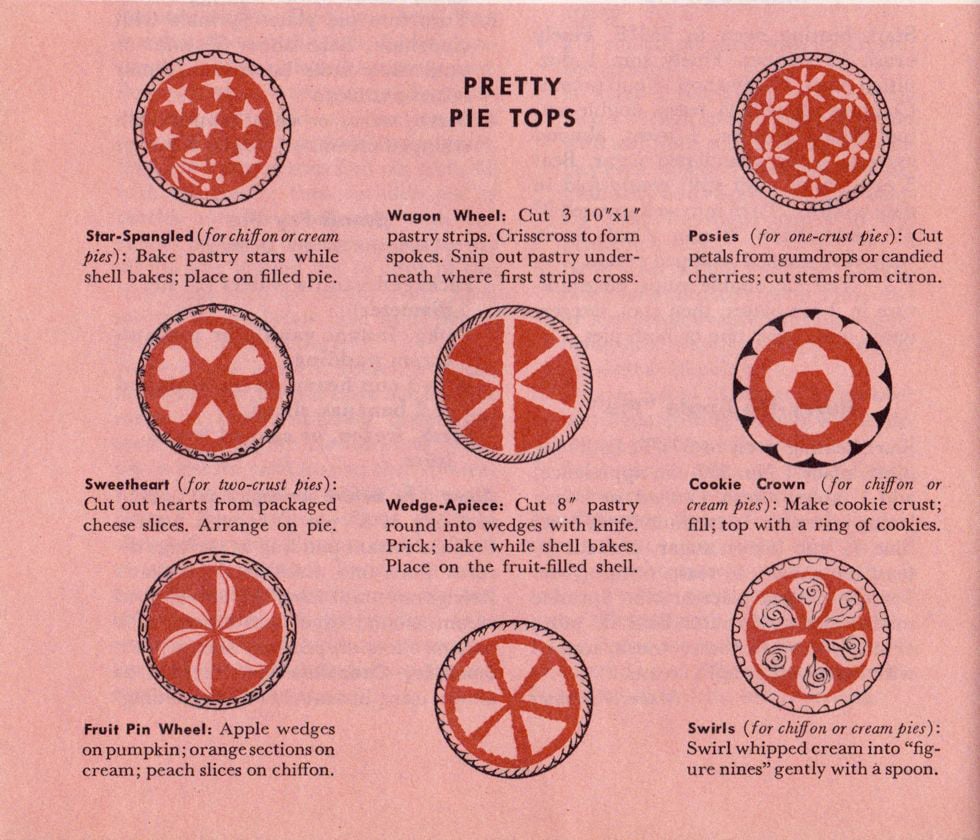
There are many ways to assemble a double-crust pie… you can lattice the top, decorate it with crust shapes, or make a wagon wheel design (illustration above).
If this is your first time making pie crust, I recommend following the steps on this blog till you’re comfortable making a simple double-crusted pie. Creating lattices and other techniques can be tricky, but fun… I’ll cover those kinds of design techniques in a future post!
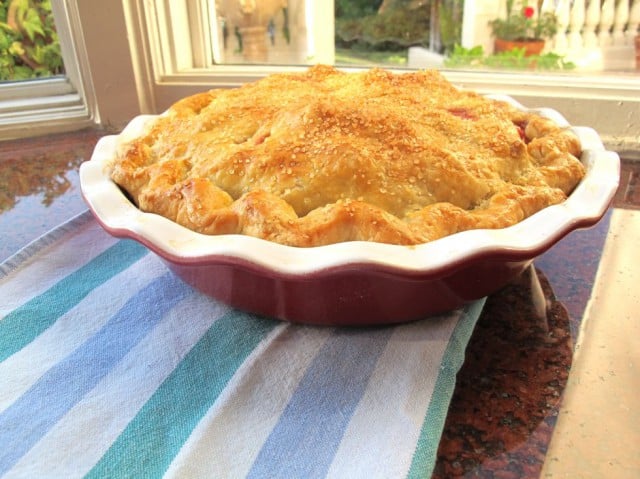
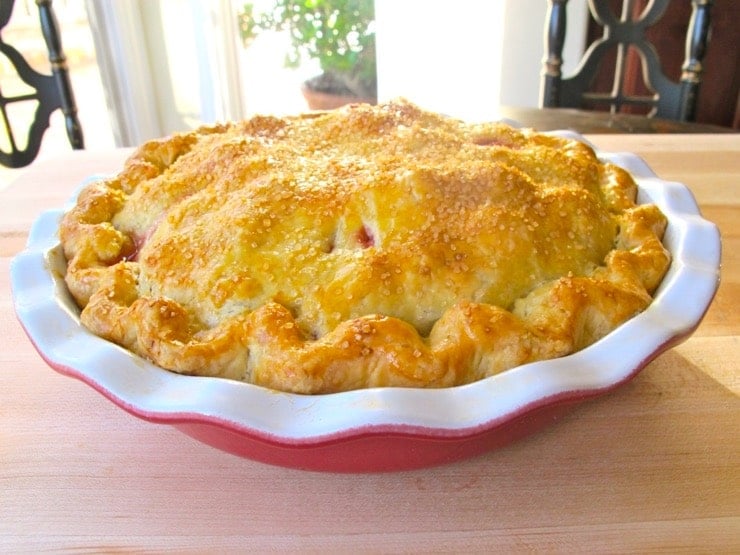
The pie I made for this blog is a Strawberry Rhubarb Pie, an old fashioned summer favorite. To learn a bit about the history of pie in America, click here.
Pie crust is one of those things that can leave a new cook frustrated. It takes time and practice to get the method right. Repetition is key… the more you make it, the better you’ll understand it.
I’ve posted lots of pictures in this blog and very clear steps to keep you on track. For those of you who are worried about messing up, I leave you with a few words of wisdom from Aunt Chick herself—
Don’t be scared. It is just pie crust.
Recommended Products:
Old Fashioned All-Butter Pie Crust
Ingredients
- 1/2 cup cold water
- 4 ice cubes
- 3 cups all-purpose flour
- 2 teaspoons salt
- 1 cup very cold unsalted butter (2 sticks)
Instructions
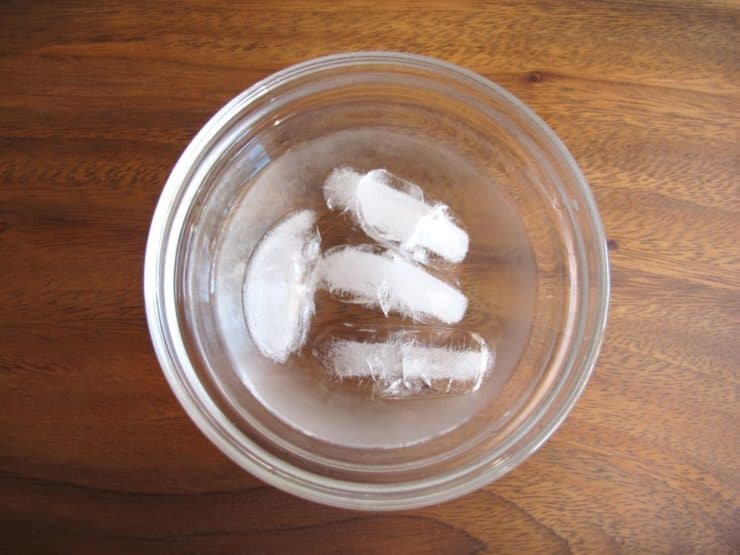
- Pour cold water into a small dish with a few pieces of ice to chill.

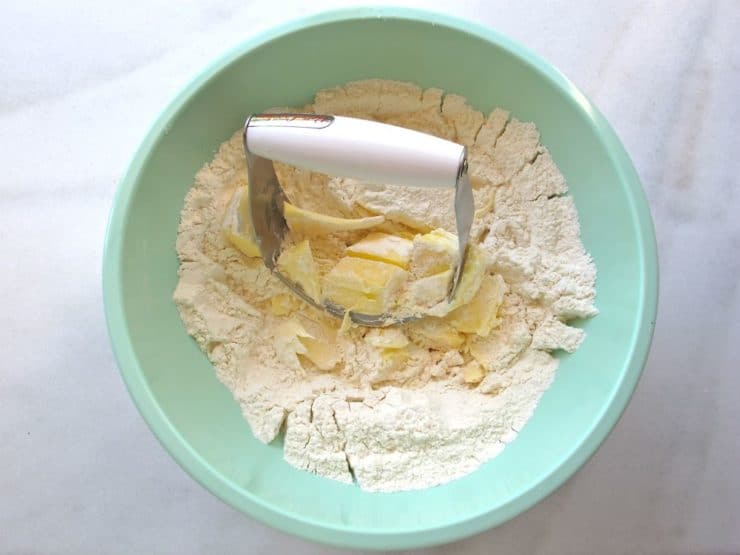
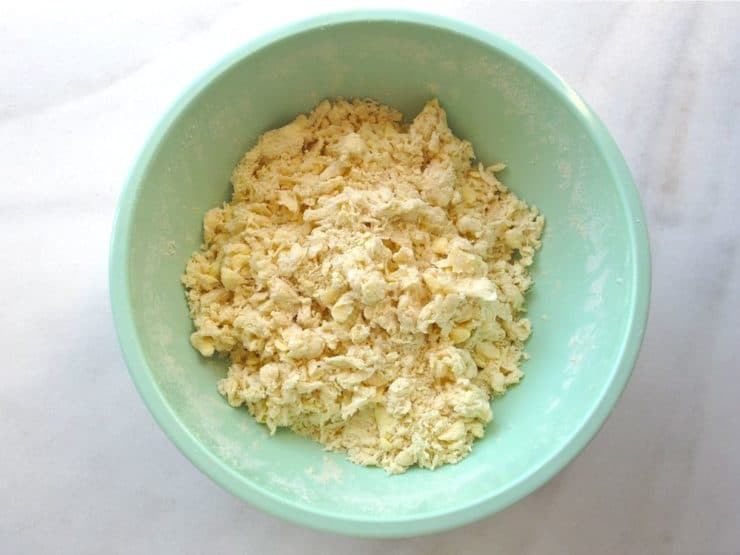
- There are two ways to integrate the butter into the dry ingredients… by hand mixing or with a food processor. In my experience, both methods work equally well as long as you mix the water in by hand. Don't process the water into the dough, or you'll end up with a tough crust.BREAK UP BUTTER BY HAND: Add flour and salt to a large mixing bowl, stir with a fork to blend. Take cold butter out of the refrigerator and add it to the bowl. Use a pastry cutter to cut the cold butter into the flour, using firm pressure and pushing down repeatedly to break the butter into small pieces.
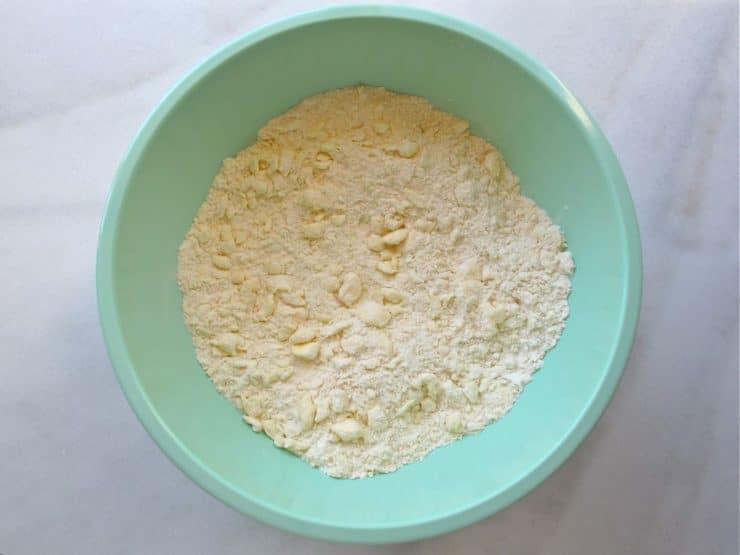
- Work as quickly as you comfortably can. Stop when the flour and butter mixture looks like large-curd cottage cheese. There should be a variety of sizes in the butter pieces… the largest should be about the size of a pea. Place flour and butter mixture in the freezer for 2 minutes before proceeding.
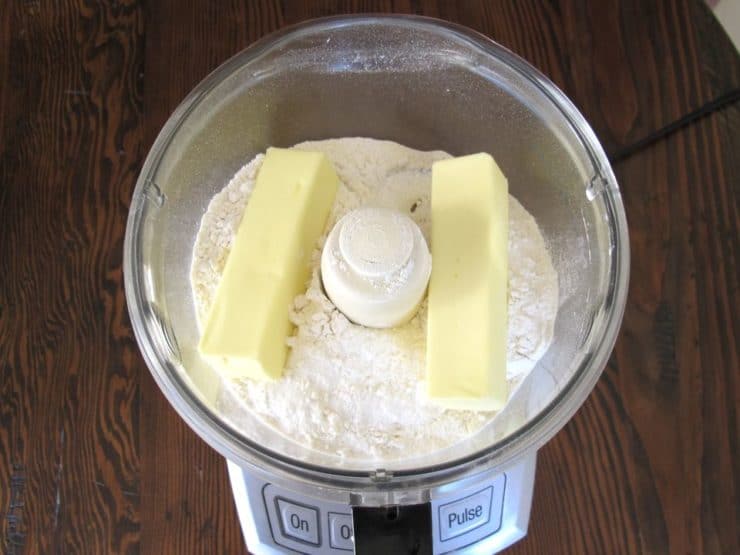
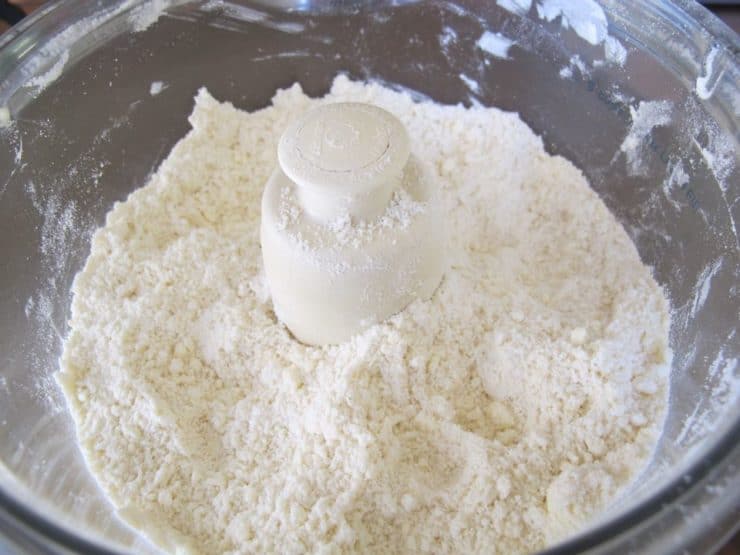
- MIXING DOUGH WITH FOOD PROCESSOR: Fit your processor with a blade attachment. Add flour and salt to the food processor.Take cold butter out of the refrigerator and add it to the processor.
- Pulse the processor in 3-second bursts to break up the butter. Stop when the flour and butter mixture looks like large-curd cottage cheese.
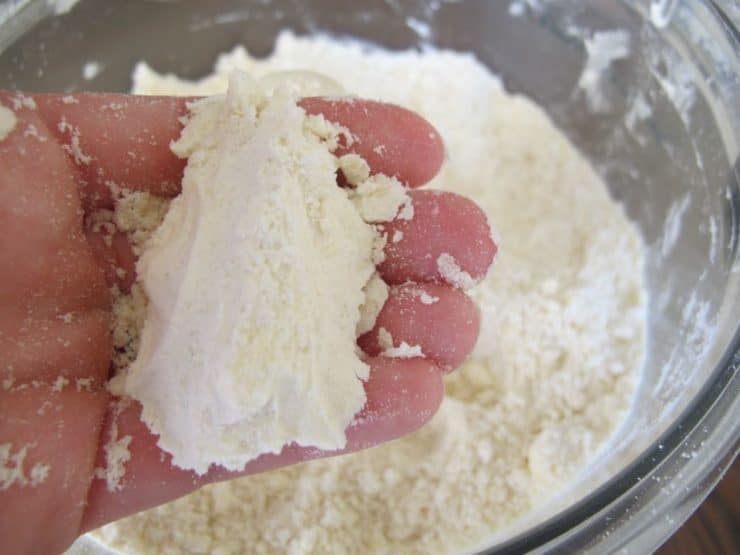
- There should be a variety of sizes in the butter pieces… the largest should be about the size of a pea. It should only take 10-12 pulses to get the right consistency; start checking consistency after 8 pulses. Make sure you don’t over-process… having a variety of sizes in the butter chunks will make a flakier dough. Mixture should hold together when squeezed in your hand. Pour mixture into a mixing bowl. Place flour and butter mixture in the freezer for 2 minutes before proceeding.
- Take ice water out of the refrigerator. Add water to the flour mixture one tablespoonful at a time, using a fork to lightly toss the liquid into the dough. Try not to touch the dough as you mix; you want the mixture to stay as cool as possible. You may not need all the liquid to bring the dough together, so add slowly… the dough can easily turn wet and sticky if you’re not careful. By the same token, you may need a bit more liquid. Pie dough is not an exact science; every batch of dough will be different.
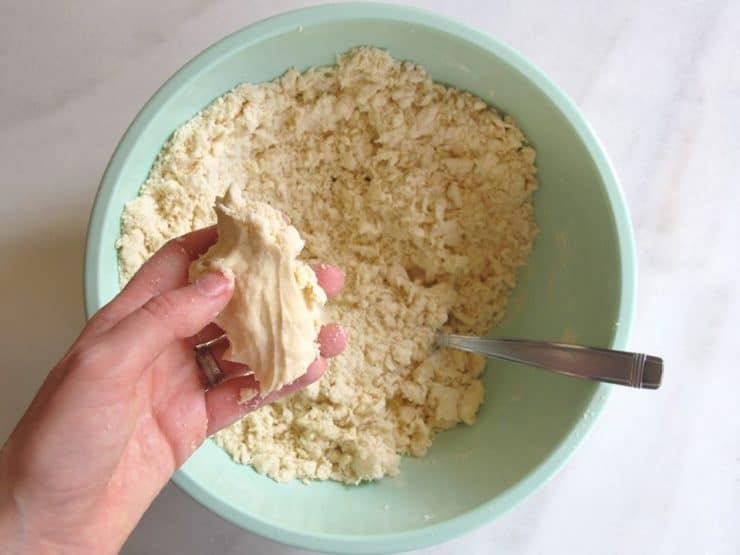
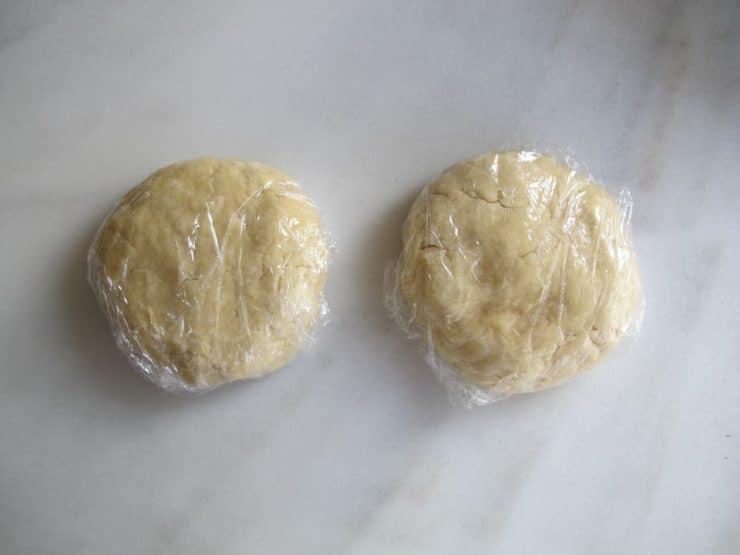
- When the dough begins to look stringy and larger lumps begin to form, take a fistful of the dough and squeeze it in your palm. Open your palm. If the dough holds together well and is just slightly tacky, it’s ready to pull into a dough ball. If the dough easily crumbles in your hand or falls apart, it is still too dry… add a little more liquid.When dough is ready, pull it together with your hands into two balls, one slightly larger than the other. Flatten the balls into disks that are 7-8 inches across.
- Cover the disks tightly in plastic wrap and place in the refrigerator immediately.The dough should be refrigerated for at least 1 hour, and up to 48 hours. I prefer to make the dough a day ahead and refrigerate it overnight. You can also freeze the dough for up to 3 months. If you freeze the dough, allow it to thaw and soften a bit before rolling out.
- TO ROLL OUT CRUSTS: Any large, smooth surface will work, as long as it is in a cool dry area. Marble is ideal. You will need to work quickly to roll out the dough– again, you want it to stay cool, so have any tools you need nearby and ready to go: rolling pin, flour, pastry scraper, 9” pie plate or dish, a sharp knife, and a baking sheet (as needed).Lightly flour your rolling surface. Take the larger of the two dough disks out of the refrigerator and discard the plastic wrap. Place it in the center of your rolling surface and sprinkle the top of the disk lightly with flour.Use your rolling pin to roll out the dough. I like to roll it from the center outward, a roll in each direction, as though I’m rolling around the face of a clock (12, 3, 6, 9, 12). You want the dough to expand evenly in all directions, so that it forms a large circular shape. Use more pressure in the center of the dough, and less as you near the edges. Don’t roll past the edge of the dough.
- As you roll, you may notice cracks forming on the outer edges. If any large cracks develop, pause and pinch the dough together to mend them before rolling again.
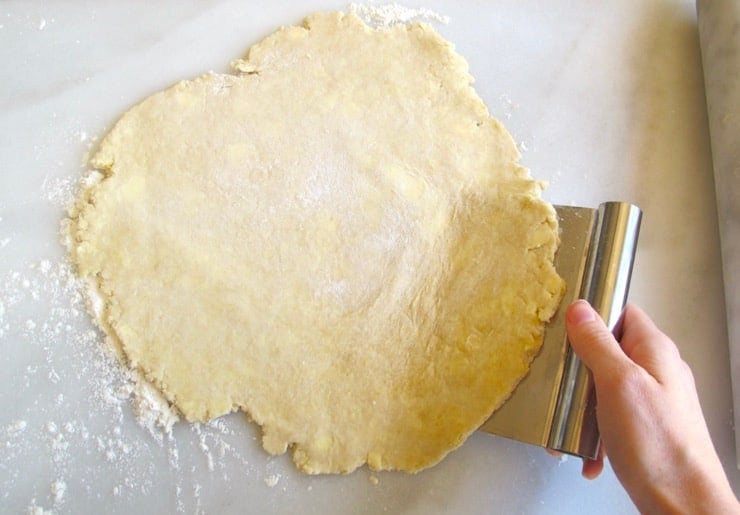
- If the dough becomes sticky as you roll, lightly re-flour the surface of the dough before proceeding. When the dough is about halfway rolled out, use a pastry scraper to loosen the dough from the board and flip it over.

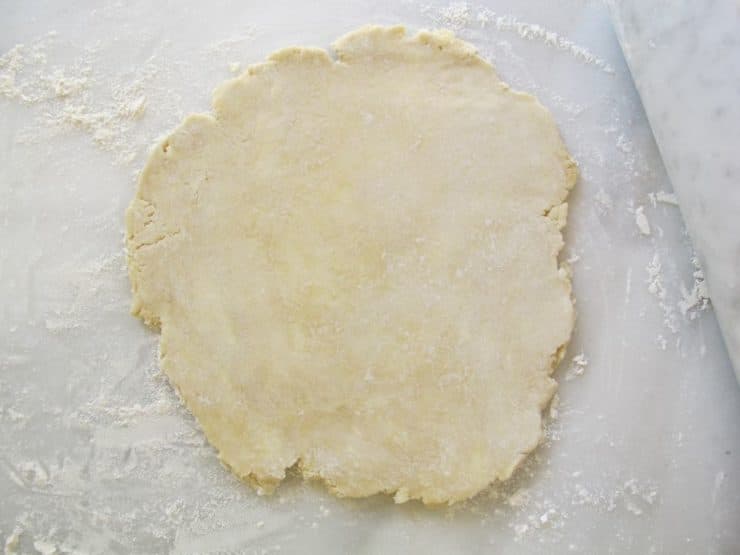
- Re-flour the board before positioning the dough in the center again. Continue to roll out the dough in the same way as before.You want the dough to end up about 1/8” thick, and as round as possible. As you roll it out, you should see a marbled effect to the dough where patches of butter have formed. This is a good thing—those pockets of butter are what make the crust flaky.
- Rolling out pie dough swiftly and efficiently takes practice. You may find that your dough is getting too soft, or the butter pieces are melting, as you roll. A little stickiness can be remedied by a sprinkle of flour, but if the dough is getting warm or the fat is melting you’ll need to re-chill the dough before proceeding. Use the pastry scraper to loosen the dough from the board and place it on a baking sheet. Place the baking sheet in the freezer for 1-2 minutes to re-chill the dough. Continue rolling out.When the dough is about 1/8” thick all the way around, take your pie dish or plate and center it in the middle of the dough. The dough will need to extend about 2 inches past the edge of the dish. Use a sharp knife to cut any rough edges off to form a smooth 2-inch circle around the outer edge of the pie dish.Unfold the dough and let it gently settle into the pie dish, lifting the edges of the dough and letting gravity pull it down into the corners. Do not stretch the dough to fit the plate; let it settle naturally, or you’ll end up with a leaky bottom crust. Adjust the dough as needed to keep it as centered as possible in the dish.Alternatively, you can transfer the crust to the dish by rolling it around the rolling pin and unrolling it over the pie dish. I prefer folding it, since it’s easier for me to center in the dish that way, but either method works.When the pie dish has been lined with dough, place it in the refrigerator to chill.Take the smaller of the two dough disks out of the refrigerator and roll it out the same way as you did the first. When trimming the edges, the dough only needs to extend about 1 inch beyond the edge of the pie dish. Re-chill on the baking sheet after rolling out, if necessary. This will be your top crust.Assemble your pie by filling the lower crust with your filling, dot the filling with butter, if the recipe requires it, then lay the top crust gently over the top of the pie. Center the top crust as much as possible over the top of the dish.Trim the edges of both crusts so that they are a little less than 1/2 inch beyond the rim of the pie dish.Roll the lower crust over the top of the upper crust and pinch gently to form a lip or edge to the crust. Work your way around the pie, rolling and pinching, until the circle is completed.Finish your edges by scalloping or crimping them with a fork. I like to scallop the crust by using the forefinger of one hand to make a crease, then pinching around the crease with the thumb and forefinger of the other hand.I work my way around the inner edge of the pie first making creases, then I finish it by working around the outer edge, scalloping in the opposite direction.Chill the fully assembled pie for at least 10 minutes before baking. Make an egg or milk wash and brush on the upper crust for a nicely browned finish (optional). Milk washes can be a bit uneven, so I prefer an egg wash– use an egg yolk whisked together with 1 tsp of water. This will give it a nice golden sheen.Cut slits in the upper crust to vent (after the wash, not before), and sprinkle the top of the pie with sugar, if desired. I sometimes like to sprinkle it with turbinado sugar to add a light candy-like crunch and a little sparkle.Bake pie according to recipe directions. During the baking process, I usually turn the pie 180 degrees about halfway through the cooking time to make sure the crust browns evenly (ovens can be hotter in the back than in the front– this allows for more even heat distribution).If these instructions are followed carefully, you should end up with a flavorful, flaky pie crust! Happy baking. 🙂


NOTES
Nutrition

tried this recipe?
Let us know in the comments!


Hi there, your post and tutorial are amazing. I have been looking for a flakey all butter recipe for quite some time. I not a fan of shortening. I indeed on making this recipe as soon as I get home. I do have a question. I male apple dumplings regularly. However, every single pie crust I have tried to use for my dumplings falls apart do you think that this will hold up? Thank you!
Hi Megan, unfortunately I have never tried this as a dumpling so I’m not sure. Hope it works out for you! Please let us know how it goes.
The crust was fine. Flakey. It was chilled so much that it really took a long time to roll out. It wasn’t as flakey as I am, I mean, as I like. 🙂 My mom said Crisco really makes a difference. Hated to hear it, but I have to believe her. Won’t make this again.
Sorry to hear it wasn’t as flaky as you would have liked Meg! I hope you have better luck with the Crisco. 🙂
OMG Tori, I tried it, since I made chicken pot pie last week Sunday and it was sooooo Good… I love the crust, very flaky and it was perfect. I usually make the ones with Crisco, but I don’t like the texture, but this crust is very, good and easy… I’ll be sticking with this recipe and I can’t wait to try turnover and apple pie… Thanks for sharing!
Vanna that’s great to hear! Glad you enjoyed the crust. 🙂
Can you use this as a meat pie crust?
Hi Vanna- yes, it works for either savory or sweet dishes, as long as you’re not attempting to make a kosher pie. Enjoy!
I make the best peach cobblers/peach pies and use store bought pie crust. Today I will make two peach cobblers to give to my family and use your pie crust recipe. I just hope it is as good or better then the reviews.
HI TORI. THANK YOU SO MUCH for taking the time to put this online. I have been trying to make pie crust for years!! I followed it exactly and boy, what a beautiful pie crust. I made an Apple pie and was so excited about how it came out I send a pic to my mom, who btw makes perfect pie crusts every time. I love the fact you had pictures too. Added bonus for me. I found aunt chicks book on eBay and purchase it, but I would not have been able to pull this off without your directions. THANK YOU THANK YOU!!!!! I am no longer afraid of pie crust! I keep this site in my favorites on my kindle. I highly recommend to all to try this pie crust. HAPPY HOLIDAYS AND HATS OFF TO YOU TORI!
That’s great to hear Kim!
Tori, I left out the pecans, this crust recipe is perfect just the way it is. I think I will do peach cobblers for Christmas. I really can’t believe I made a pie crust this good.
Tori !!!!!!!!. Lady you should be in jail !!. There should be a law against pie crust tasting this good. I made 2 Apple cobblers last night using this recipe and me and my wife were BLOWN AWAY !!, my wife still keeps telling me how good the crust was, the bottom was not soggy at all, I put it on the bottom rack as you suggested. I am throwing all my other pie crust recipes away and keeping this one. My filling was good, a little to sweet but the crust balances out the sweetness of the filling, Thank you so much for sharing !!!!!!!!!!!!!!.
Haha that’s awesome Vince! Congrats on your success!
Hi Tori !, I plan on making a apple cobbler, with a top and bottom crust. I was wondering if I could work about a half cup of finely chopped pecans into the crust ? would that be a problem ?.Thank you for taking my question.
Hi Vince, I’ve never tried that but I’m guessing it would probably work well– can’t promise though, as I haven’t tested it myself!
Dear Tori,
I have truly enjoyed exploring your blg & recipes & genuine historical root history! Thank you!
I am baking an apple pie this evening and have been looking for a cheddar cheese crust to accompany the apples sweet n tart… I was thinking to tweak this beautiful “old fashioned all-butter pie crust” by perhaps replacing a portion of the butter with shredded sharp cheddar…have you had experience with this particular endeavor? Any and all wisdom are heartily appreciated my dear!
Thank you….
Paulina
Hi Paulina, that sounds like a delicious idea. The only thing I’d be concerned about it the possibility of the crust becoming too crumbly to form if you sub too much cheddar for butter. As I’ve never tried it I can’t guide you on this. If you decide to experiment with it please let us know how it turns out!
Nothing about baking scares me, althought the time factor can be intimidating!
Tried this pie recipe, combined with another peach pie filing recipe, and I have to say! This one takes the cake!! Literally, it was better than any cake, cookie, pie or square I’ve previously baked! My husband thanks you! 😉
That’s great to hear SarBear! Thanks for letting me know you tried it. 🙂
my pie crusts were never flakey. yours sounds amazing.i am going to try your recipe.
Wonderful photos! I use my own lard for a real old fashioned, flaky crust! I have used vodka as well, instead of water. Sometimes orange juice. Thanks for the tutorial!
Used to bake pies for a living, I use vodka in place of water makes for a flakier crust. As you said keeping everything cold is the key.
Hello Tori , Your Pie looks Delicious and the tutorial is so easy to follow i am going to show this to my daughter she has been afraid to try to make a Pie Crust . Even though i told her not to be afraid it is just Flour ,Butter ,and Water and lots of love . thanks for the post and Beautiful Presentation i subscribed so i won’t miss a recipe in the future . Keep on Baking
okay, you taught me how to make Challah and I trusted you. I will try AGAIN to make a pie crust with your instructions.
great receipe
Gorgeous tutorial and gorgeous pie. Unfortunately, I didn’t read your pre-recipe warning about the salt! I was doing an experiment by trying 3 different pie recipes for 3 different pies, and this recipe was my first of the day. I didn’t even notice the 2 tsp of salt until all my other recipes said 1/2 tsp. This dough ended up in the trash. I’m using your tutorial for the rest of the instructions, though.
Hi Erin– 2 tsp is the right amount of saltiness for me and my family, but if you use a butter with salt in it instead of unsalted it will taste far too salty. Also, if you’re salt sensitive (as I mentioned in the intro), it may taste too salty for you, so feel free to cut it to taste. Glad the tutorial is helpful!
You make this look so easy (and delicious)! Hopefully it is because I’m trying it tonight for the first time. Thanks!
Oh, one more thing. A few people mentioned using vodka. How much should one use, and do you decrease the amount of water accordingly?
The vodka is used in place of water, so you would need to replace an equivalent amount of water with vodka. Start by adding 2-3 tbsp of ice cold vodka to the flour and fat mixture, stirring it in with a fork, then continue with the ice water as directed above till the dough comes together. I do not recommend replacing all of the water with vodka; most of the alcohol will cook out during baking, but some remains, so I wouldn’t use more than 3 tbsp in the crust mixture.