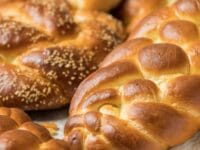
Is there any food that reflects the beauty of Judaism more than a freshly baked challah? Jews and non-Jews alike love the flavor and shape of this delicious eggy bread.
But challah is so much more than just bread. The tradition of challah is a very spiritual one; for observant Jews, it is a way to directly connect with the spiritual energy of God. In fact, baking challah is considered an important blessing in the Jewish home.
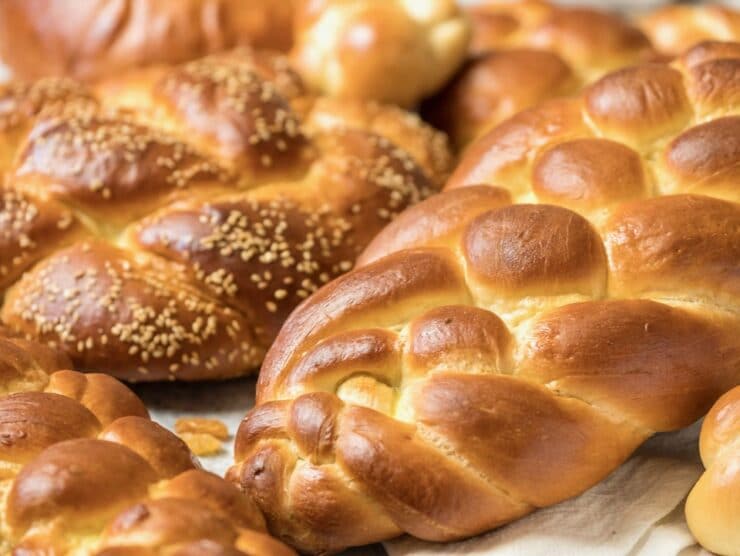
Today, the word challah is used to describe the beautiful loaf of braided bread that appears on Shabbat tables all over the world. In ancient times, challah referred to a small bit of dough that was set aside for the Temple priests as an offering to God:
Of the first of your dough you shall present a loaf as a contribution; like a contribution from the threshing floor, so shall you present it.
Numbers 15:20
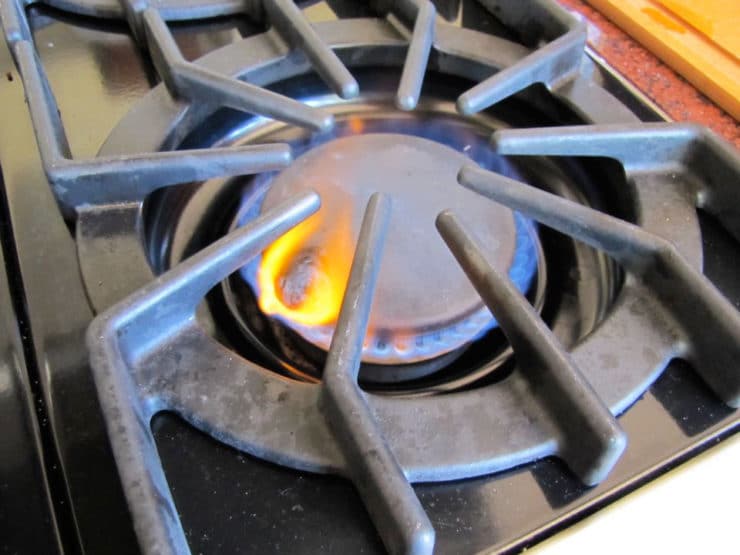
Burning a small portion of dough as an offering is part of the challah blessing.
Traditionally, challah is served on Shabbat and holidays. I like to think of challah as a “special occasion” bread because of the time and effort that goes into making it. You can certainly make challah any day of the year, but in my home the process is reserved for Shabbat and the major Jewish holidays (except for Passover, of course, when leavened bread is not allowed).
The smell of freshly baked challah ushers in our weekly Shabbat celebration and puts everybody in a mood of gratitude. As blog reader Rabbi Gershon Steinberg-Caudill put it—“I love it when I finish making my Shabbat Challah. It smells like Shabbat!”
The ritual associated with separating and blessing the challah is a somewhat complex process, dependent on the size of challah you are baking and your level of observance. Customs vary according to Halachic opinion; Ashkenazi and Sephardic traditions approach the blessing differently. If you are interested in learning more about the process of separating challah, there are many guides available online… or ask a trusted rabbi!

For me, baking challah is like a meditation. Kneading and rising, kneading again, shaping, braiding and baking— it all takes a lot more time than baking brownies from an instant mix. Smelling the bread baking, then seeing your gloriously braided challah on the dinner table, really makes it all worthwhile. I hope this blog inspires you to try it yourself!
The following recipe is my favorite way to make challah, developed after many attempts to create a “foolproof” challah recipe. It’s a rich, moist, eggy challah sweetened with honey.
The multiple risings create a beautiful texture, and the egg wash results in a gorgeous golden crust. Feel free to sprinkle your challah with any of the toppings suggested in the recipe. You also can add raisins or chocolate chips to the dough (adding real chocolate will make it a dairy recipe). No matter which way you choose to make it, challah is a delicious way to celebrate Shabbat, or any other holiday.
If you’ve never made challah before, remember to be patient. Baking challah is a simple process, but it does take time and effort. You may need to try it a few times to get a “feel” for the dough. If you follow my instructions exactly, you should be fine— I’ve tried to describe each step very carefully and specifically. Comment me if you have any questions.
For instructions on how to braid your challah, click the following link:
Challah Part 2: How to Braid Challah.
Good luck! 🙂
Recommended Products:
We are a participant in the Amazon Services LLC Associates Program, an affiliate advertising program designed to provide a means for us to earn fees by linking to Amazon.com and affiliated sites. As an Amazon Associate I earn from qualifying purchases.

Challah
Ingredients
Dough Ingredients
- 1 1/2 cups lukewarm water, divided
- 1 packet active dry yeast (1 packet is equivalent to 2 1/4 tsp or .25 ounce active dry yeast) - you may substitute 1 3/4 teaspoons of instant yeast or .6 ounce compressed fresh yeast (1 small cake)
- 1 teaspoon sugar
- 1 large egg
- 3 large egg yolks
- 1/3 cup honey
- 2 tbsp avocado oil (I prefer avocado oil for flavor and health reasons - you may substitute sunflower oil or canola oil)
- 2 teaspoons salt
- 4 1/2-6 cups all purpose flour - PLEASE NOTE - if you are using the metric conversion tool on this recipe, the flour is not updating correctly. The correct metric measurements for flour are 562.5 to 750 grams (do not change the recipe serving sizes or it will not work)
Egg Wash Ingredients
- 1 large egg
- 1 tablespoon cold water
- 1/2 teaspoon salt
Optional Ingredients
- Raisins, chocolate chips (1 ½ cups of either)
Optional Toppings
- Sesame seeds, poppy seeds, kosher salt
Instructions
- Pour ¼ cup of the lukewarm water (about 110 degrees) into a large mixing bowl. Add 1 packet of active dry yeast and 1 tsp of sugar to the bowl, stir to dissolve. Wait 10 minutes. The yeast should have activated, meaning it will look expanded and foamy. If it doesn’t, your yeast may have expired, which means your bread won’t rise—go buy some fresh yeast! This step Is called "proofing" the yeast - if you're using instant yeast you can skip this step and simply add the yeast to your dry ingredients. If you're using fresh yeast (or compressed or cake yeast), simply stir it into the lukewarm water to dissolve, then add the remaining wet ingredients - no need to wait for proofing.

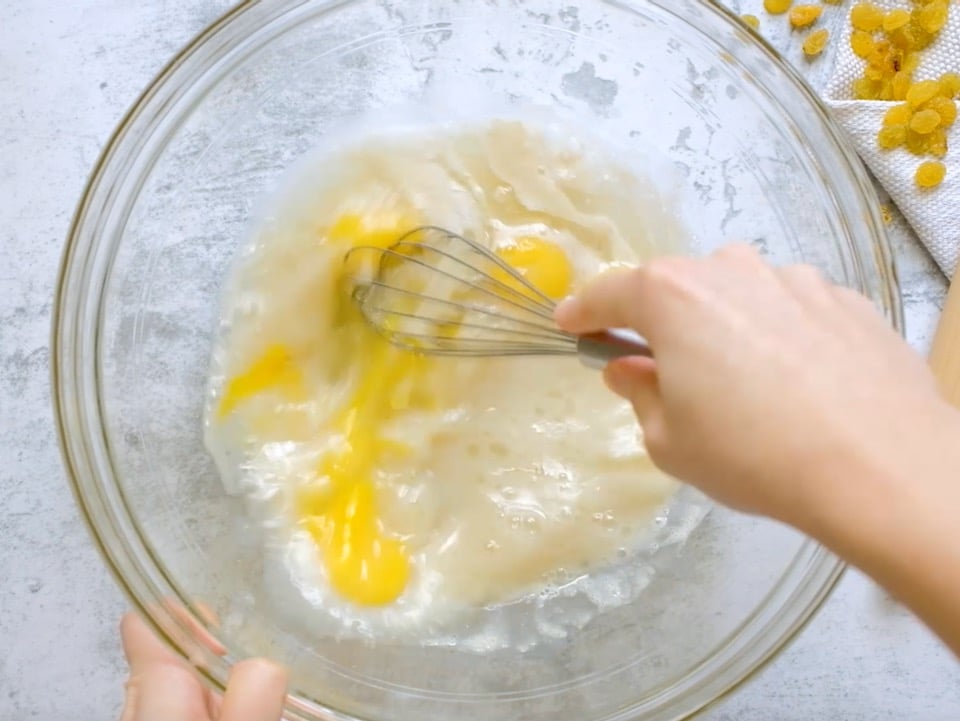
- Once your yeast has activated, add remaining 1 ¼ cup lukewarm water to the bowl along with the egg, egg yolks, honey, oil, and salt. Use a whisk to thoroughly blend the ingredients together.

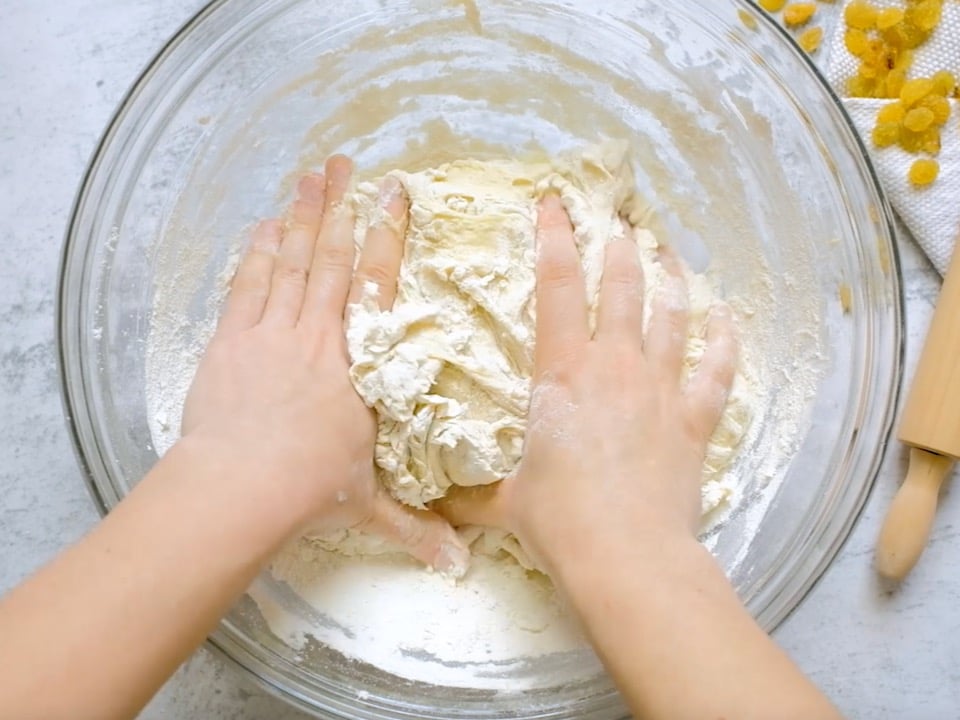
- Begin adding the flour to the bowl by half-cupfuls, stirring with a large spoon each time flour is added. When mixture becomes too thick to stir, use your hands to knead.Continue to add flour and knead the dough until it’s smooth, elastic, and not sticky. The amount of flour you will need to achieve this texture varies—only add flour until the dough feels pliable and “right.” If you plan to add raisins or chocolate chips to the challah, incorporate into the dough as you knead.
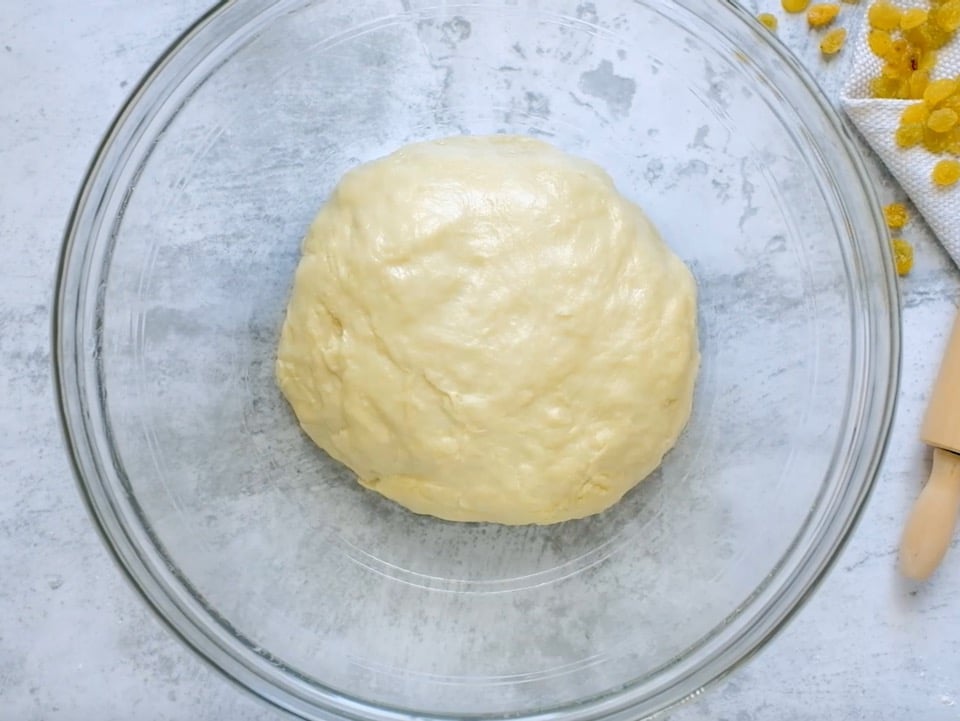
- Place a saucepan full of water on the stove to boil.Meanwhile, remove the dough from your mixing bowl and wash out the bowl. Grease the bowl with oil. Push the dough back into the bottom of the bowl, then flip it over so that both sides are slightly moistened by the oil.
- Cover the bowl with a clean, damp kitchen towel. Place the bowl of dough on the middle rack of your oven. Take the saucepan full of boiling water and place it below the rack where your dough sits. Close the oven, but do not turn it on. The pan of hot water will create a warm, moist environment for your dough to rise. Let the dough rise for 1 hour, or until the dough doubles in size. This may take longer depending on a number of things, including weather conditions... be patient! It's important to let the dough rise for best results.

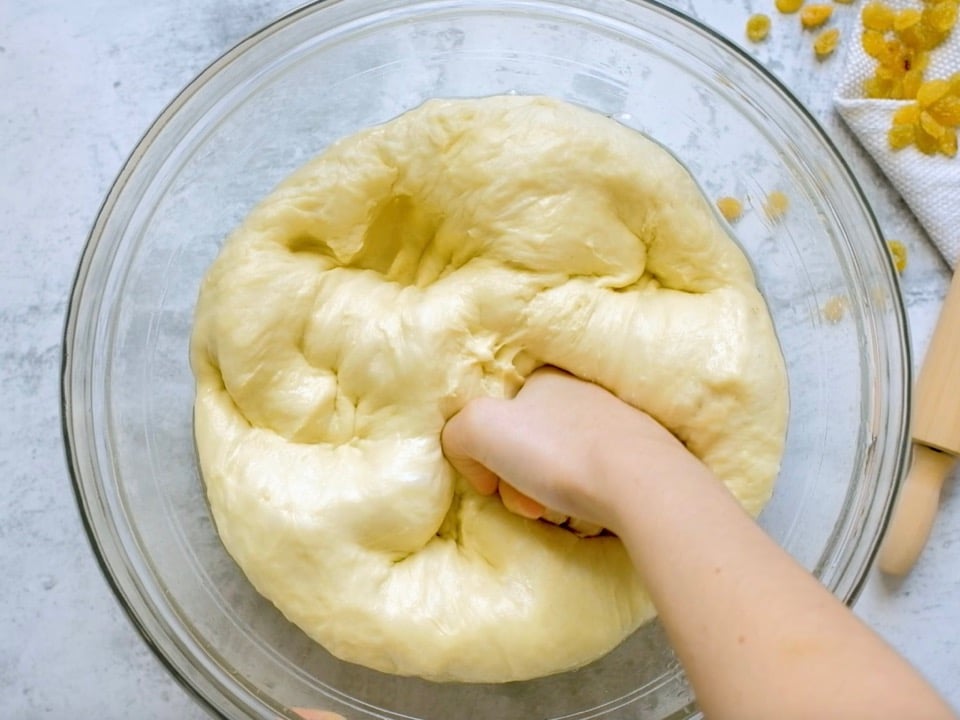
- Take the dough bowl out and punch it down several times to remove air pockets.
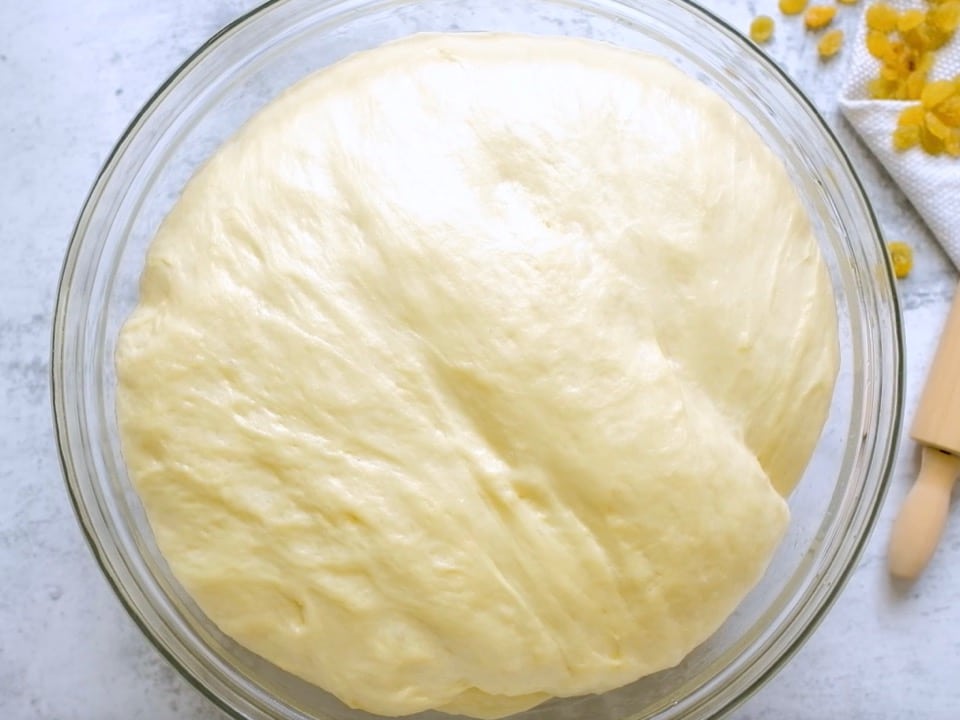
- Place it back inside the oven and let it rise for 1 hour longer, or until the dough doubles in size.
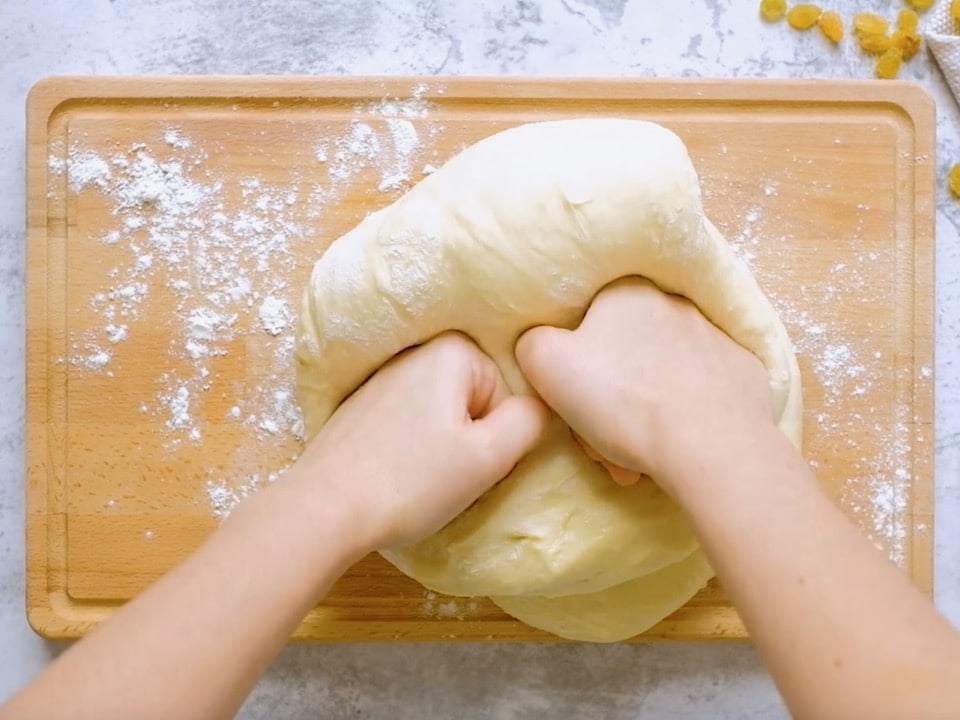
- Take the dough out of the oven. Flour a smooth surface like a cutting board. Punch the dough down into the bowl a few times, then turn the dough out onto the floured surface. Knead for a few minutes, adding flour as needed to keep the dough from feeling sticky.
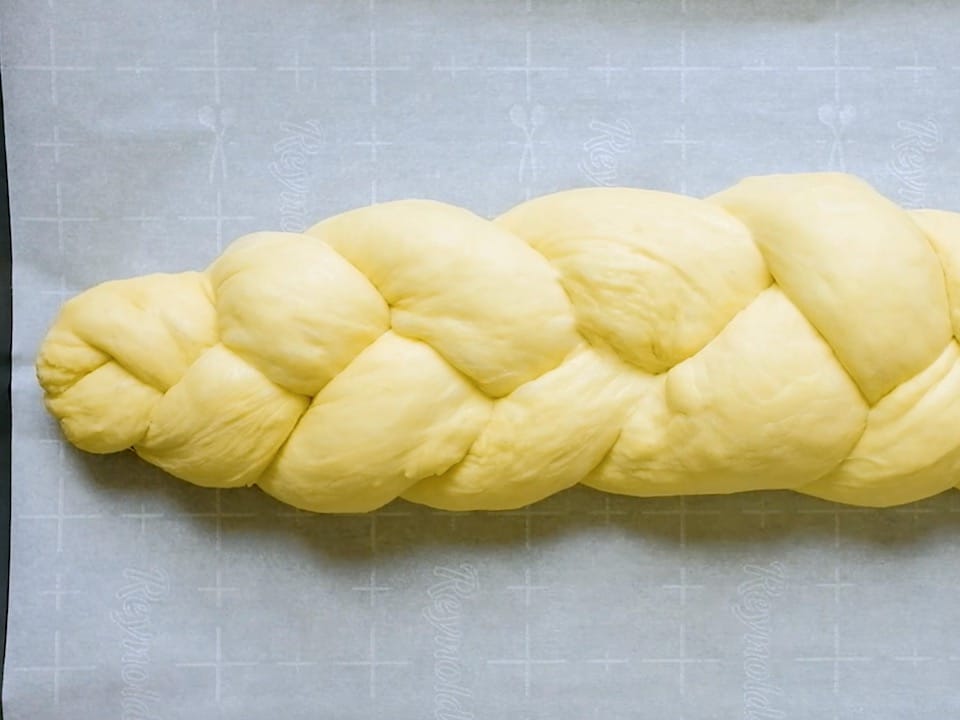
- Now your dough is ready to braid. If you plan to separate and bless the challah, do it prior to braiding. Click here to learn how to braid challah.After you’ve braided your challah, place it on a cookie sheet lined with parchment paper (this will catch any spills from your egg wash and keep your challah from sticking to the cookie sheet).Note: I usually only put a single challah braid on a cookie sheet, since they tend to expand a lot when baking.
- Prepare your egg wash by beating the egg, salt and water till smooth. Use a pastry brush to brush a thin layer of the mixture onto the visible surface of your challah. If you're adding sesame seeds or some other topping, sprinkle it on the damp dough now - the egg wash helps it stick. Reserve the leftover egg wash.
- Let the braid rise 30 to 45 minutes longer. You’ll know the dough is ready to bake when you press your finger into the dough and the indentation stays, rather than bouncing back.Heat oven to 350 degrees F. The challah needs to bake for about 40 minutes total, but to get the best result the baking should be done in stages. First, set your timer to 20 minutes and put your challah in the oven.
- After 20 minutes, take the challah out of the oven and coat the center of the braid with another thin layer of egg wash. This area tends to expand during baking, exposing areas that will turn white unless they are coated with egg wash.Turn the tray around, so the opposite side is facing front, and put the tray back into the oven. Turning the tray helps your challah brown evenly—the back of the oven is usually hotter than the front.
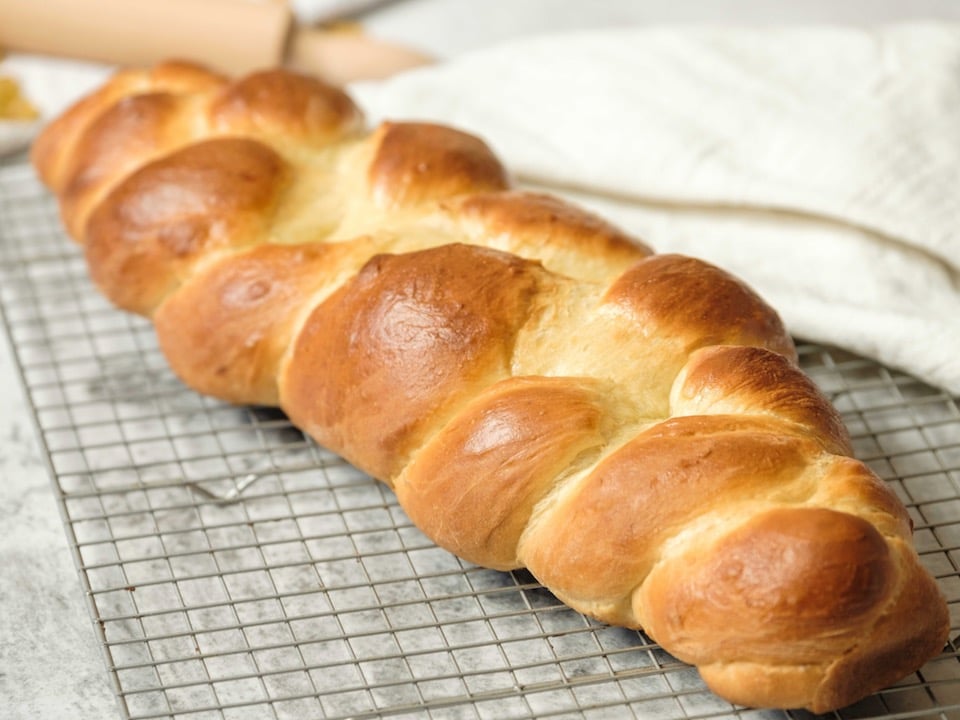
- The challah will need to bake for about 20 minutes longer. For this last part of the baking process, keep an eye on your challah—it may be browning faster than it’s baking. Once the challah is browned to your liking, take the tray out and tent it with foil, then place it back in the oven. Remove the foil for the last 2 minutes of baking time.Take the challah out of the oven. At this point your house should smell delicious. You can test the bread for doneness by turning it over and tapping on the bottom of the loaf—if it makes a hollow sound, it’s done. Let challah cool on the baking sheet or a wire cooling rack before serving.


NOTES
Nutrition


I made this recipe in the four-stand braid for our Thanksgivukkah dinner last night, and it turned out perfectly. I also made your pumpkin challah for the meal – but I think I am more of a purist and preferred the traditional dough. My family did enjoy both, and they were a great centerpiece. I wanted to thank you for both recipes and the how-to-braid tutorial.
You have made a challah-maker out of me – thank you!
Hi! Love your website and heard you on the radio yesterday! Can you put the challah dough after it rises in the oven in the fridge for a couple of hours before braid it and bake it?
Hi Lisa, after you punch it down let it rise again halfway (not fully), then put it in the refrigerator. It will continue to rise in the fridge, but more slowly. Once it has fully risen in the refrigerator you can take it out and braid it (it’s actually a bit easier to braid when it’s cold!), then let it rise once more before baking. You can also braid it prior to putting it in the refrigerator and let the braid slowly rise for a couple of hours in the fridge. Hope that helps!
This was my first time making challah or anytype of bread/dough for that matter. Im not afraid to try something new so i kinda just went in for it..it didnt really come out as expected taste wise..looks wise i braided it just fine and it held up…the problem ? The top is too crusty/crispy and not very soft and i feel i didnt use enough honey..it tastes like a regular fancy dinner bread or something…grrr! I really wanted to enjoy it for this weeks hanukkah thanksgiving
Thank you Tori, I really appreciate this recipe, I am working with it now 🙂 But I was wondering if you are using bread flour or just plain all-purpose? I am going with the assumption that it is all-purpose 🙂 Have you tried it with bread flour yet?
Hi Tori, thank you so much for coming back to me. I was actually wondering if I hadn’t kneaded it for long enough, as I definitely didnt do the ten minutes. I wonder if I perhaps added too much flour to the surface when kneading. Will definitely look at cooking times and temps going forward. Thanks so much again
Lauren
Hi Lauren– yes, too much flour on the kneading surface can “dry out” the dough a bit and lead to toughness. Perhaps try flouring the surface less next time and keep an eye on your cook time. Good luck!
Hi Tori,
Beautiful Challah. Mine was a bit hard inside; do you know why this might be please?
thanks!
Hi Lauren– you may have over-kneaded the dough, which can result in a stiffer bread. It is also possible that you baked the challah too long. Next time try using a thermometer to measure the internal temperature– when it reaches a temp of 190 in the thickest part of the challah, it’s done.
Hi there!
Love your recipes 🙂 everything I’ve tried has come out wonderfully!
I was just curious if you had any tips on freezing the dough? What I want to do is braid the dough and freeze it before the final rise, and bake it fresh erev shabos. I’ve read you can do so by wrapping it in plastic wrap, then foil, and stashing in freezer ziplocs prior to freezing. Have you ever tried that/ have any tips? Thanks so much!
Hi Gina, challah does freeze well. You can bake, then freeze, or you can freeze the dough. To freeze after baking, place the bread while it’s still warm from the oven (not hot) in a plastic freezer bag. Squeeze as much air as possible out of the bag before sealing. When ready to serve, put the challah straight from the freezer into a 350 degree oven till warmed through.
If you want to freeze the dough and bake later, allow the dough to rise and shape into braids. Place the braided dough on a tray on parchment in the freezer until it gets hard. Wrap it in plastic wrap in three layers, then in foil. Freeze until needed (no longer than 1 month, or you risk freezer burn). When thawing, remove plastic wrap, allow to thaw/rise at room temperature for 2-3 hours, then bake as directed.
I bought a house 10 years ago and didn’t realize until after closing that the oven didn’t work. I finally got a full size oven last week, after waiting for 10 years… and your Challah bread was the first thing I baked in it 🙂 It is just about finished now… It smells heavenly and looks pretty good, considering how out of practice I am! (I made all of the bread for a family of six for many, many years, but like I said, it’s been a little over a decade). I need to practice my braiding – I did the six strand braid – the middle is a bit low and didn’t brown as much as the outer edges, but I am very pleased with this effort. Thanks for the recipe and clear directions!
Tracey, I’m honored that the first thing you baked in your new oven was my challah! Hope it tasted as good as it smelled. 🙂
I would love suggestions on how to make a rye challah? Would it be half rye and half whole wheat flour with the same recipe? It would be a great healthy alternative for my family.
I made your bread recipe today to gave a friend for her birthday. It turned out almost as beautiful as yours. Thank you for the recipe; the dough worked up great! I made two loaves and did the three braid. Next time I’m going to be brave and try the four braid. My friend was very pleased with her birthday present! Again thank you for sharing your recipe and the tutorial on braiding.
Wonderful! Happy birthday to your friend. 🙂
I tried to make the Challah. It tasted great, but came out dry and crumbly. What do you suggest I do so that it comes out moist and not crumbly. I only baked it for 25 minutes.
Hi Jerry– I’m not sure what happened, but crumbly dough could mean that you added too much flour during the kneading and braiding process, or that you let it rise too long. Next time try using a high gluten flour (also known as bread flour), and only let it rise till you can poke your finger in and the indentation stays– no longer. Hope that helps!
The “party” loaf was very well received! The “me” loaf is also delicious, I just had to cut off the egg on the bottom!
First time challah baker here and I am SO happy with how my loaves turned out! I’ve been wanting to try forever, and your tutorial was just perfect, from the yeast to the braiding. I am very excited to serve this tomorrow at a potluck.
One sort of funny thing that happened- I must have overloaded on egg wash on my 2nd loaf. I don’t have a pastry brush and basically spooned it over… turned out to be a bad idea. It created a crust around the bottom of the bread- that was essentially scrambled eggs! Made me laugh, but obviously not an ideal outcome. Luckily it was the “me” loaf and not the “party” loaf
Thanks for the great instructions!
Aww, I’m happy the “party” loaf turned out ok Felicia!!
Hi Tori,
Could you share more about your baking challah in Masada? Was that part of a tour? Thank you for your informative culinary blog.
Blessings,
lynn
Hi Lynn, we baked the challah as part of my stepdaughter’s bat mitzvah ceremony on top of Masada. The challah part was organized through a local Chabad group. Here is the link if you’re interested: http://www.deadsea-chabad.com/templates/articlecco_cdo/aid/687087/jewish/Bat-Mitzvah.htm
Hi Tori,
Thank you so much for the link.
What a meaningful way to mark this important passage in life!
Toda,
lynn
You’re welcome!
This was a very easy recipe to follow and it turned out wonderful. Thank you for sharing.
Great!
Hello,
I tried your recipe for Rosh Hashana and my challah came out very dense (not light, airy and fluffy). It was not very good. The dough was not rising as much as I expected as well. The yeast did ‘bubble-up’ after sitting for 10 minutes. I am not sure what happened but I did follow your instructions exactly as written. Any thoughts?
Hi Melissa– you likely did not let the dough rise enough. It really needs to double up in size twice (once, then punch, then once again) before braiding, then it needs time to rise again in braided form. Partial rising leads to a more dense bread. Another reason might be that you over-floured the rolling surface when creating the strands, which can dry out the dough and make it more dense. As I was not with you when you made it, it’s hard to say what went wrong, but those are the most likely reasons. Hope that helps!
Hi Tori,
Love your recipes. Going to try challah for rosh hashana. Was wondering if I can make it without braiding in a round loaf which I beleive is traditional for the new year ( according to my mother in law many yrs ago). I was thinking of making a long ” snake” and going round and round to form a circle. I am not sure of the baking time. Can you help me? I am very insecure to deviate from your braided recipe. Thanks for all you do ShanahTova to you and yours. Xoxo Rho
Hi Rhonda, you can braid it in a single strand if you prefer, then into a ring, like this:
http://theshiksa.com/2011/11/23/pumpkin-challah-centerpiece-with-cinnamon-honey-butter/
Make the strands the way you’re instructed to in this blog (stuffing them with apples), then use the braiding/baking instructions on the pumpkin centerpiece blog. They will be similar in terms of the time you’ll need. The best way to check for doneness is to turn the challah over and knock on the bottom– if it sounds hollow and is well browned, it should be done. Hope that helps…
I just made this Challah also challenged myself with doing the 6 braids. Family loved it and it tasted amazing! Been searching for a good recipe and so glad to have found that works. Thanks for such detailed instructions! It helped to make a flop proof challah! Great recipe and definitely recommend others to try the 6 braid one as it looks beautiful!
Awesome Stacey! That’s great to hear. 🙂
Great recipe. I wonder if it is possible to make the dough on Thursday to bake on Friday
Hi Fern. Yes, you can make the dough a day ahead. Leave it in the refrigerator for one slow rise overnight. Take out of the refrigerator and shape it into braid(s) while cold. Put on parchment-lined baking sheet, cover with a clean towel to rise, and let it rise for at least 2 hours before baking (the dough will be cold and will need more time to reach room temperature, then rise). It’s ready to bake when you gently press a finger into the dough and the indentation stays rather than bouncing right back. Enjoy!
Your recipe for challah bread is excellent;
I am not Jewish but I am taking classes on Torah Seder. I volunteer to make challah, I have never made it before. I went searching on the internet for something easy and something that looked professional. I made the challah bread from your recipe and everyone in class loved it.