One of life’s greatest pleasures, this homemade chicken schnitzel recipe is a family favorite in my house. Breaded and fried, it’s golden on the outside and tender and moist in the center. Budget-friendly and quick to prepare, it’s one dish I’ve been making for years, and I’m sharing all my tips and tricks so you can have it on the table in just over 30 minutes!
Love schnitzel? Try my Italian schnitzel bites, portobello mushroom schnitzel, and corn & pepper panko schnitzel, too.
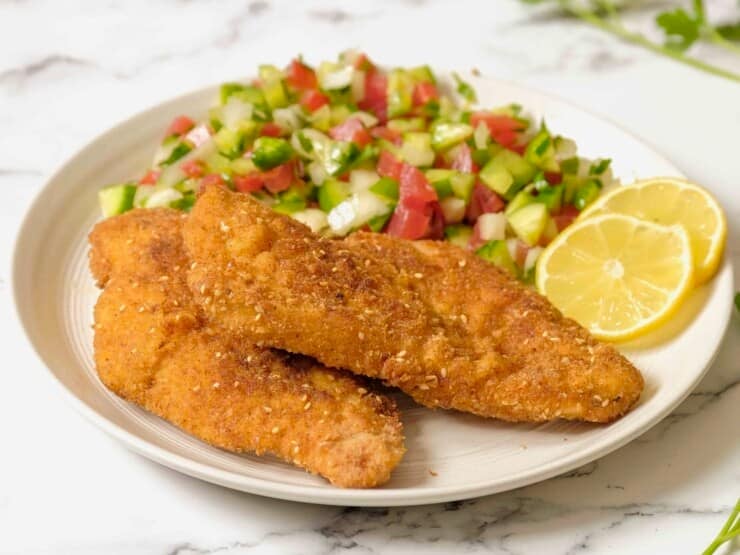
Table of contents
In case you’re unfamiliar with the history of chicken schnitzel, it is a dish made with crispy fried chicken breasts originally from Austria. Traditional schnitzel is made with veal (known as Weiner schnitzel) or pork. However, the dish quickly became popular in Germany as well and later found its way to Israel through European Jews.
Like many other foods, Jews adapted this regional dish to suit their dietary kosher laws, replacing pork (which is treif) and veal (which was expensive and difficult to obtain) with chicken and turkey. Now, chicken schnitzel is popular throughout the world and is a particular favorite in my household.
Ingredients and Notes
Please be sure to scroll down to the recipe card for the complete details!
- Chicken – Boneless chicken breasts are best for schnitzel, because their mild flavor pairs with the breading nicely. However, boneless, skinless chicken thighs will also work. I like to butterfly the chicken breasts, then pound them between sheets of parchment paper or plastic wrap. Consequently, this makes the chicken cook more evenly, resulting in a crispier result.
- Flour – I use all-purpose flour for the base of the breading. However, if needed, you can substitute a 1:1 all-purpose gluten-free flour to keep this recipe gluten-free.
- Breadcrumbs – You can use a variety of ingredients for coating the schnitzel, including breadcrumbs, matzo meal, and Japanese panko. Overall, breadcrumbs are the most popular choice and my go-to for a classic schnitzel. Matzo meal is used during Passover, when Jewish cooks have a kosher restriction on leavened grains. Panko breadcrumbs produce a very light, crisp, and airy coating.
- Oil – Make sure to use an oil with a high smoke point for frying. I prefer avocado oil, but grapeseed oil also works well.
How to Make a Classic Chicken Schnitzel Recipe
- Butterfly the chicken. Trim the tenderloin off the chicken breast, if needed, along with any extra fat. Then, butterfly the chicken, and slice the breasts in half, creating four chicken fillets.
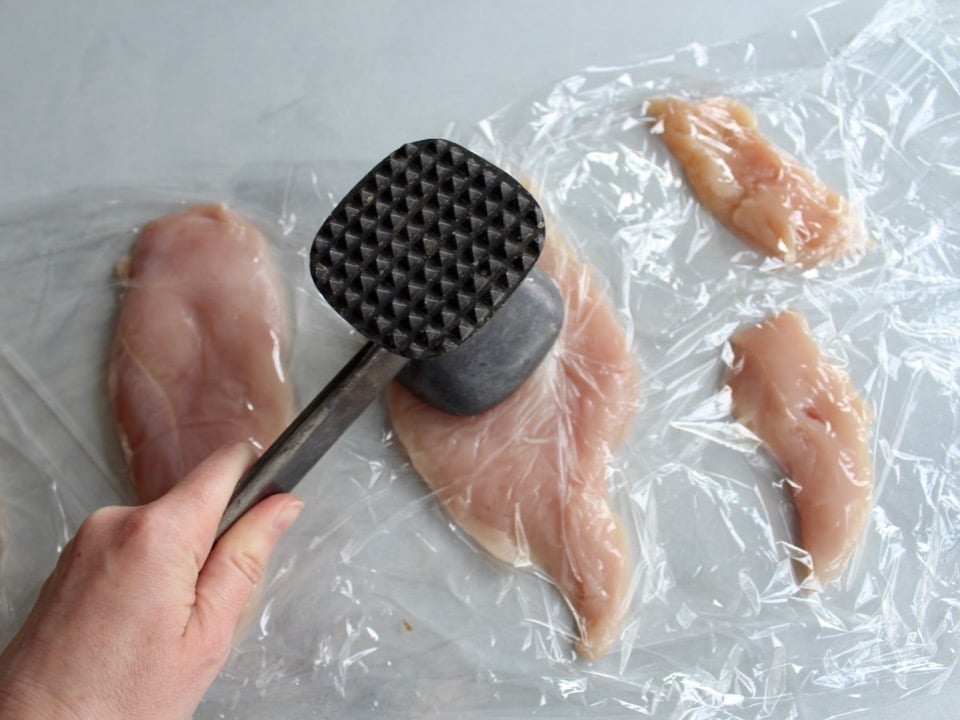
- Pound the chicken. Use a meat mallet or heavy-bottomed pot to pound the chicken until each piece reaches a uniform thickness.
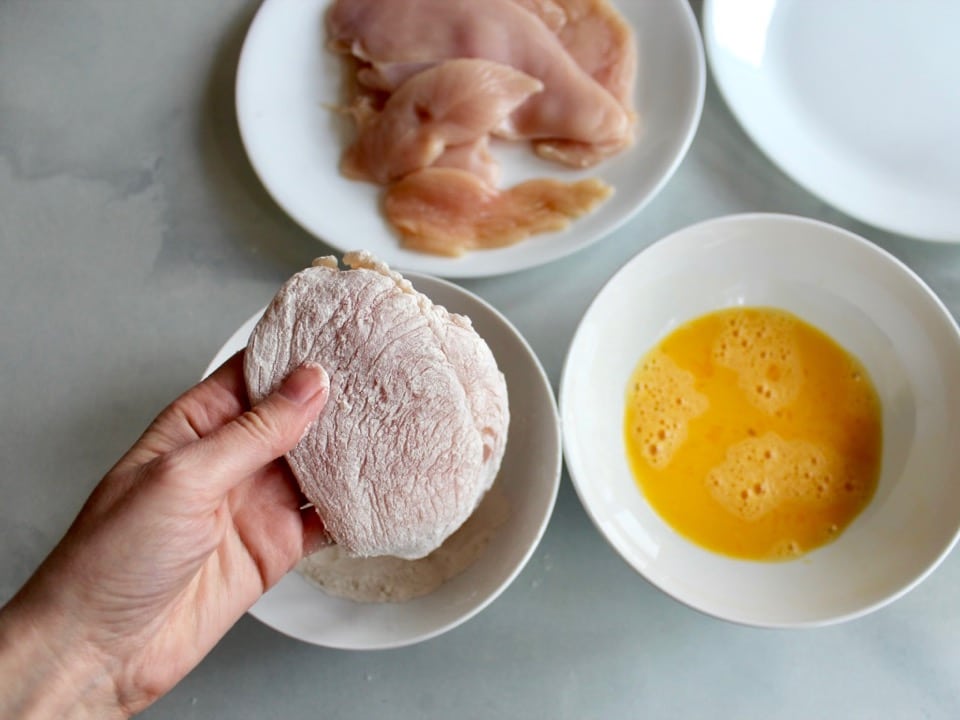
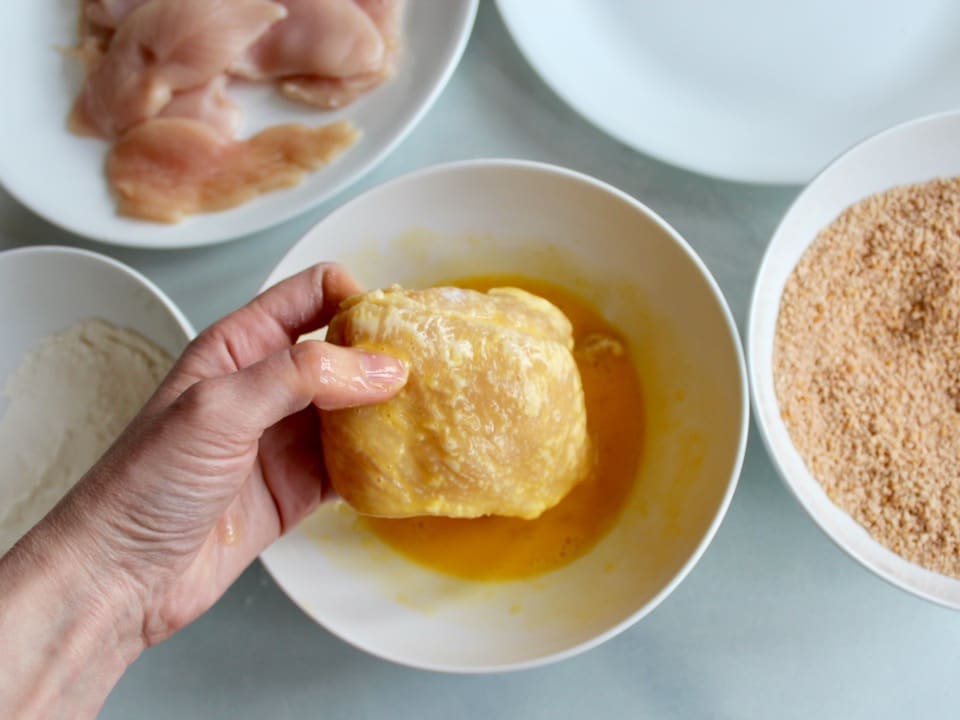
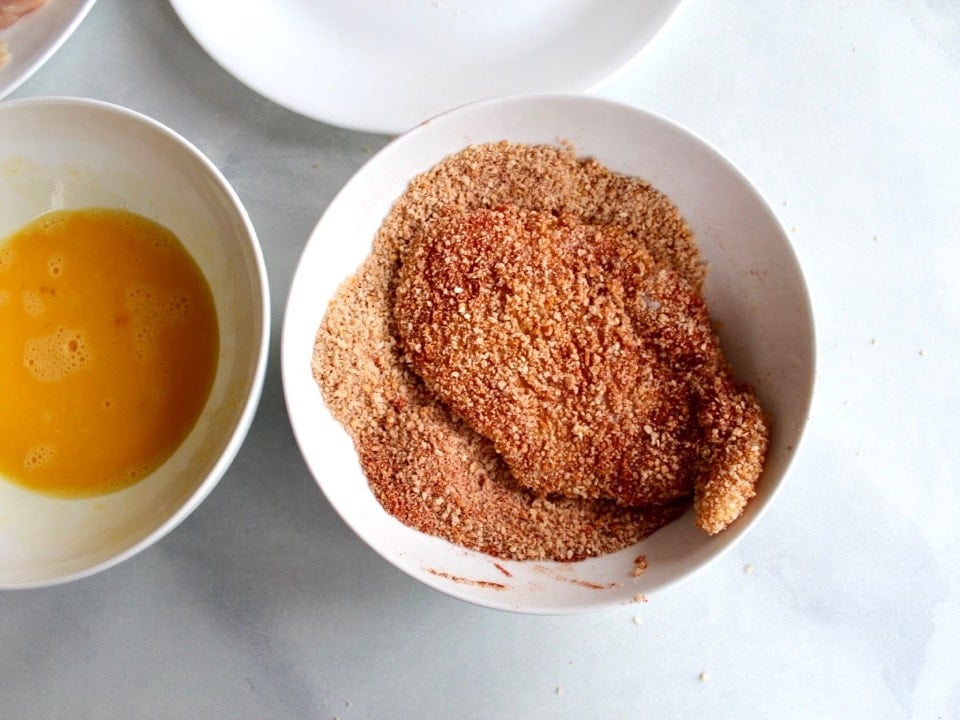
- Bread. Create a breading station using three large, shallow bowls. Working one at a time, dredge the chicken with flour, followed by the beaten egg and breadcrumb mixture. Let any excess breading drip off.
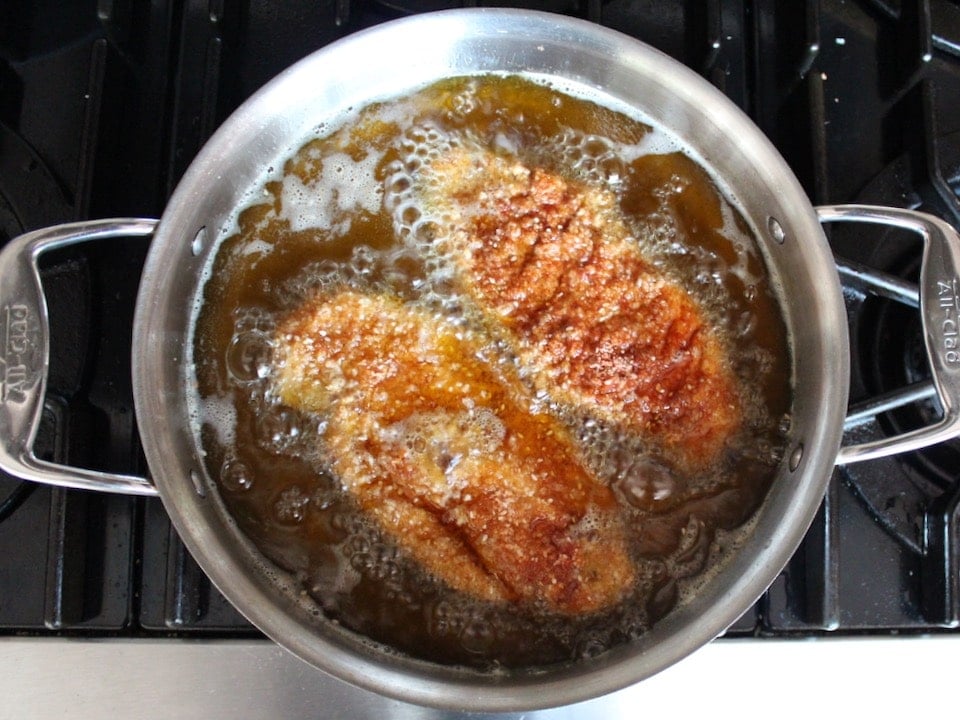
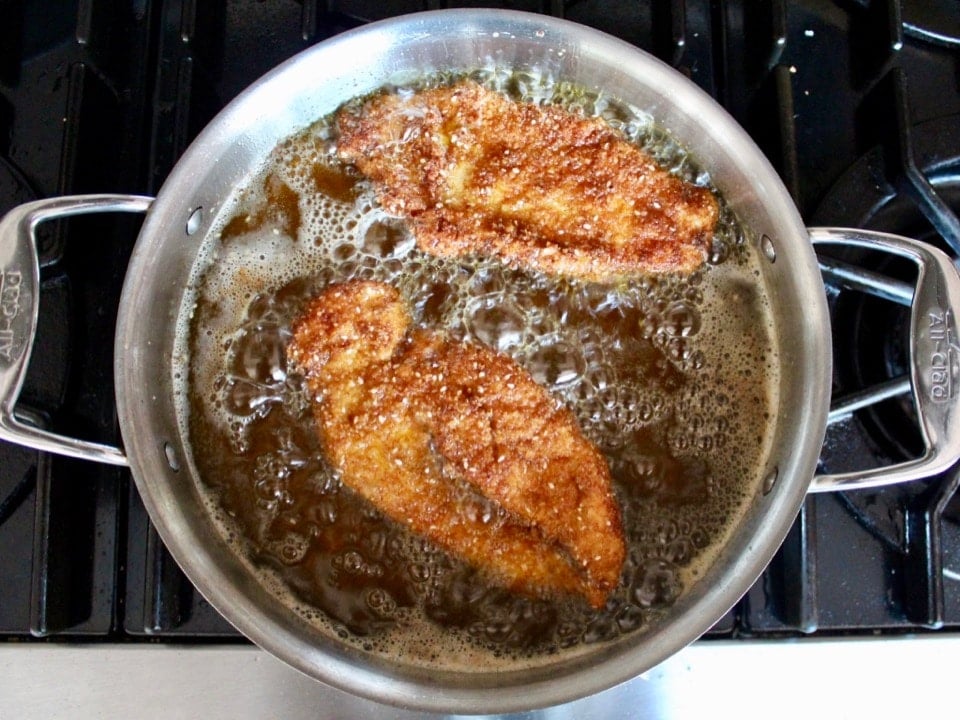
- Fry. Working in batches, fry the breaded chicken breasts in hot oil in a large skillet until a golden brown crust forms on the first side. Then, flip, and continue to fry until the chicken cooks through. Transfer the cooked chicken schnitzel to a wire rack or a paper towel-lined plate to catch any of the excess drips of oil. Repeat as needed, cooking all the chicken pieces.
- Serve. Season with salt as needed, and enjoy warm.
Tori’s Tips for Making Crispy, Juicy Chicken Schnitzel
- Pound the chicken evenly. The key to achieving crispy, tender chicken schnitzel is to pound each chicken piece to an even thickness, roughly 1/8 inch thick.
- Add flavor to the breading. I like to season my breadcrumbs with paprika and salt. Then, I add white sesame seeds for a little extra crunch and a subtle nutty taste.
- Heat the oil slowly. Let your oil warm over medium heat, allowing it to become nice and hot without burning, which can create an unpleasant flavor and prevent the chicken from cooking properly.
- Avoid overcrowding. Work in batches, leaving space all around each piece of chicken. This promotes fast, even cooking and allows the breading to become golden and crisp on all sides.
- Use a meat thermometer. Eliminate any guesswork when cooking, and use a meat thermometer to ensure your chicken reaches an internal temperature of 165°F (74°C), meaning it’s fully cooked and safe to eat.
- Rest before serving. Let your chicken pieces rest for at least 5-10 minutes before serving. This allows the natural juices to redistribute, keeping it tender.
Serving Suggestions
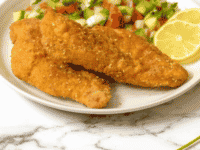
This tasty, crispy chicken is often served as a main dish with a starchy side dish like French fries, olive oil mashed potatoes, or Middle Eastern roasted vegetable rice. For the most part, I prefer to serve it with a fresh Israeli salad to cut down on calories.
Lemon wedges and parsley are the traditional garnish for chicken schnitzel. While I do love my schnitzel with lemon, I also like to dip it in spicy mustard, hot sauce, or hummus. You can’t go wrong either way. Save extra chicken cutlets to make sandwiches, too!

Chicken Schnitzel
Ingredients
- 1 pound boneless skinless chicken breasts (2 large breasts)
- 1/2 cup flour
- 2 large eggs
- 1 cup breadcrumbs, matzo meal, or panko
- 1 tablespoon paprika
- 1 tablespoon sesame seeds (optional)
- 1/4 teaspoon salt, or more to taste
- Oil with a high smoke point for frying – avocado oil preferred, grapeseed oil also works well
- Fresh lemon wedges for garnish
Instructions
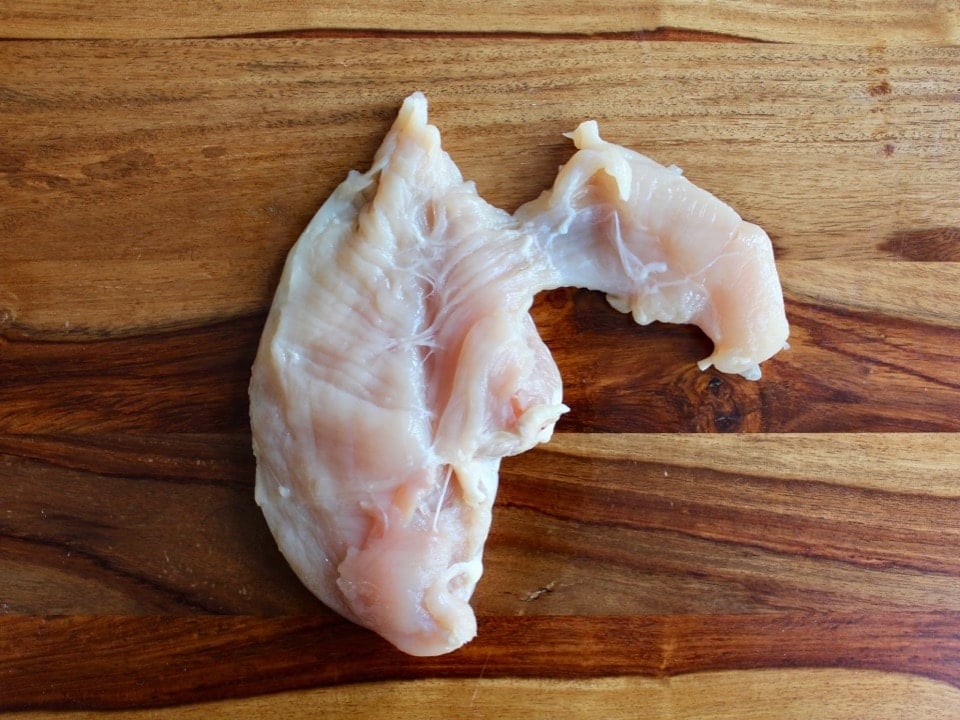
- For each breast, check to see if there is a tenderloin (an extra flap of meat that sort of hangs off).

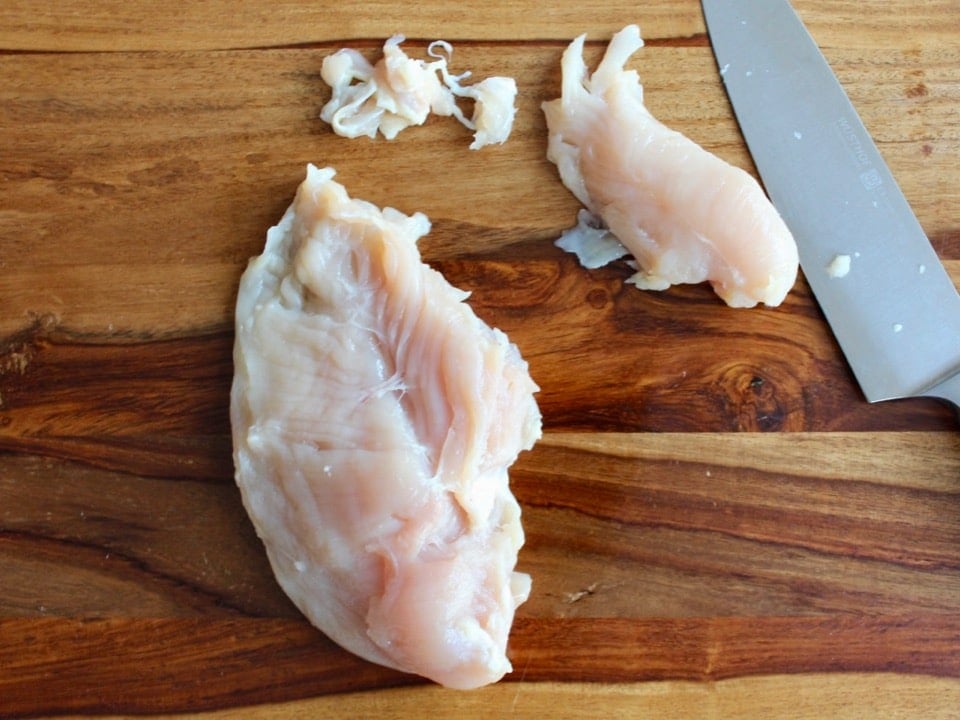
- If there is a tenderloin, slice it off of the breast. Trim any visible tendons or extra bits of fat from the breast and the tenderloin. Set tenderloin aside.
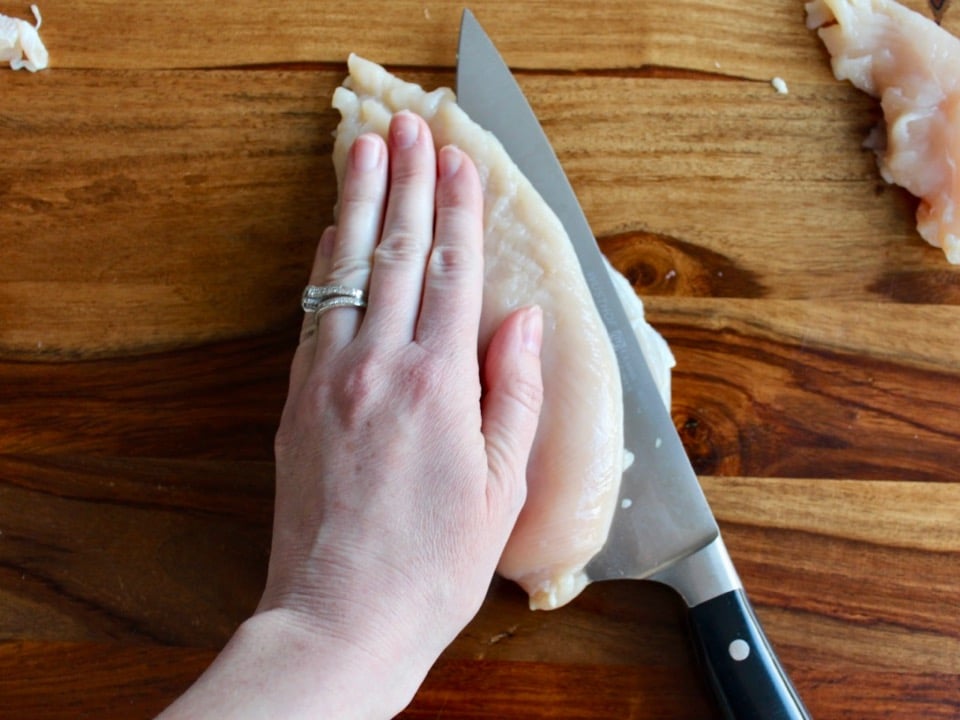
- Lay the breast on cutting board with smooth side facing upward. Identify the thickest round edge of the breast. Place your hand flat on the top of the breast. Slice carefully horizontally into the thickest round edge, slicing about three quarters of the way into the breast (divinding top half of breast from bottom). Do not slice all the way through.
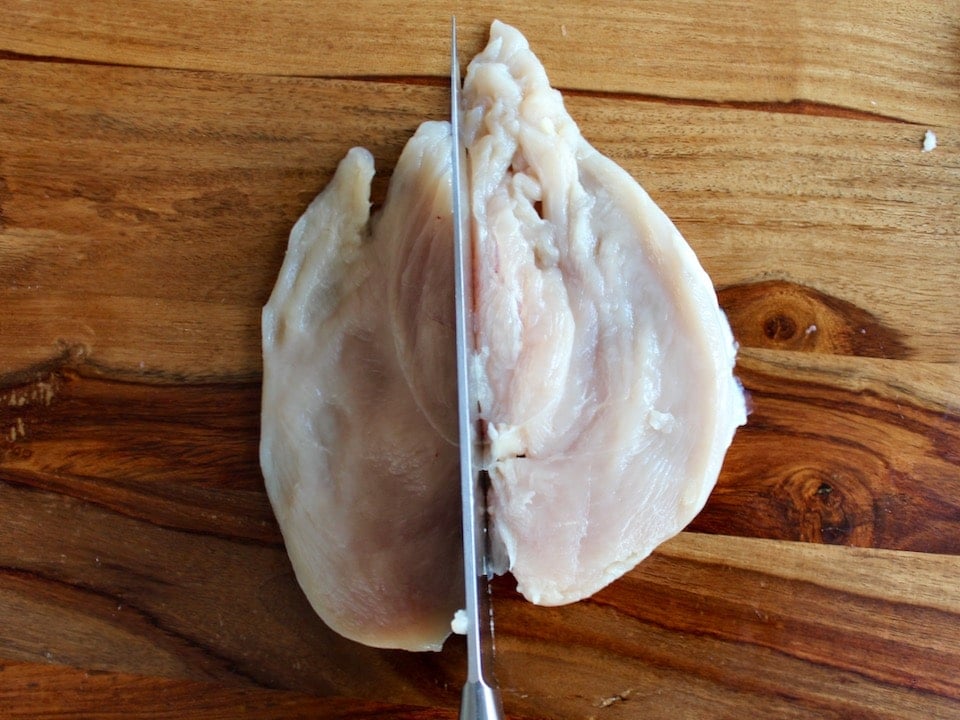
- Unfold the breast to reveal two symmetrical halves (this is a "butterfly" of the breast). Slice down the middle to divide the breast into two equal pieces. When finished with the pound of chicken, you should have 4 breasts of relatively equal size, and perhaps a couple of tenderloins as well.
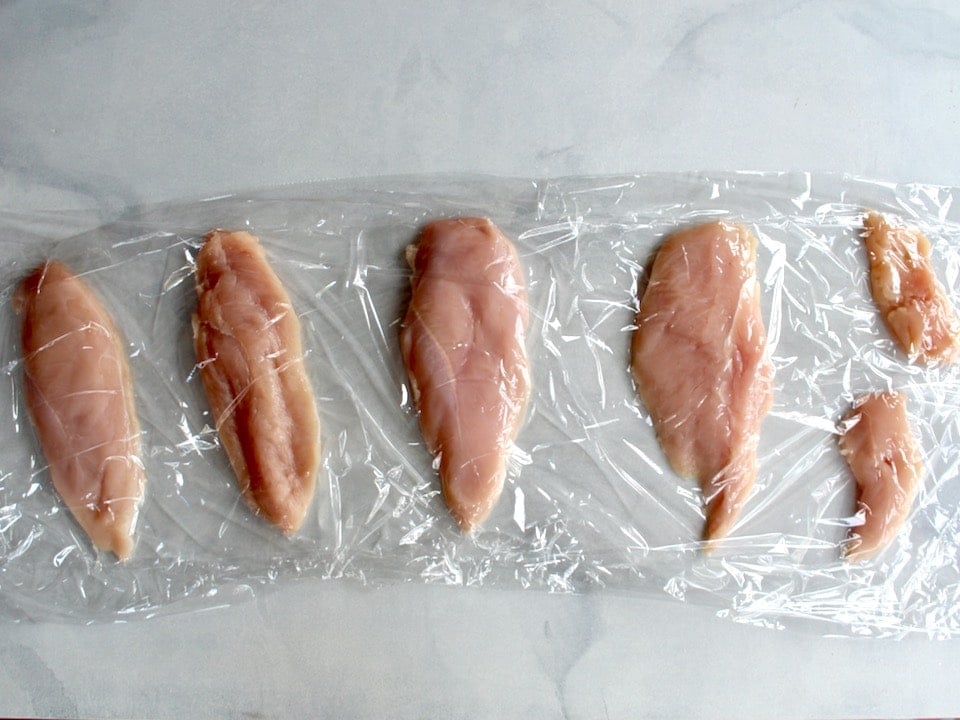
- Lay down a 2- to 3-foot long strip of plastic wrap on your kitchen countertop. Place chicken breasts and tenderloins on the plastic, leaving a 2-inch space between each piece of meat. Cover the breasts with another strip of plastic, so the meat is sandwiched between two layers of plastic.
- Use the flat side of a mallet to pound the breasts thin until they are of a uniform thickness, roughly 1/8 inch thin throughout.
- Place all the pounded breasts and tenderloins on a plate. Set up three wide, shallow bowls and a large empty plate on your countertop. In your first bowl, put the flour. In your second bowl, beat the eggs together with 2 tsp of water until well mixed. In your third bowl, stir together the breadcrumbs, paprika, 1/4 tsp salt and sesame seeds (optional) until well blended. Place empty plate nearby where you will put your coated schnitzels.
- Pour oil into a skillet or sauté pan until it’s deep enough for frying (about ½ inch). Heat the oil slowly over medium. While oil is heating, dip each breast one by one into your breading bowls—first dredge with flour.
- Next, dip the floured breast in the egg mixture until well coated.
- Finally, place the egg-covered breast into the bowl of breadcrumb mixture. Use a dry hand to coat the breast evenly with breadcrumbs. Repeat process for remaining breasts and tenderloins.
- You want your frying oil to be around 350 degreees F – hot, but not so hot that the oil smokes or splatters. You can test the oil temperature with a tenderloin first, if you have one. Fry the coated breasts in single-layer batches until they are golden brown on both sides. If your oil is at the right temperature, it should take about 2-3 minutes per side to cook the schnitzels.
- Don’t fry more than two breasts at a time in a regular sized skillet, or the oil temperature will drop and the schnitzels will become greasy. When the oil is at the right temperature, the schnitzels will absorb very little oil and cook up light and crisp.
- After frying, set the schnitzels on a wire rack (or on a paper towel-lined plate or baking sheet) to drain excess oil.
- Sprinkle the schnitzels with additional salt to taste, if desired. Serve hot garnished with lemon wedges or your favorite condiment. Mustard and hot sauce both pair well with schnitzel. If you have any tenderloins, take dibs on who gets to eat them – that meat is especially tender (hence the name "tenderloin"). Enjoy!


NOTES
Nutrition

tried this recipe?
Let us know in the comments!
If you enjoyed this recipe, I’d love it if you left me a star rating and comment below. Also, don’t forget to share and tag us on Facebook and Instagram!
FAQs
The main difference is that schnitzel chicken is made by pounding chicken breasts until they’re very thin, whereas breaded chicken is often left thicker. In addition, schnitzel is most commonly pan-fried, whereas breaded chicken can be either pan-fried or deep-fried.
I haven’t tested this recipe in the oven, but it should work. Bread the chicken as usual. Then, arrange it in an even layer on a prepared baking sheet, and bake at 400°F (200°C) for about 20-25 minutes, or until the chicken cooks through. I recommend flipping the pieces over halfway through cooking to ensure they brown nicely on both sides!
This recipe is best served warm while the breading is still crisp. However, if needed, you can store leftovers in an airtight container in the fridge for 2-3 days. You can also transfer the chicken to the freezer for up to 2-3 months.
To serve, thaw in the refrigerator overnight. Then, reheat the chicken pieces in the oven at about 350°F (177°C) for 10-15 minutes or just until warmed through. You can also reheat chicken schnitzel in the microwave, but I find it causes the breading to become a bit soggy.


excellent! keeper!
Husband who loves schnitzel LOVED it!!
Tori, This recipe is delish! I have followed several of your recipes and this chicken schnitzel has savory flavor which is a very pleasing taste. I prefer to add spices rather than use salt. Your recipes give me this option. I cannot thank you enough for taking time to combine recipe ingredients.
The best part is the layout of your website which is easy to follow. Your explanation of recipes to follow for holidays is a joy! If I neglect to say anything, I am rushing to make your kugel with pineapple & raisins. MAZEL TOV and continued health & happiness to you & your family!
Awww thank you so much Sandee, I appreciate the kind comment!
This was wonderful! I omitted the paprika (based on other comments) and used skinless chicken thighs as they retain so much moisture. And, of course, used Panko. Really fabulous and only took maybe 5 minutes to cook. So tasty and crunchy and flavorful. Thank you for the recipe!
5 star , easy peasy and delicious
Looking Good
This is my first introduction to your recipes and have to let you know how well written and clear your instructions are. Even a beginner cook can get good results. I’ll be sure to visit the site again.
Having said that, I found that the chicken schnitzel called for too much paprika, such that it overtook the flavour.
Thanks Linda! Did you use “sweet” paprika here, rather than smoked or spicy paprika (cayenne)? I’ve never found the sweet paprika overpowering here, so wondering if maybe you used another kind. Regardless, thank you for sharing your feedback!
Hello Tori;
I love this recipe (in fact) all the recipes I’ve tried from your site are awesome. Question about the schnitzel:. I want to make this for a Hanukkah party to take to my daughter’s house – any suggestions on how to keep them crisp? I hate not eating fried foods right away.
Thank you
Jackie
This recipe is fabulously delicious! Guests always love it when I make it. It is a huge hit with my husband and kids; I have to make more then 2 pounds for everyone to get there fill the night of and for the next day. Leftovers are delicious too either warmed in the oven or over a salad.
Wow! This is a nice, clearly written recipe. Thanks!
Thanks for the great recipe. Easy, economical, and delicious. I also looked at your Israeli salad and noted that it is almost exactly the same as Tunisian salad. The only difference is that Tunisian salad uses mint in place of parsley.
There are so many variations on this salad concept throughout the Middle East and Mediterranean. I have yet to find one that I don’t like! They’re all amazing.
very precisely explained, thanks.
This was a hit with the family! Thank you! I bashed an old french baguette in a plastic bag with a rolling pin to make the breadcrumbs. I used sunflower oil for frying. It was easy and delicious. We ate it with the Israeli salad and with some steamed Jasmine rice on the side. Thanks again! You’re recipes are always consistently delicious.
In my experience, dredging the cutlets using cornstarch instead of flour and panko would give a crisper finished product.
I just finished making , it came out so tasty and crunchy . I love it , thank you for sharing!
I love this recipie and make it often. Thank you for such detailed directions!!
Glad to hear you’re enjoying it as much as we do! 🙂
Too eggy. Not nearly crunchy enough.
Wow, sorry to hear that! Can’t say I’ve ever heard that complaint with this recipe. I guess it can’t be to everyone’s taste. To be honest, my family adores this recipe as written, and many readers have also enjoyed it, so I’m wondering if something went wrong for you in the preparation? It’s super crunchy. Anyway, better luck next time.
Thank you very much. I had potato puree and corn salad with pickles and red cabbage. This is also on top of our dinner list, very delish.
This is the most helpful recipe description I’ve ever read. I’ve never been able to successfully bread and fry anything but this came out delicious and the whole family loved it! Thanks for describing how to get the temperature right and all the kitchenware needed up front.
You’re welcome! I really try to be as detailed as possible – I find it helps people to be more successful with the recipes. Glad you enjoyed it!
Excellent. We made this tonight for Rosh Hashanah. I used gluten free matza crumbs and equal amounts Bob’s Red Mill gluten free flour and oat flour. Thank you for the recipe!
I just did this recipe and it was yummilicious!!! Thank you for sharing this recipe Tori!