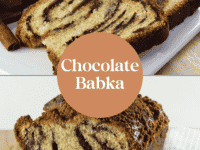
This Chocolate Babka recipe was developed after months of careful research. My goal was to produce a classic babka recipe that works every time. Learn to bake tender, delicious homemade chocolate-filled babka with this illustrated step-by-step tutorial.
When I started the process of developing this recipe, I realized that just good babka wasn’t enough. It had to be great babka, foolproof and irresistible with perfect texture and spot-on flavor. High standards? Maybe. But babka is labor-intensive. If you’re going to the trouble to make chocolate babka, it’d better be amazing.
Thanks to a gentle nudge by online friend and Kveller editor Tamara Reese, I decided to tackle this whole babka thing. My assistant Ashley and I spent days testing chocolate babka recipes to create our own “ultimate” version. After lots of trial and error– baking is a bit of a science, after all– we incorporated the textures and flavors we loved most. The result is the recipe you see here.
Babka is an Eastern European cake-bread. Modern babka is similar in texture to challah, but slightly more cake-like. The name comes from the Slavic babcia, meaning grandmother, which is closely related to the Yiddish bubbe. The word babka translates to “grandmother’s cake,” inspired by the shape of an old woman’s skirt. Babka was originally baked in fluted Polish baking pans and typically made by grandmothers.
Jewish babka first appeared during the early 1800s when Polish housewives would prepare extra egg challah dough to be filled with cinnamon or jam, then rolled up and baked alongside the Shabbat challah. It was served to hungry children during busy Shabbat preparations or reserved as a special treat. Streusel toppings came along during the mid 1900s.
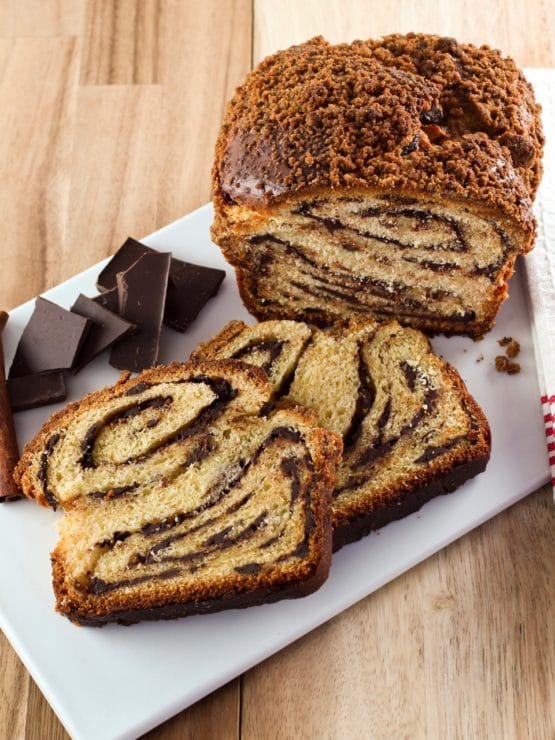
Here is our recipe for Chocolate Babka. After much consideration, we decided to give it a streusel topping– because, well, why not make a good thing even better?
Recipe Update: I originally launched this recipe in 2015. Since that time I’ve had multiple readers test it with great results. Throughout the years I have made some minor adjustments that help make this Chocolate Babka recipe even more bulletproof. I’ve incorporated those adjustments here, along with pretty new pictures and a few tips from Kelly Jaggers. Enjoy!
Recommended Products:
We are a participant in the Amazon Services LLC Associates Program, an affiliate advertising program designed to provide a means for us to earn fees by linking to Amazon.com and affiliated sites. As an Amazon Associate I earn from qualifying purchases.
Food Photography and Styling by Kelly Jaggers

Chocolate Babka
Ingredients
Dough Ingredients
- 1 packet active dry yeast or 2 1/4 tsp
- 2/3 cup whole milk warmed to 110 degrees F, plus 1 additional tbsp for egg wash
- 5 tablespoons unsalted butter at room temperature
- 3 tablespoons granulated sugar plus 1 tsp for yeast
- 1 1/2 tablespoons flavorless cooking oil (grapeseed is an option)
- 1 1/2 teaspoons vanilla extract
- 4 egg yolks reserve 1 egg white for egg wash
- 2 1/2 - 3 1/4 cups all purpose flour (flour amount detailed in instructions below)
- 1 teaspoon kosher salt
Chocolate Filling Ingredients
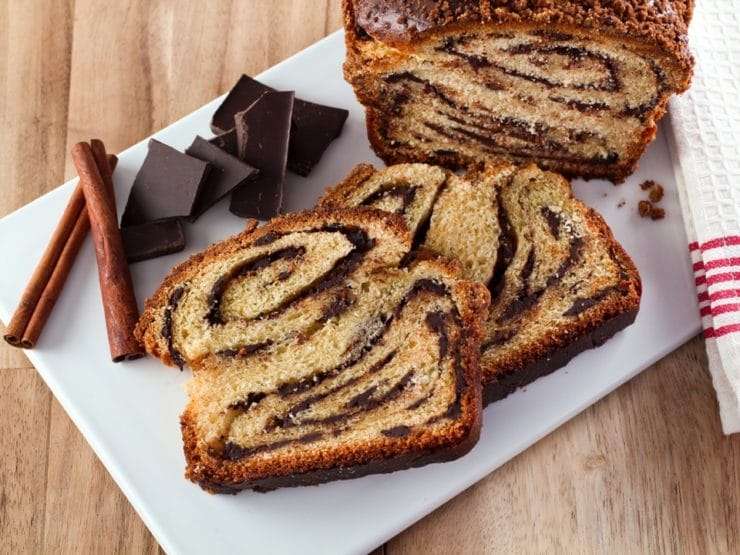
- 2 cups finely chopped, good quality dark chocolate (two 4 oz. bars of dark chocolate)
- 2 teaspoons ground cinnamon
- 1/3 cup unsalted butter cold
Streusel Ingredients
- 1/4 cup dark brown sugar
- 1/4 cup all purpose flour
- 2 tablespoons unsalted butter cold and cut into small pieces
- 1/4 teaspoon kosher salt
Instructions
- To prepare the dough: Start by dissolving the yeast in the warm milk along with 1 tsp sugar. If you do not have a thermometer, the milk should be warm to the touch but not hot. Whisk the yeast into the milk along with 1 tsp sugar to dissolve. Over the next few minutes, the milk/yeast mixture should become foamy as the yeast begins to grow. If it doesn't, this likely means that your yeast has expired or the milk was too hot, causing it to die. Get some fresh yeast and try again, otherwise your babka won't rise... and that would be a major bummer.

- While the yeast proofs, cream together the butter and sugar in a stand mixer fit with the paddle attachment.
- Once the butter and sugar are well combined, add the oil and vanilla extract and mix well at low speed. Add egg yolks 1 at a time and increase the mixer to high. Beat for an additional 2 minutes.
- Turn the mixer back to low speed and add 2 1/2 cups flour and 1 tsp salt, then add the foamy yeast mixture. Be sure to give the yeast mixture a final whisk before adding it in, especially if it is very foamy.
- Mix until just combined, then replace the paddle attachment with the dough hook. Continue to mix, adding 1 tbsp of flour at a time, just until a soft dough forms. The amount of flour you need will vary based on humidity and altitude; best to add flour slowly and check texture as you go. You want a dough that is soft a pliable, not stiff. The dough should be tacky, but not wet or sticky, and shouldn't cling to the skin. Do not walk away during this part, you also want to keep an eye on the dough to make sure that you do not over mix it. It should be easy to form into a smooth ball.
- Once a soft dough forms that can easily be removed from the hook by hand, transfer it to a lightly floured surface and knead several times, or until you have a smooth ball of dough. Do not over-knead.
- Place the ball of dough into a greased mixing bowl and cover with plastic wrap. I usually let the dough rise in the refrigerator overnight, but if you prefer you can let it rise at room temperature for 1-2 hours, or until it has just about doubled in size.
- To prepare the chocolate filling:In a mixing bowl, combine the grated or finely chopped chocolate, cinnamon and butter. Mix with hands until well combined, it should have a chunky texture. Set aside.
- Remove the dough from the refrigerator and allow to come to room temperature, about 1 hour. Once the dough reaches room temperature, roll it on a lightly floured surface until you have a 14x18 inch rectangle.
- Evenly sprinkle the chocolate filling over the dough, leaving an even 1-inch border around the edge. Then, starting with the long side, roll the dough into a tight log.
- Roll the log back and forth several times, gently spreading it out until the length of the log is about 20 inches.
- Twist the dough into a figure 8 and pinch the ends together. Sometimes using a bit of water will help the ends to stick. Line your loaf pan with parchment paper, then lightly spray the parchment with nonstick cooking oil spray. Transfer the dough to the lined loaf pan. Cover the pan with a tea towel, or loosely with plastic wrap, and allow to rise for 1 hour, or until the babka completely fills the pan. It will get pretty big!
- While the dough is rising, prepare the streusel by combining the ingredients in a mixing bowl until well combined and crumbly.Once the dough has risen, preheat oven to 350 degrees F.
- Using a very thin skewer, poke a few holes into the babka. This allows steam to be released during baking so that you aren't left with very large gaps between the dough and the filling.
- Brush the babka with an egg wash made from 1 egg white whisked together with 1 tbsp of whole milk.
- Sprinkle the streusel over the top of the babka. It will collect more in the crevices, but this is fine. Babka should have a rustic look.Place the pan on a baking sheet and bake for 25 minutes, then turn the pan 180 degrees and cook for an additional 25 to 30 minutes, or until it reaches an internal temperature of 185 degrees F in the thickest center part of the babka. The babka will be golden brown and should have a hollow sound when tapped.
- Allow the babka to cool before slicing. This is truly the hardest part of the whole process, but trust me - cutting into it while it’s still hot will leave you with quite a mess. The filling needs time to set up a bit. Even after cooling it will crumble a bit when you slice it. That's part of the charm. Serve with coffee or tea and enjoy your babka bliss!


NOTES
Nutrition

tried this recipe?
Let us know in the comments!
Research Sources:
Marks, Gil. Encyclopedia of Jewish Food. Hoboken, NJ: Wiley, 2010. Print.
Other Great Recipe Ideas


First time making and it has a few steps but overall it was delicious and my grandchildren loved it and they also love saying babka.
Thanks for the delicious Babka!!!
Thank you, its the second time I made this Babka. It’s wonderful. I am just relearning to bake with Yeast.
Also the Tutorial is very helpful
Hi Tori,
I planned this recipe since the summer when my best friend was in Isreal emailing me about chocolate babka loaf. Your recipe looked the best and I bought Lindt 90% cocoa chocolate bars to chop up for the loaf. I had not made a yeast bread in 35 years and followed your directions to the letter. Also used Saigon cinnamon with the chocolate. When I surprised my friend with her gift of chocolate babka loaf, she was speechless and proceeded to slice it open and try it. The aroma of chocolate and cinnamon was almost overwhelming as was her gratitude after tasting it. So I am passing on the kudos to you –
it was perfect. And she said she has not tasted a better chocolate babka loaf, ever!! Happy New Year from British Columbia.
It came out just as beautiful as the pic you posted. Thanks so much – what a great recipe and excellent directions and pictures. I’ll definitely be making this again.
This could not have been easier. The dough was easy to work with and the flavor delicious. I used my oven’s “proof” function to let the dough rise and the texture was perfect.
Will I be able to use Instant Yeast? And how would I do it?
Hi Ann, Tori’s assistant Ashley here! We have not made this recipe using instant yeast, so I am not sure if the results would be the same.
making it now…..dough has doubled beautifully…..is this one loaf or 2? It says one but it looks big.
Thanks
Hi Donna, Tori’s assistant Ashley here. This recipe is for one large loaf of babka.
The recipe worked perfectly – YUM!!!!
hi tori thank you for posting this recipe. do you recommend all purpose or bread flour ? thanks
Hi, Tori’s assistant Ashley here. This recipe is made with all purpose flour.
Hi. Looks great! Can I use a food processor instead of mixer for the dough? Thanks.
Hi Tori:
Thanks for your response. I live in Ontario. I doubled the recipe and followed it verbatim. Oh well! I’m sure it’s me. I took it out of the fridge this morning. Maybe, when I get back from work, I’ll be pleasantly surprised, but somehow I doubt it. Too much flour, I think. I used standard cups to measure the flour and leveled them. I’ll let you know what happens! Thanks again! I was hoping to serve it for Ukrainian Easter this Sunday. I just might try again! Single recipe this time!
Oh yeah– I never double baked recipes unless I know that they work. Most baked recipes have to be adjusted when they are being made in multiple amounts. I hope it works! Fingers crossed. If not definitely try the single batch next time.
Help! My dough is in the fridge and has been overnight, but it’s hardly grown. I doubled your recipe, and followed the recipe exactly. Instead of a soft ball of dough, it was semi-dry/tough. I’ll remove it from the fridge after work, hope it grows in the warmth…room temp. as you say, and cross my fingers. The yeast did foam, so it wasn’t killed.
Any suggestions? And addition of milk or butter before I roll it out tonight (after it’s warm and has hopefully gotten bigger?)
thanks!
Hi Tanya– are you in the UK? Using different measurement sizes, maybe? Living in an area of high altitude? All of these things can affect the dough. If the dough felt dry/semi-tough before refrigerating then it probably doesn’t have enough moisture and it likely won’t rise. This leads me to believe your measurements are off, so perhaps you’re not using standard U.S. cups/teaspoons/tablespoons? Doubling the recipe can also be problematic. Without testing it myself, I wouldn’t recommend it.
I used this recipe for the first time ever making yeast bread and it worked like a charm! So impressed. I really do a lot of research when it comes to choosing a recipe and this one was detailed and just seemed to make sense. It was definitely a good choice because I am now making the recipe again with multiple loaves for the whole family for Easter brunch. It’s super rare that I find a recipe that I don’t have to alter to make work well. Total success! Thank you so much for posting it, I really feel like it can become a traditional recipe for us 🙂
Dena I’m so pleased it worked out well for you! Thank you for letting me know 🙂
Hi! I e made this and the cinnamon recipe numerous times. MY kids LOVE this babka. I made it perfectly a bunch of times, but now when I make it, the top side seems to explode a little and the filling leaks out a bit. It still tastes great, but looks a little weird. I can’t figure out what I’m doing wrong suddenly. Any ideas?
This babka looks ah.may.zing!!
I have a question about the filling. My mom’s filling recipes are cocoa/sugar based. Does your filling with chopped chocolate completely melt during baking or does it remain with chunks of unmelted chocolate?
Hi Yael, it turns into a gooey sort of filling, no chunks.
Hello I am yet to try the recipe but I was wondering if its okay to use bread flour instead of all purpose flour
Yes bread flour will work just as well.
Babka is my all time favorite dessert and few bakeries can make it like my childhood memories. This recipe baked beautifully and tasted incredible. Best babka dough just like I remember. My only change was smearing the sheet with almond paste in addition to your chocolate filling. Loved it!
why do you use both butter and oil? How does each of them contribute to the final product?
Hi Esti, great question. Using pure butter in a baked bread, cookie or cake (rather than a mixture of butter and oil) tends to make it more dry and crumbly, but butter gives great flavor. Using the combination of oil and butter gives you the flavor of butter with the superior texture that comes from oil. I’ve found using both gives a nice balance of flavor and texture.
Great recipe! Very easy to follow and the finished bread was heavenly, thank you very much…Seinfeld would be happy!
Hello! I was just wondering if I can make this a day or two in advanced and it still be good, or if it is best to eat the day you make it?