
Ever wondered how bakeries make those beautifully iced holiday sugar cookies? These colorful cookies are miniature works of art, decorated with such careful attention to detail. It’s a fun project to try at home, especially during the holidays. This step-by-step photo tutorial will walk you through the process of decorating sugar cookies with royal icing.

I’ve found that the easiest way to decorate is using an icing bottle set. These bottles are so much easier and less messy than using pastry bags; they’re also reusable, which makes them environmentally friendly. If you prefer using pastry bags, feel free—the tutorial will be helpful whether or not you use the bottles.
You will need at least one batch of Royal Icing to begin, as well as a batch of fully baked sugar cookies:
The main thing to remember with icing cookies is texture. If the texture of the icing is correct, it will make decorating a lot easier. There are two main textures you will need to achieve—flood texture and detail texture. It will take some trial and error at first; you will learn the proper texture with patience and practice.
I have done my best to provide detailed instructions and pictures, so hopefully you’ll get great results on the very first try! Once you master texture and a few other basics, you will be able to create gorgeous iced sugar cookies.
Recommended Products:
We are a participant in the Amazon Services LLC Associates Program, an affiliate advertising program designed to provide a means for us to earn fees by linking to Amazon.com and affiliated sites. As an Amazon Associate I earn from qualifying purchases.

How to Decorate Sugar Cookies with Royal Icing

Ingredients
- Sugar cookies
- 2 batches of Royal Icing made separately
- Icing bottles or pastry bags with fine decorating tips
- Funnel
- Toothpicks
- Decorative elements - candies sprinkles, candied beads
Notes
Instructions
- There are two steps to creating beautifully iced sugar cookies - flooding and detailing. Flooding describes the process used to create a smooth, beautiful "bed" of frosting on top of your cookies. This flat frosting surface creates a canvas, which you can then add detail frosting to. Both types of icing - flood and detail - have different textures. Each icing step begins with a batch of tinted (or white) https://toriavey.com/toris-kitchen/royal-icing/Royal Icing.

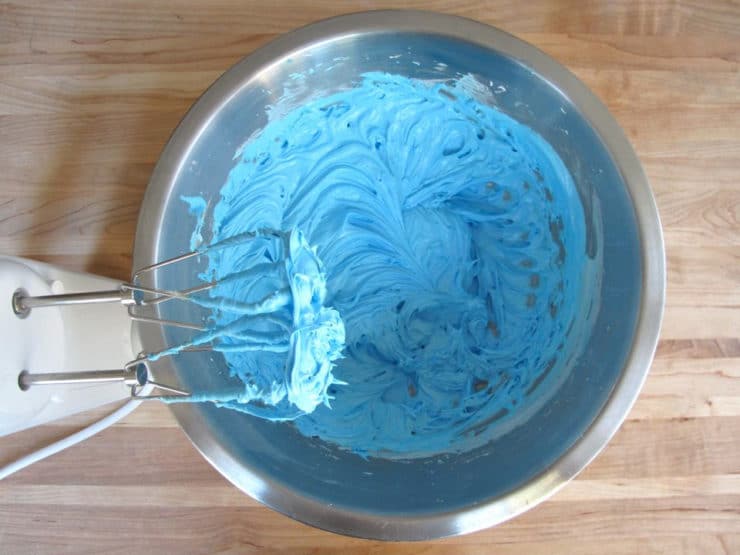
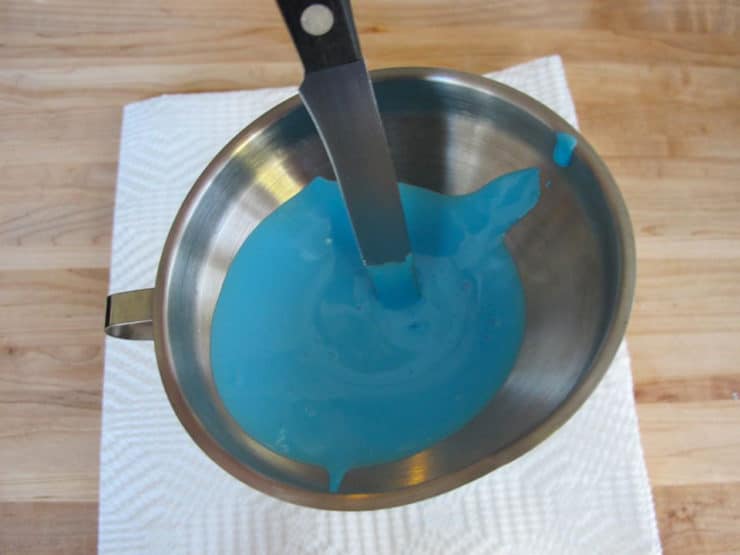
- First, create your flood icing. For this tutorial, I started with a vibrant blue royal icing for Hanukkah. Add water to your thick royal icing, a few drops at a time, using a spatula to stir the water in. The texture you are looking to achieve is somewhat similar to the texture of shampoo. Frosting can easily go from thick to fluid, so add water carefully and stir frequently until the desired texture is achieved.
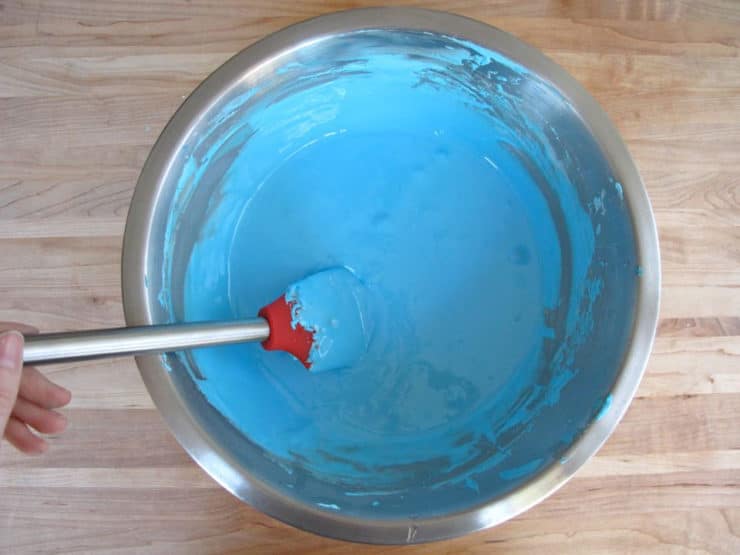
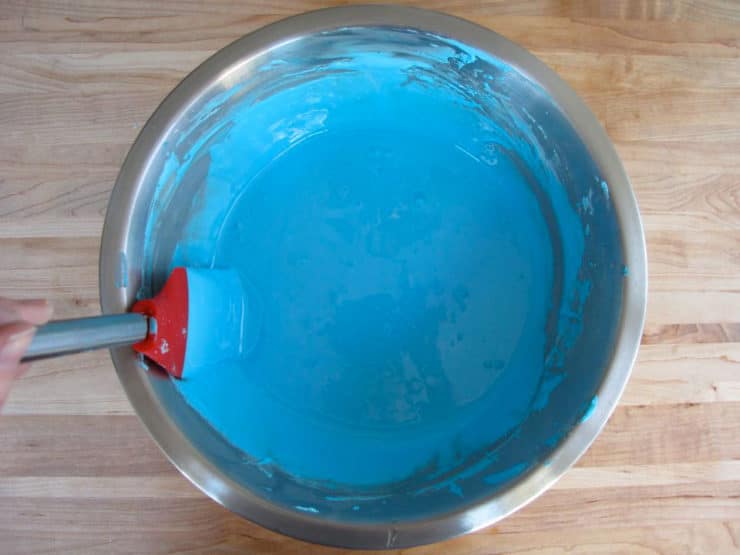
- To check if you have the right texture, use the "10 second rule." Drag a spatula through the frosting to make a line.
- Count how many seconds it takes for the surface of the frosting to become completely smooth again. It should take around 10 seconds... if it takes more time than that, your frosting needs more water added. If it takes less time, your frosting is too liquid-- stir in additional powdered sugar to thicken.
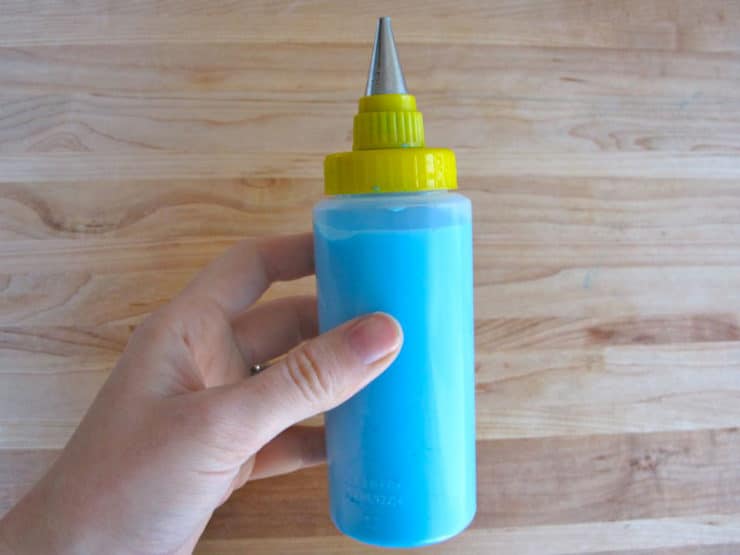
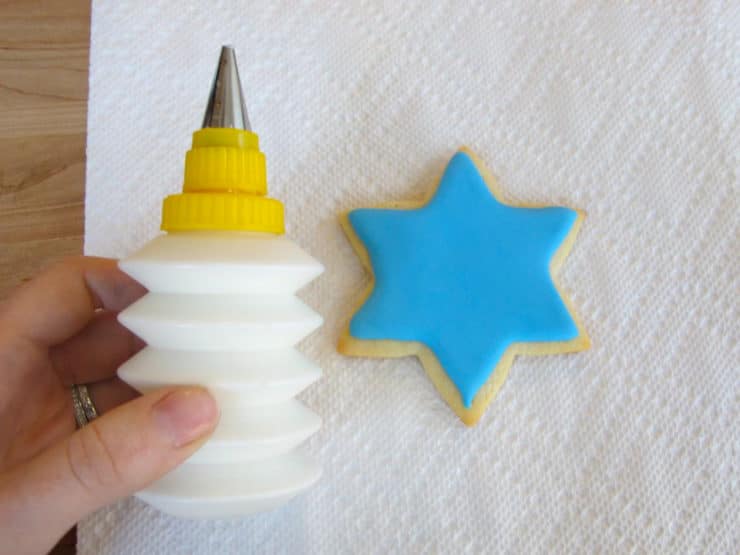
- Once your frosting is at the right texture, fill two decorating bottles (or pastry bags) with the frosting. For the bottle, I use a funnel to pour the frosting in, since the opening of the bottles is rather small.
- Pour frosting into the funnel. Agitate it with a thin knife, stirring and pushing the frosting through, till the bottle is full. This may take a few minutes.
- Once your two bottles are full of frosting, attach a tip to each one. I use a #1 round tip (small) for outlining and a #2 ribbon tip for flooding.
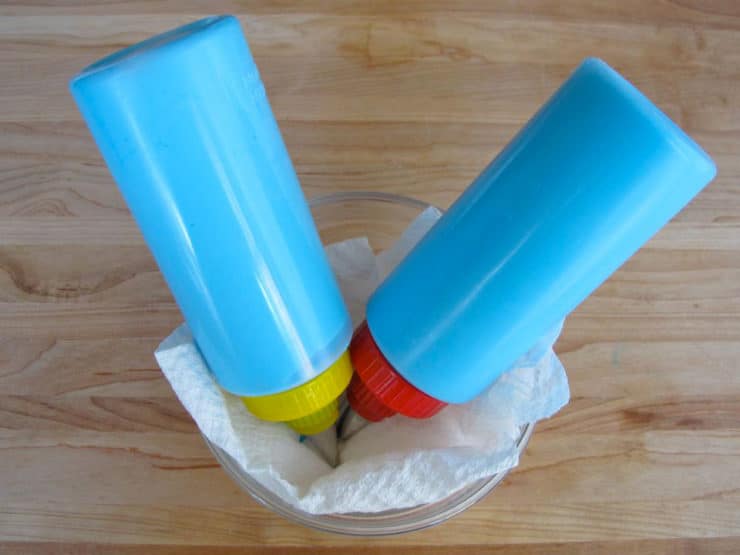
- Place a small bowl with a damp paper towel on the side of your decorating area. You can place the bottles, tip side down, on top of this towel to keep the tips damp and clean-- royal icing is kind of like cement. Once it dries, it can plug up your tips and make decorating difficult. The damp paper towel will help keep this from happening.
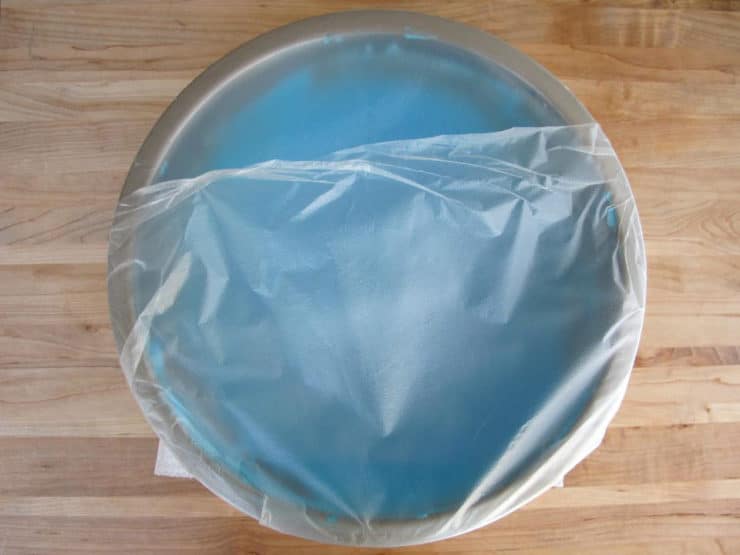
- Keep unused icing in a bowl tightly covered with plastic wrap.
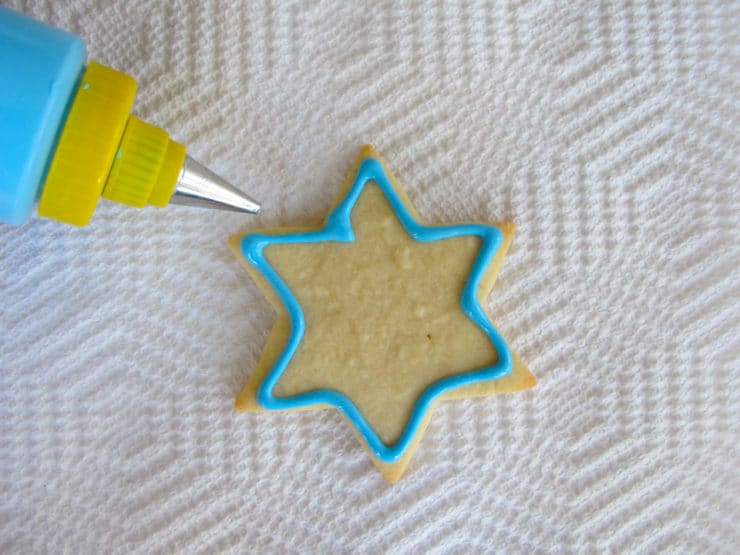
- Starting with the #1 tip bottle, squiggle a line on a piece of paper to make sure any air bubbles are pushed out. This will also give you an opportunity to get a "feel" for how quickly the frosting will flow from the bottle. Next, outline a cookie along the outer edge. This thin tip will create a liquid "dam" to keep the flood icing from dripping over the sides of the cookie.
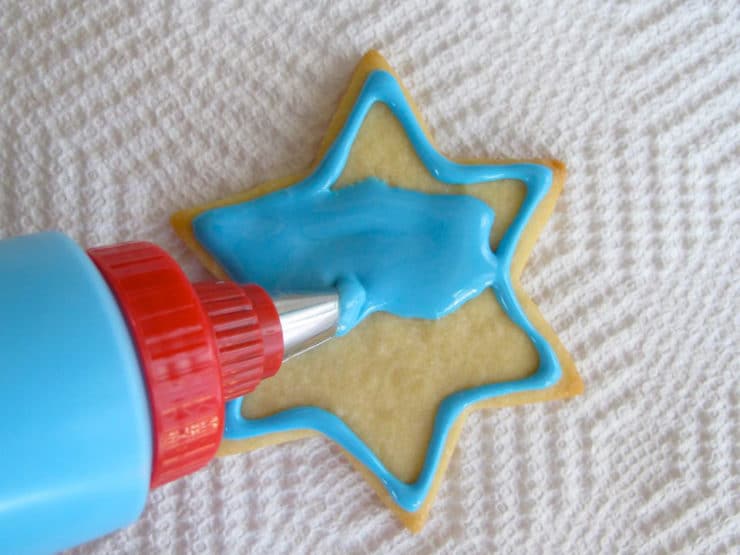
- As soon as the outline is done, use the #2 tip bottle to fill the center of the cookie with icing. Imagine you are "coloring inside the lines" in a coloring book. Don't overdo it on the icing, a little goes a long way. If you add too much, the icing will leak over the outline you created and make a mess. Use the wide #2 tip to spread out the icing across the cookie and nudge it into detailed corners. Be patient, this process takes a gentle touch and takes some practice to get right... don't be hard on yourself, and take your time.
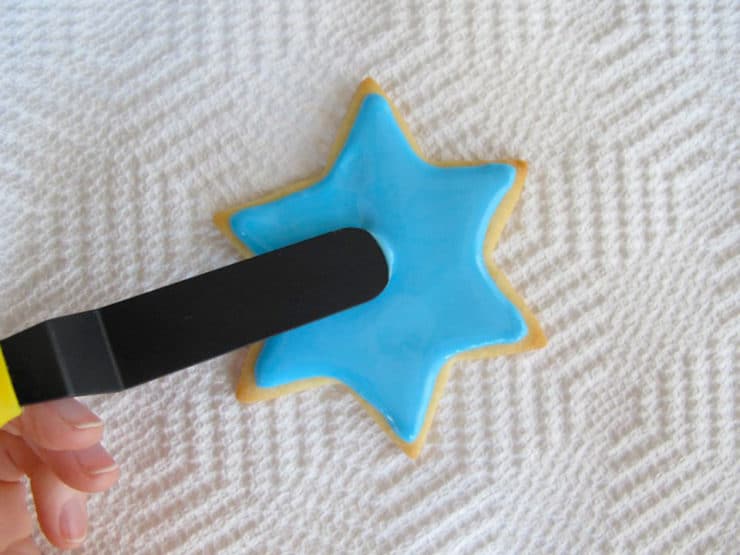
- Once the cookie is covered with icing, use a very small spatula or butter knife to smooth out any globs or uneven surfaces. If your icing looks pretty even already, you may not need to do this.
- Use a toothpick to pop any small bubbles that have risen to the surface of the icing.
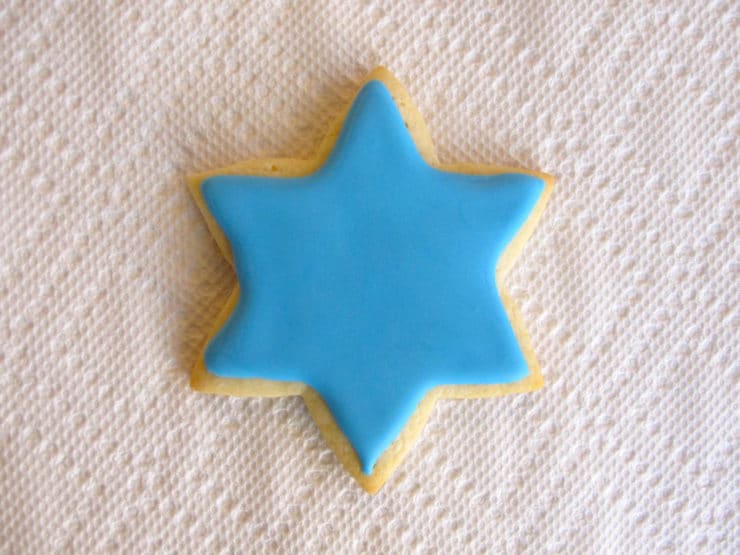
- Carefully grasp the outer edges of the cookie with two fingers and gently tap the cookie up and down to settle the icing. This will help to smooth out the surface even more.
- Let the icing dry for at least 3 hours, up to 24 hours. I let them dry overnight to make sure they're nice and firm before moving on to the detail icing stage.
- Once your flooded cookies are completely dry, you're ready to play! With detail icing, you can "draw" on top of the cookie and making all kinds of beautiful designs.
- Start with another batch of royal icing. For this tutorial, I used white, which made a lovely contrast to the blue flood icing. For the detail icing, you want your consistency to be thicker and more like glue than shampoo. If you use a 10-second rule for flood icing, I would say the detail icing will be more like a 25-second rule. It should be gloppy, not runny-- but not overly thick. Again, knowing the proper texture takes practice, so add water slowly and test the texture as you go.
- Fill a bottle with detail icing, using the same funnel method I outlined above. Attach a #1 tip for thin detailed lines, or another tip of your choice to create pretty details (the star tip is nice for creating flower-like designs, while the #4 tip makes leaf-like designs. Feel free to get creative with your tips!
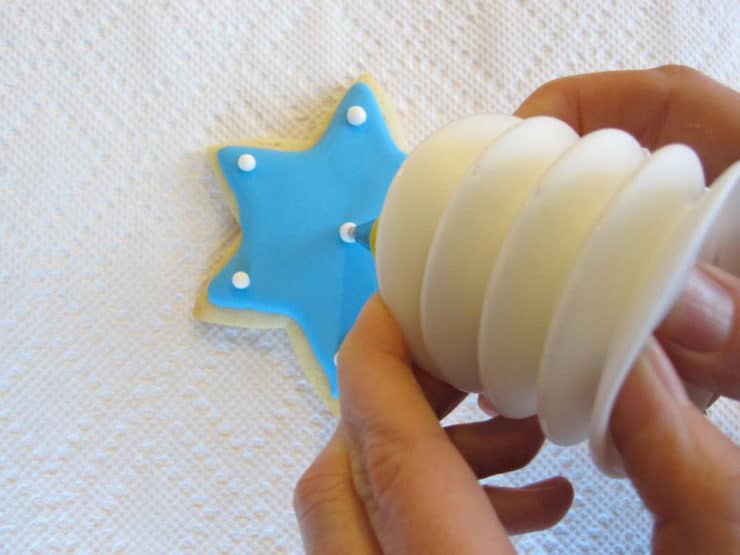
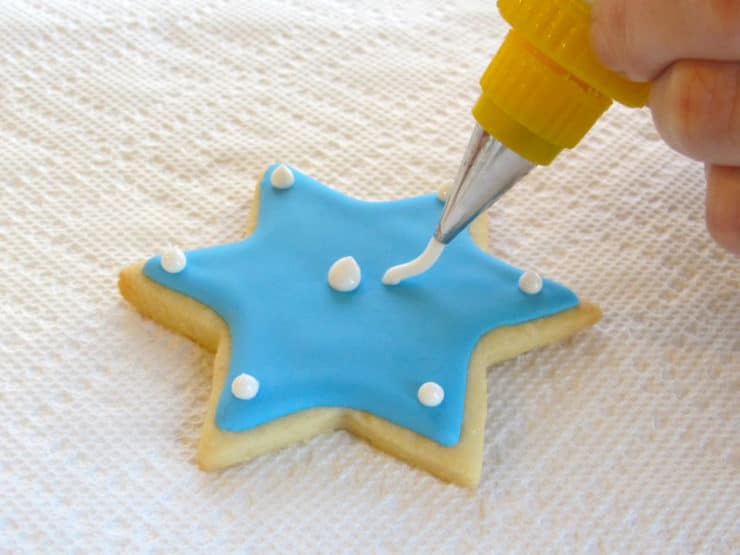
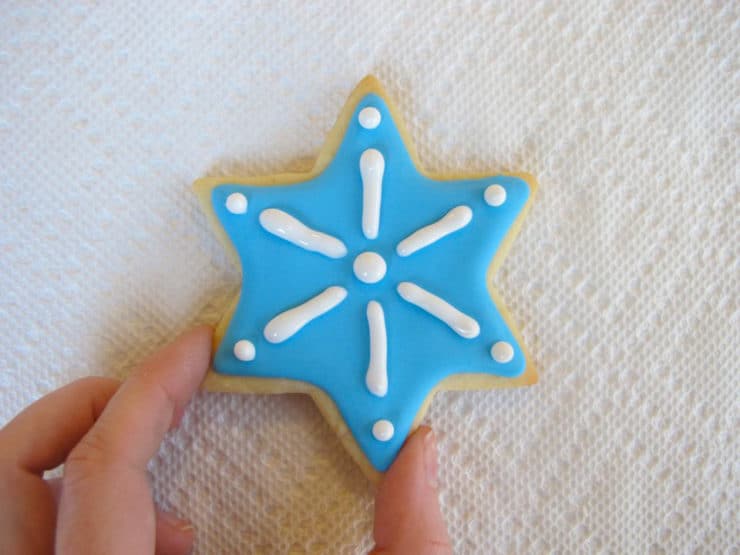
- Use the detail frosting bottle to decorate, as you would with a paint brush and thick paint. Press the #1 tip gently to the surface, squeeze, and lift straight up to create dots.
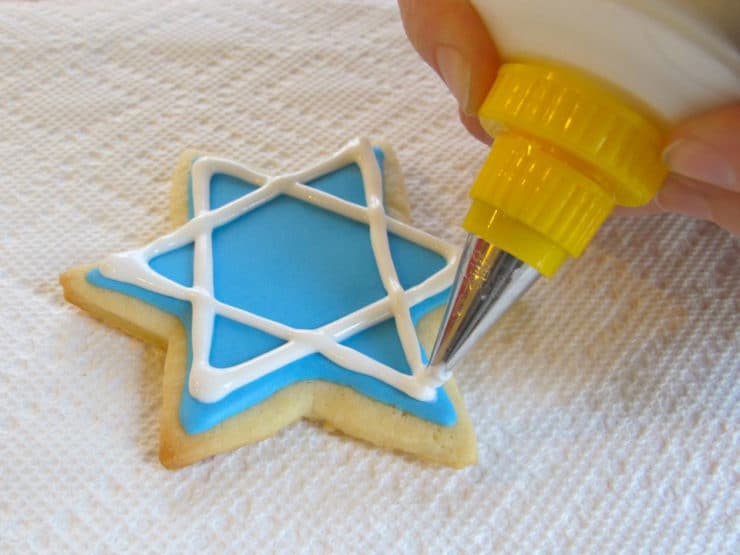
- To create straight lines, press your tip to the surface and squeeze to create a starting point. Immediately lift the tip, keeping your eye on the end point where you want your line to end. Keep your handy steady and pressure even as you pull towards the end point, lifting and then lowering when your line is finished.
- The lifting action will help you to control the straightness of the line. Again, it will take some practice to get a feel for the icing... have patience and don't be too hard on yourself!
- Once your lines have been added, grasp the cookie with two fingers and gently tap to smooth out the icing lines. If you see any small bubbles, pop them with a toothpick as you go. Small imperfections can usually be fixed with a toothpick, too, as long as you fix them within a minute or two of applying the icing. Once it starts to dry, it becomes more difficult to "clean up."
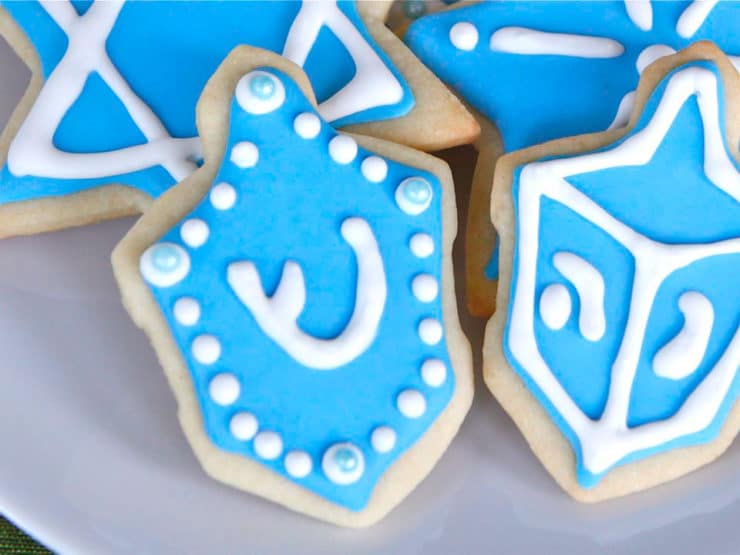
- While the detail frosting is wet, you can also add small detail effects, like candied beads and sprinkles. The frosting will act as a glue to hold the details in place.
- When you're done decorating, wait at least 3 hours up to overnight to dry. The longer the frosting dries, the more stable it becomes.


&n


Thank you for your clear and helpful instructions!
Do these freeze well once they are iced?
Hi Jessica, Tori’s assistant Ashley here. Yes, these cookies can be frozen. Store them in the freezer between layers of parchment or wax paper to keep the decorations intact.
If some one wishes expert view on the topic of blogging after that i recommend him/her to pay a quick visit this
weblog, Keep up the good job.
I like this website because so much useful stuff on here :
D.
Thanks for the great tips! I have cookies to decorate for a bridal shower and needed a refresher!
These cookies look Amazing! Do you have any tips on how to keep darker colours from bleeding into lighter ones? I have tried a similar recipe a few years ago (I made bright yellow happy faces with black trim and black eyes) and the black ran into the yellow. I was sad about it but no one seemed to care … except me. Lol
Thank you so much for this icing recipe and any advice you can offer ?
Hi Tracy, Tori’s assistant Ashley here! We have not experimented with black and yellow, but I do know that it is important to make sure that your base icing (the flood icing) is completely dry before you add any detail on top. Also, the detail icing should be much thicker than the flood icing. It takes a few tries to get a feel for the right consistency. Hope this helps!
Some sugar cookies call for cake flour, others say all purpose flour. Does it make a difference?
Cake flour gives a finer crumb, it is a slightly more delicate texture that is well suited to cakes– but for a crisp sugar cookie it shouldn’t make a big difference. However, if your recipe calls for cake flour, you should use cake flour – it doesn’t exactly measure out cup-for-cup with regular flour. If you want to make a substitution, follow the instructions in this post: http://www.cookinglight.com/cooking-101/essential-ingredients/all-purpose-flour-vs-cake-flour-whats-the-difference
Hello! I know this article is quite old. Just thought I’d give it a shot. Can you use cream of tarter instead of merengue powder?
Hi Daisy, Tori’s assistant Ashley here! We’ve never made this recipe with a substitution for the meringue powder, however I don’t think that cream of tartar is advised. There is some information online regarding using egg whites in place of meringue powder, though we have not tried it so I can’t say for sure how it works.
Hi, thx for you excellent instructions. When you finish it and the icing pass the 10 seconds rule is it ready for making the outside line or the flood? Thanks for your help… 😉
Hi Linda, when it passes the 10 second rule it is ready for both the outside line and the flood line. Glad the tutorial has been helpful!
Awesome tutorial…THANK YOU!! Quick question…after making your royal icing you said to fill two bottles with different tips, one with tip 1 and one with tip 2 (outline and flood). 10 second rule for outline and ?? for flood? Thanks!
I am making cookies for an occasion I am familiar with royal icing but have used icing with karo syup that hardens nicely and I think tastes better I need to ship these !. what is the best way to pack and ship2. what is the difference in the two icings I have not seen anyone professionally say they use the karo recipe to decorate 3. I need to freeze because I work and need to make over 400 cookies! what do you suggest help! I am in contact w someone who might make some who lives near the destination as shipping that many could be a nightmare. this is a huge project that is terrifying me! thanks
I am sorry Marilyn, I’ve never shipped this many cookies so I won’t be much help here. Good luck!
Hi, this looks amazing and you have made it sound a little more ‘doable’ than I thought it would be. I have my daughter’s 1st birthday and will try making these for her candy buffet. Thank you!!!!
When you do the outline are you still using the thin icing, or do you use a thicker one for the outline and the think one to flood? Your instructions were great – that is the only part I was unsure of.
Use thicker to outline, thin to flood. Good luck!
Thanks for your quick reply!
Please put me on you’re Email list!
Done June! Go ahead and click the confirmation email when it comes through. Welcome!
I always wondered how to decorate cookies and make them perfect and now i know thank you!