
Want to learn how to truss a chicken like a pro? Trussing is a simple but essential step that helps your roast chicken cook evenly, stay juicy, and develop an irresistible crispy skin.
Whether you’re preparing an average-sized chicken for a cozy weeknight dinner or a showstopping roasted bird for the holidays, this technique ensures failproof results, even if you’re a beginner home cook!
What Is Trussing a Chicken?
Trussing a chicken means tying the chicken’s legs and wings snugly against the body using butcher’s twine or kitchen twine. This compact shape allows the chicken breast side to cook evenly while keeping the sides of the chicken from drying out or burning.
It also gives the bird a tidy, professional appearance, which is perfect for a holiday centerpiece or Sunday dinner.
It’s especially helpful if you’re making something like a honey herb roasted chicken or Farrah’s roast chicken, where presentation and even cooking are key.
Personally, I’ve found that a trussed chicken holds onto moisture better and yields more reliable results. It also gives the chicken a nice structure that makes carving easier once it’s done. (This technique works for turkey, too!)
Why You Should Truss a Chicken
There are several good reasons to truss a chicken before roasting:
- Even Cooking Time: Keeping the front of the entire bird compact ensures the breast, wings, and thighs all finish roasting at the same time.
- Crispy Skin: Tucking everything in helps the skin render and crisp evenly, especially around the chicken’s legs.
- Better Juiciness: Trussing helps the bird retain moisture, particularly in the breast meat.
- Presentation: A well-trussed bird holds its shape and looks elegant on the table.
- Stuffing Security: If you’re adding aromatics or stuffing, trussing prevents them from spilling out during roasting.
Ingredients and Notes
Please be sure to scroll down to the recipe card for the complete details!
- Whole Chicken – An average-sized chicken is about 3–5 pounds. If your grocery store doesn’t carry whole birds, check with your local butcher’s shop.
How to Truss a Chicken (Step-by-Step Instructions)
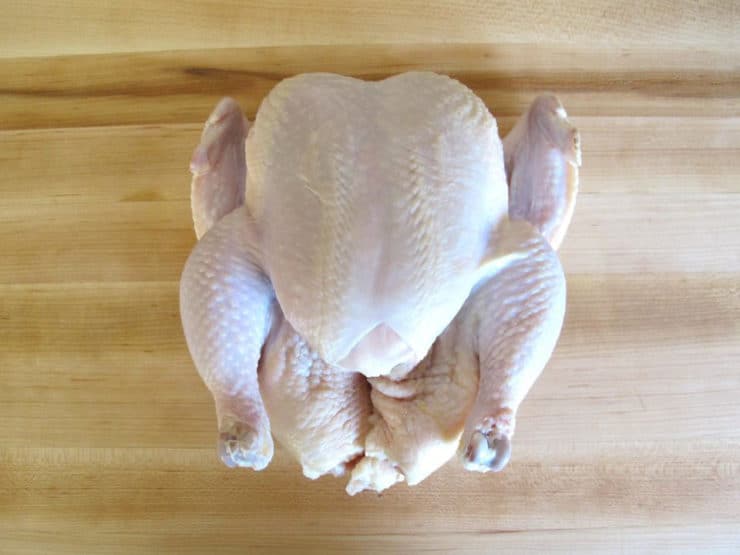
- Prep the chicken. Place the chicken breast side up on a clean cutting board or flat surface. Tuck any loose fat or skin back into the breast cavity.
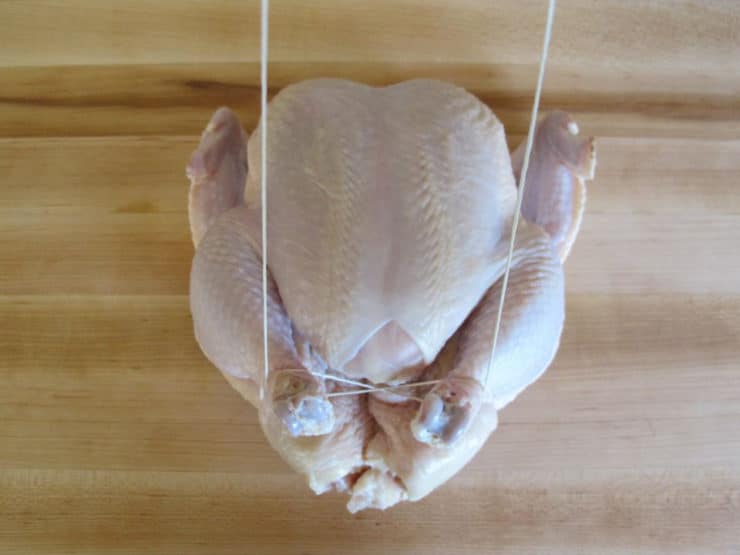
- Tie the legs. Loop a long piece of kitchen string underneath the chicken’s legs, passing it under the tail and bringing it up on both sides. Pull the ends of the string over the drumsticks, crossing them at the front of the bird. Then, bring the string ends down and wrap them beneath the drumsticks, pulling the legs together.
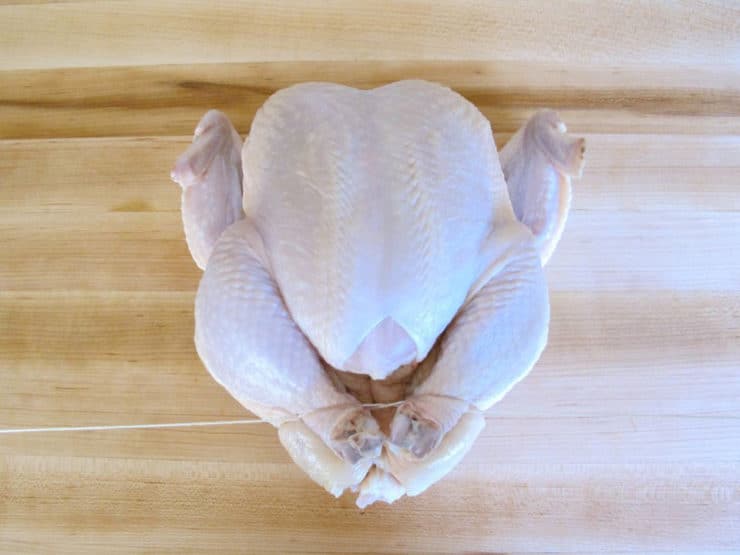
- Wrap under the wings. Guide the string under the thighs and along the sides of the chicken, then over the wings. Flip the bird carefully, and tie a solid knot around the neck bone area, securing the string in place, keeping the tension fairly tight.
- Tuck the wings. Pull the wing tips up and fold them behind the neck opening. This keeps them from burning and gives the chicken a neater shape. Pull the skin of the breast downward to cover as much meat as possible, then tuck it into the body cavity.
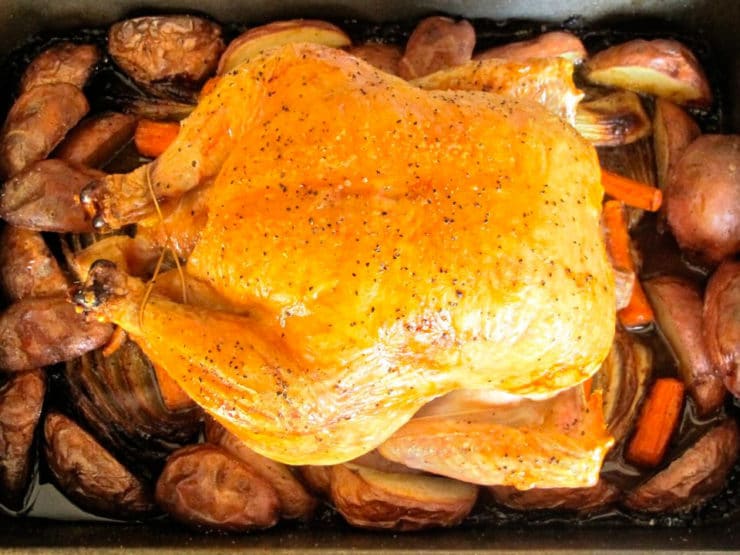
- Roast. Transfer the bird to a roasting pan and follow the cooking time for your chosen roast chicken recipe. Then, let it rest, and slice the pieces with a sharp knife.
Tori’s Tips for Successfully Trussing a Chicken
- Use sharp kitchen scissors to easily trim twine. This prevents the ends of the string from fraying.
- Don’t skip drying the chicken with paper towels! This helps the skin crisp up in the oven, becoming beautifully golden.
- Don’t overtighten the twine. It should be snug but not so tight that it cuts into the meat.
- If you don’t have twine, use unwaxed, unflavored dental floss or silicone bands made for roasting.
- Use a meat thermometer. You’ll know your chicken is finished cooking when the thickest point of the chicken breast reaches an internal temperature of 165°F.
How to Truss a Chicken
Ingredients
- 1 whole chicken
- kitchen string
Instructions
- Place your chicken on a flat kitchen surface, breast side up, cavity facing you. If you plan to stuff the chicken, do that prior to trussing. Tuck any excess fat or skin back into the cavity. Cut a 3 foot piece of kitchen string.

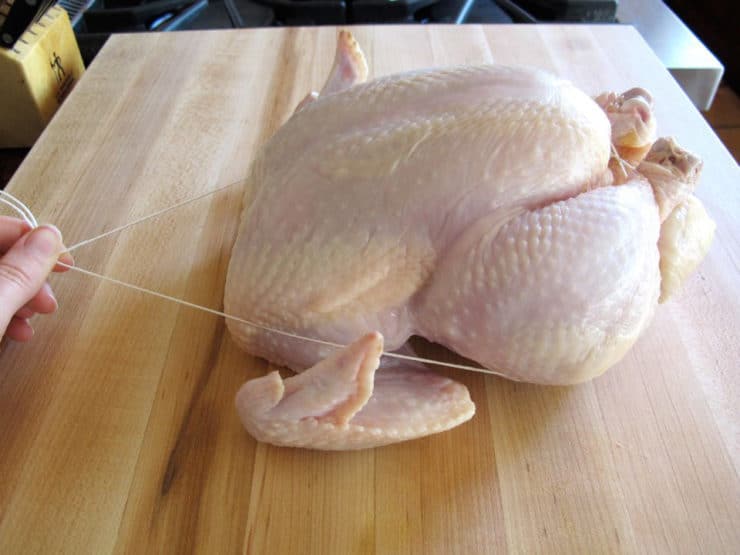
- Loop the string underneath the bottom of the chicken, pulling up an equal amount of string on either side of the drumsticks.
- Pull the string ends down between the two drumsticks and cross the strings in an X formation. Pull the ends underneath the two drumsticks and up on either side.
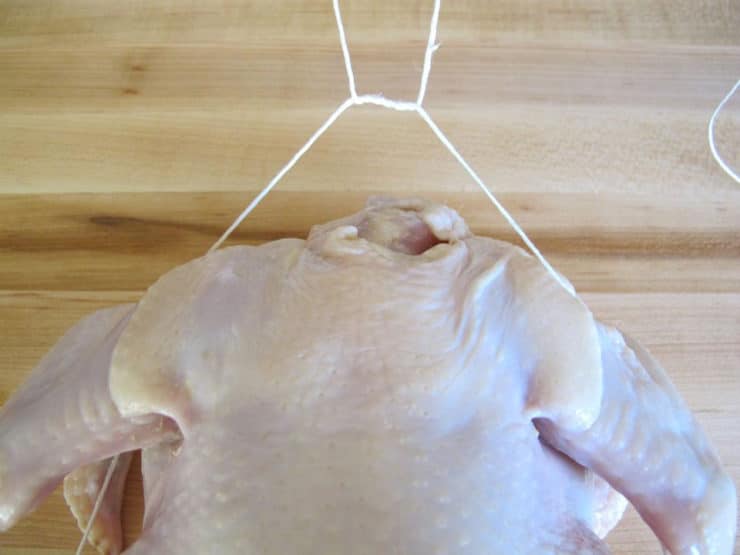
- Pull tightly to bring the ends of the two drumsticks together.
- Guide the two strings under the thighs and over the wings. Hold the string ends together at the top of the chicken.
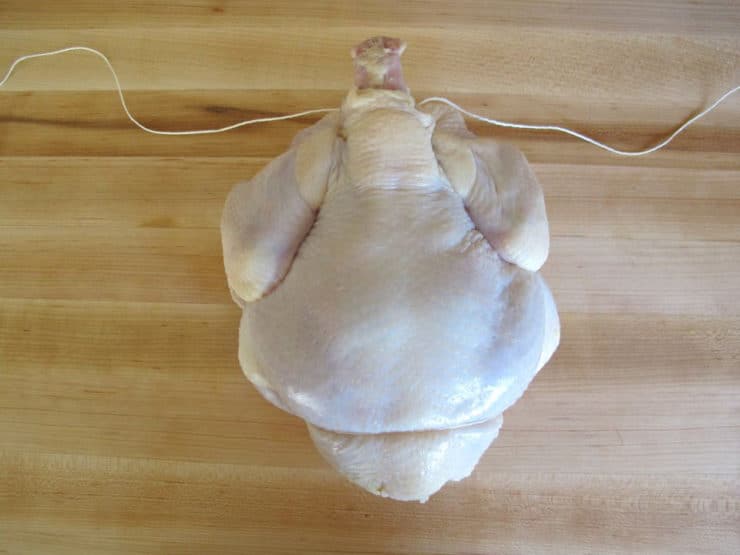
- Loop one string under the other, in the same way you would if you were just starting to tie your shoes. Holding the strings snug so they stay tight, flip the chicken over, breast side down.
- Loop that string two more times to start a knot.
- Pull the string ends so the knot closes in front of the neck, pulling the neck backwards towards you. Pull the knot tightly till you hear a creaking sound as the chicken tightens.
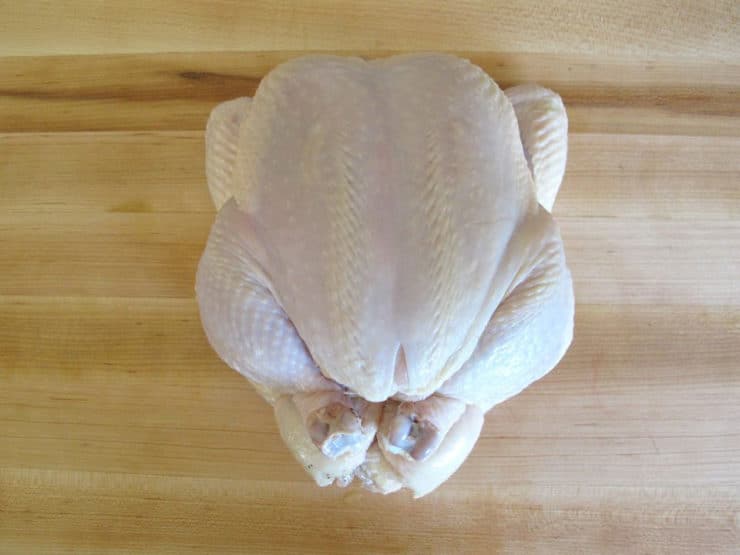
- Cut the excess string ends off and discard. Flip the chicken breast side up again. Pull the wing tips up and tuck them back behind the neck area of the chicken.
- Pull the skin of the breast down as far as you can to cover the breast meat. Tuck the skin into the cavity.
- Proceed with roasting.


NOTES
Nutrition

tried this recipe?
Let us know in the comments!
Note: Nutrition facts above are for 1 whole chicken.
If you enjoyed this recipe, I’d love it if you left me a star rating and comment below. Also, don’t forget to share and tag us on Facebook and Instagram!
FAQs
No, but it’s highly recommended. Trussing helps the chicken cook more evenly and look better once roasted. Untrussed chickens may have dry wings and rubbery skin.
Absolutely! Before trussing, fill the cavity with aromatics like halved lemons, garlic, onion, celery, or olives. Just be sure to remove them before serving and confirm that the internal temperature reaches 165°F.
Without trussing, the legs may splay out, the wings can burn, and the breast meat might cook unevenly. It also makes for a less polished presentation.
Remove leftover chicken from the chicken bones (save these to make chicken stock!). Then, transfer the meat to an airtight container and store it in the refrigerator for 3-4 days. Or, freeze it for up to 4 months.


I made this for my parents wedding anniversary dinner and they absolutely LOVED it! Thank you so sooo much. The recipe was easy to follow because explains everything so clearly for an inexperienced cook like me! I was surprised at how much my parents enjoyed this since they have very traditional Korean pallet. (although my mum did have to finish off with a bite of kimchi hahaha) I’ll be saving this recipe for many other times to come! And I’m definitely sharing the link to this page with my friends 🙂 Thanks again. Merry Christmas!
Wouldn’t have gotten it without the pictures, they’re a big help.
I will be referring to this again for sure! One of my fall goals is to make a whole roasted chicken. I’ve never done that before and am on a mission. This will come in very handy!
Have never Truss a chicken but wondered how it was done. Thank for this tutorial.
wow nice tutorial… learned a lot thanks =)
Ok very cute…I already know how to truss but I still truss you! ROFL!!!
Great tutorial and a very cute little chickie!
One of my favorite dinners!