A few months ago I wrote up a short post on a new food “trend” with ancient roots – fermentation. Many of you expressed interest in learning more about the process. I’ve never done any fermenting at home before, but your interest inspired me.
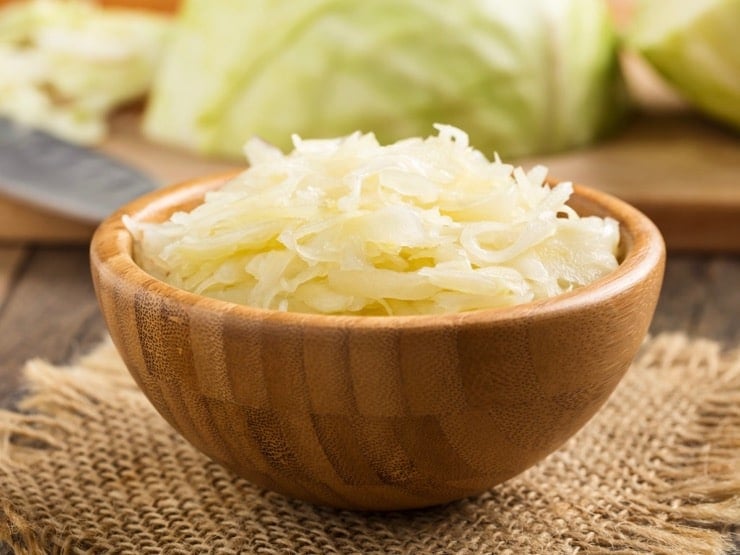
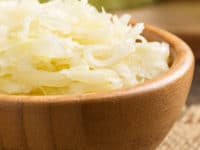
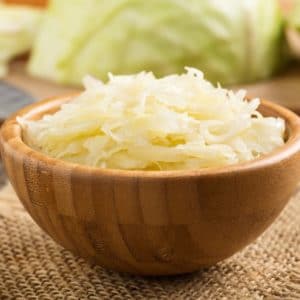
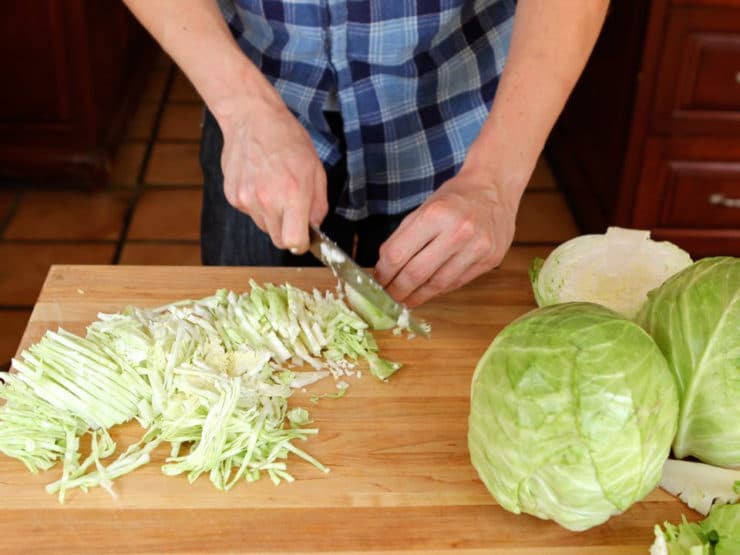
For my first fermentation adventure, I decided to take a crack at homemade sauerkraut. Together with my kitchen assistant Gary, who happens to be a farm trained, do-it-yourself culinary school grad with lots of fermenting experience, we fermented a crock of cabbage to make homemade sauerkraut.

iStock.com/vertmedia
Sauerkraut, a combination of the southern German and Austrian words “kraut,” meaning cabbage, and “sauer” meaning sour, literally translates to sour cabbage. It is created by fermenting cabbage over a long period of time.
There are several health advantages to homemade sauerkraut. It’s high in enzymes and vitamin C, both of which are lost during the heating and pasteurization of store-bought sauerkraut. It’s also low calorie and easy to digest.
As I was learning about the fermentation process, I became curious about the difference between fermenting and pickling. The most obvious difference is that fermentation creates acid, while pickling requires an added acid, for example vinegar. Both serve as a preservation technique, the science is just a bit different.
Sauerkraut takes about 4-6 weeks to make. Since it’s a “hurry up and wait” kind of thing, I am documenting the adventure here on my blog. I will walk you through what we did, step-by-step, so you can try it at home.
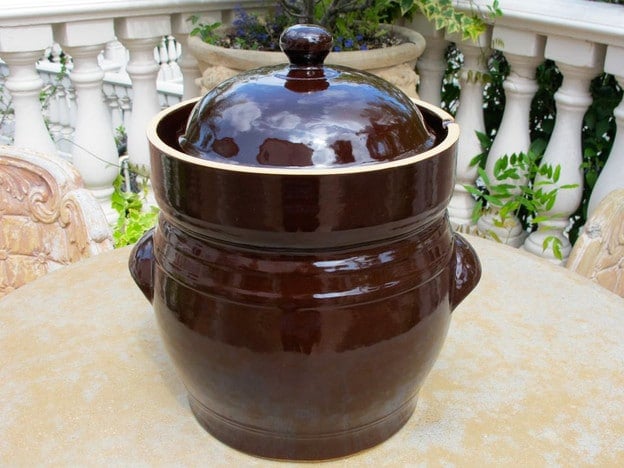
First thing’s first– I bought a crock. A big, honking fermentation crock. It really looked so much smaller online. At first, I was dismayed.
After the initial shock wore off, I decided the size was a plus… it means you can make a large batch of fermented veggies at the same time. With the amount of time it takes to ferment, why not make a big batch that will last you several months? And I do mean a big batch. We sliced up enough cabbage to create a decade’s supply of sauerkraut. Seriously.
If you too would like to be the proud owner of a ginormous fermenting crock, here is the one I’m using. Keep in mind that it’s pretty heavy/substantial and kind of awkward to handle. It also comes in a smaller size, which is likely a lot more manageable. There’s an even larger size, but that would require some serious fermentation love.
You will also need a set of weights to help weigh down whatever you are putting in the crock. We used 10-15 liter stone weights; for a smaller crock, use 5 liter weights.
Crocks can be a bit pricey, so if you’d rather not invest in one, there are some less expensive options. You can use just about any sterilized container, taller than it is wide, made from enamel, ceramic or food grade plastic.
Once you have chosen your vessel, find a plate that will cover the majority of the cabbage. To make sure that the cabbage stays submerged in the brine, a key component of fermentation, you will need to make a weight to place on top of the plate.
The simplest option is to place plastic storage bags filled with salt water on top. You can then cover your container with plastic wrap or a lid.
Once we cleaned out the crock, we got to work. With Gary and Ashley’s help and experience, I felt more confident in outlining the process for you here. I’ll check back with you in a few weeks and let you know how our sauerkraut turned out.
Meanwhile, here are a few books that helped us learn the basic fermentation process:
Preserving Food Without Freezing or Canning
Since I’m fairly new to fermentation, I decided to start with a basic sauerkraut, which only requires salt, cabbage, and water. Spices can be added to make a flavored sauerkraut or kimchi. If you feel like experimenting, the same method can be used for other vegetables, including cucumbers, onions, beets, carrots, kohlrabi, red cabbage, and rutabaga. You can even combine a variety of vegetables in a kraut medley if you’re really feeling adventurous.
We are a participant in the Amazon Services LLC Associates Program, an affiliate advertising program designed to provide a means for us to earn fees by linking to Amazon.com and affiliated sites. As an Amazon Associate I earn from qualifying purchases.
How to Ferment Cabbage and Make Sauerkraut

Ingredients
- Fermentation crock
- Cabbage - amount varies based on your needs we used 3 large heads
- Large mixing bowl
- Kosher salt
- Kitchen scale
- 2 fermentation weights
- Medium saucepan
Notes
Instructions
- Start by boiling 6 cups of water with 1 tbsp of kosher salt till salt is dissolved. Allow to cool.
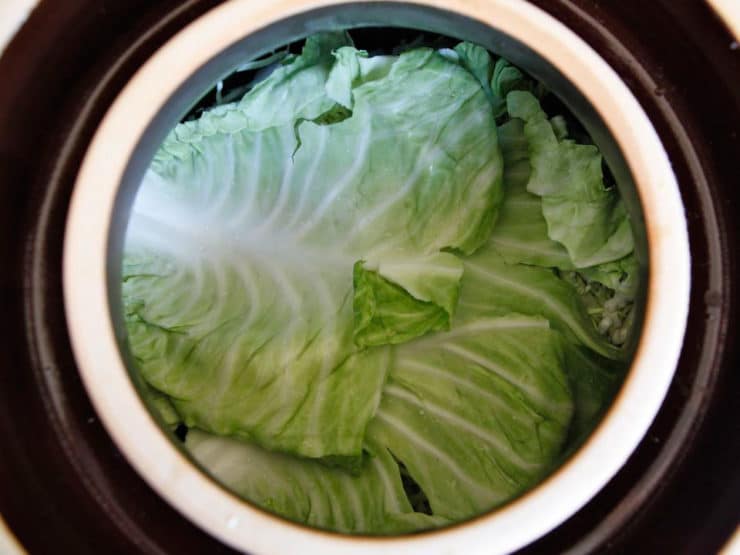
- Meanwhile, clean your cabbage and pull off 5-6 of the external whole leaves, set aside. Shred the remaining cabbage - for instructions on shredding cabbage, click here.

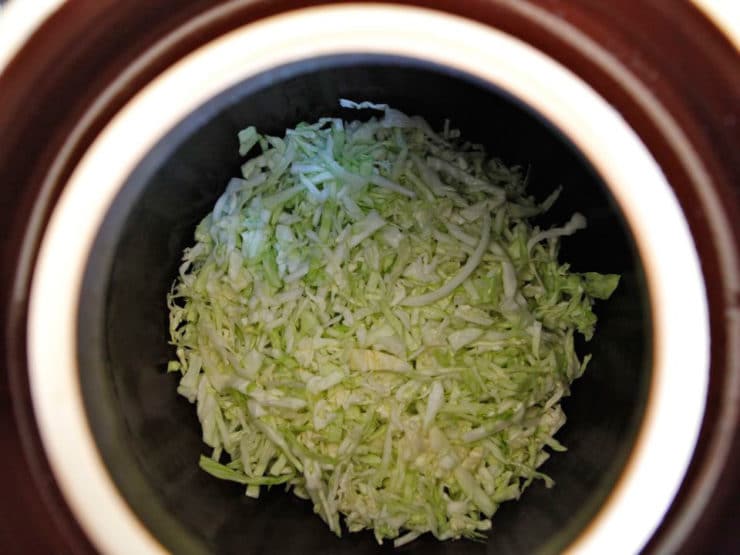
- Cover the bottom of your fermenting pot with 3-4 whole cabbage leaves. You will only need two layers of whole leaves in the crock, one on the bottom and one on the top.
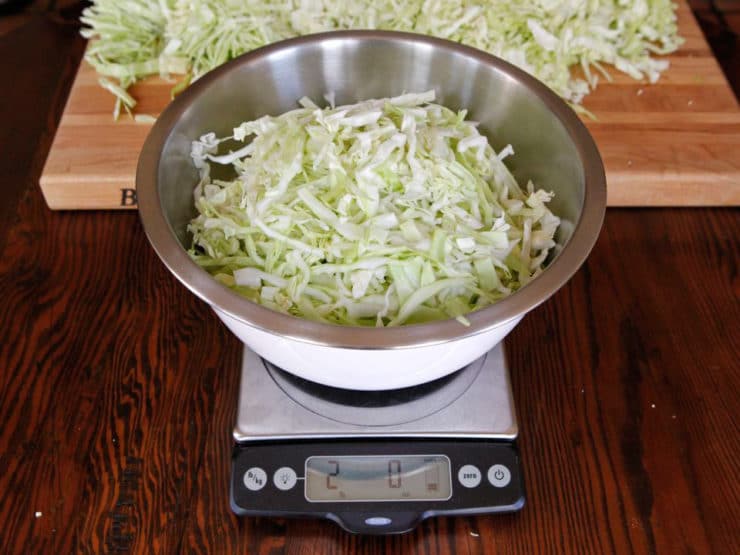
- You will need to salt the shredded cabbage before adding it to the fermentation pot. We found this is easiest to do in smaller batches, to keep the salting amount consistent and mixed throughout the fermentation crock. Measure out 2 pounds of shredded cabbage into a bowl (we zeroed our scale with the bowl on, then measured a 2 pound batch).
- Use clean hands to toss the shredded cabbage in the bowl with 1 tsp kosher salt.
- Place the salted, shredded cabbage into the fermentation pot on top of the whole leaves.
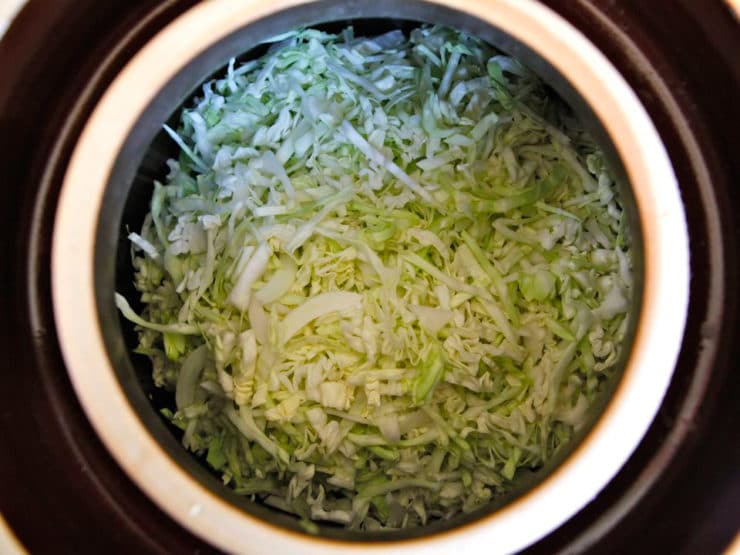
- Measure out another 2 pounds of the shredded cabbage and mix with 1 tsp of salt, then add to the fermenting pot. Repeat this process in batches until all of your shredded cabbage has been salted and added to the pot. Pack down the cabbage tightly, but do not crush the cabbage strips.
- Cover the top of your shredded cabbage with remaining whole cabbage leaves. These leaves will help to collect the yeast that may accumulate at the top of the crock, and can easily be removed and discarded after the fermentation process is complete.
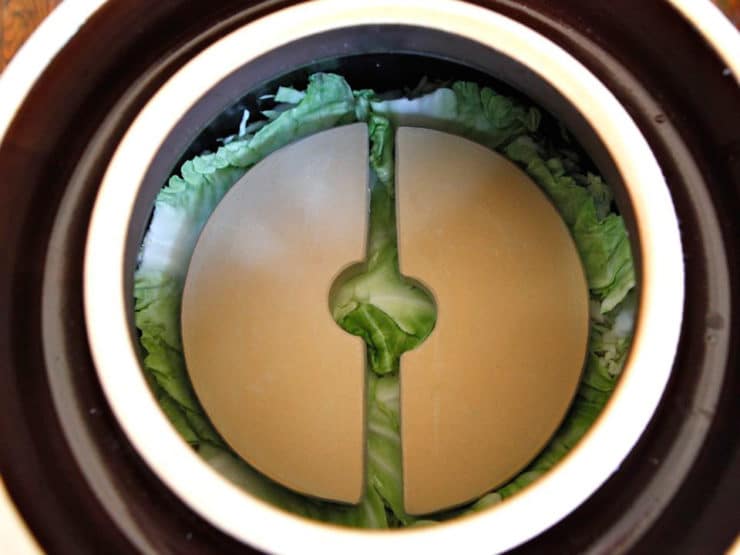
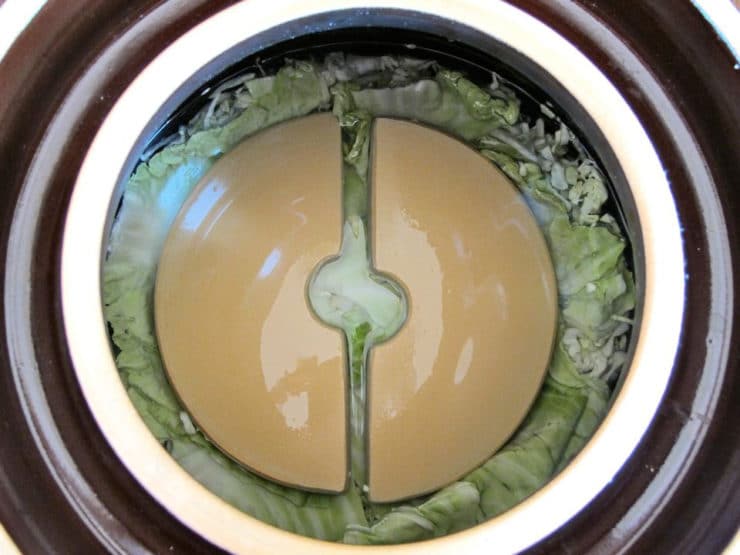
- Place stone fermentation weights on top of the whole cabbage leaves and press down, but not too hard. You don’t want to damage the cabbage.
- Cover the fermentation crock with a lid. The salt will naturally draw some water out of the cabbage. After a few hours, check to see how much liquid has accumulated inside of the pot. It should be about 1-3 inches above the cabbage. If this hasn’t happened, add cooled, boiled salt water to the pot. We ended up needing about 3-4 cups of salt water. Pour it over the cabbage till it is submerged (you may not need to do this if your cabbage has created enough natural liquid). Reserve the remaining salt water.
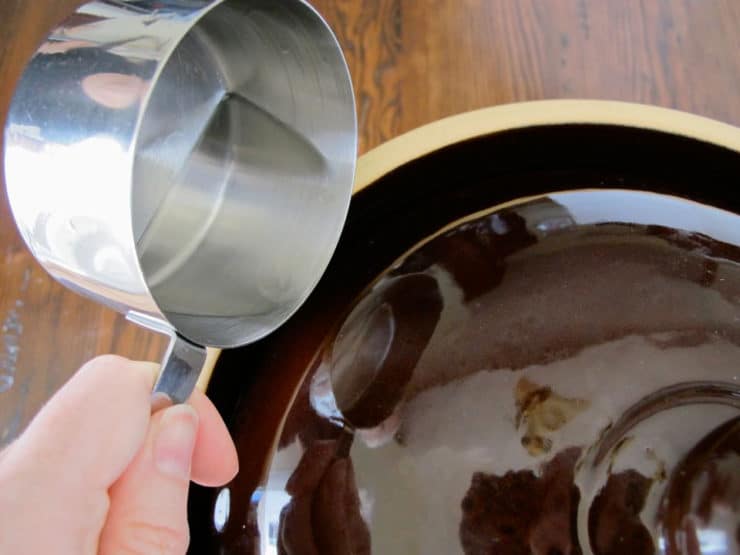
- Once the water level is where it should be, cover the pot and fill the channel around the lid with cooled salt water to create an airtight seal. This will keep oxygen out of the pot. Once this has been done, do not open the fermentation pot for at least 2 weeks. No peeking! Reserve the remaining salt water brine in a sealed container in the refrigerator; you will need it over the course of the next several weeks.
- For the first few days, store the pot in a warm place, between 68 and 72 degrees. After a few days have passed, listen for a fizzy, bubbling sound coming from the pot. This is good and means that fermentation has begun. If you don't hear anything, don't worry, it may just mean that the walls of your crock are too thick for sound to travel through. After fermentation has started, move the pot to a cool place, between 59 and 64 degrees, for the remaining fermentation time. If you don't hear anything after 1 week, go ahead and move the crock to a cooler location without waiting for it to sound bubbly.
- Check your water channel regularly to make sure that it's filled with salt water. At times, the pressure which builds up inside the crock can cause suction, which pulls the channel water into the crock (it happened to us a few days in). If this happens, pour more of the salt water into the channel to keep it full.
- After the first 2 weeks, check your sauerkraut’s brine level and skim off any yeast or bubbles that have gathered near the top. Be sure that your cabbage is always submerged in the brine. Fermentation breeds strange sounds and smells, so try not to worry about those. Close the fermentation crock again and refill the channel with salt water.
- Your sauerkraut should be ready in about 4-6 weeks. You will know for sure once bubbles no longer appear in the liquid. The longer you allow the cabbage to ferment, the tangier the flavor will be.


UPDATE: Our kraut turned out great! It took about 5 weeks to achieve the flavor and texture I was going for. This sauerkraut was so much better than the store-bought kind… it was salty, pungent and the lactic acid made it tingle on my tongue. It’s delicious and way cheaper than store-bought probiotics. Good for your gut, good for your tastebuds… can’t beat that!
Have you tried fermentation before? Did it turn out the way you hoped it would? What is your favorite fermented f


So after the fermenting was finished – did you just leave it in crock or put in jars?
Hi Cathy, I put in sterilized jars in the refrigerator.
You do not need a crock. Any glass jar will do. Cabbage, water, salt and 2 weeks. Easy.
RR
Yes, I’ve done 2 batches in 2 gallons glass jars that were great. Just started my first in a real crock, we will see…..
I followed your recipe thoroughly and we are enjoying Wonderful! sauerkraut. The best. I just packed the crock for another round.
So happy to hear that Fenna! Enjoy!
I live in Israel and I had this crock in my shopping cart at Williams-Sonoma on-line shop for quite a while, but the shippment was so expensive, that I kept postponing ordering it. And then we travelled to Poland for vacation and guess what – in the city of Boleslawec, in
Lower Selesia (the border between Poland, Germany and Chech Republic) we came across a factory and the shop that actually produces these crocks! I was so excited! We shlepped one back to Israel and I went online to look for the receipt. And that’s how I came across your site. I assume your crock comes from the same origin 🙂 (actually on WS site it say that it is made in Poland).
So I did my first batch of the saurkraut following your receipt, and I have a couple of questions:
1. After a couple of hours the level of the cabbage went down considerably and freed a lot of space. Can I add some cabbage before I finally ceal it?
2. Shall I fill the crock with water up to the rim? Or is it just a couple of inches above the weights? But then there is still air inside…
Thanks
Hi Marina,
As the cabbage ferments the resulting production of carbon dioxide will push the air out of the crock leaving a protective layer of CO2 over the cabbage thereby inhibiting spoilage. You don’t need to fill the crock entirely with brine, an inch or two over the the stones should be sufficient.
Why do you say not to press hard or don’t damage cabbage? My Grandfather started making sauerkraut when he was still living in Hungary. He used a 20 gallon crock and a wooden tamper to pound the cabbage as he added each layer. His sauerkraut was the best I think I’ve ever eaten. He always told me how important it was to break down the cabbage to release the water.
Hi Doug, this is a note of texture preference. Tamping down causes a much softer end result, the leaves don’t hold their structure as well during the fermentation process. If you like the way it turned out when your grandfather made it, use his method…grandparents always know best, in my opinion!
I tasted my sauerkraut today. I think it’s pretty darn good. First attempt for me. How do I store the finished sauerkraut ? Do I just leave it in the crock and take out small amounts at a time for eating? Or put it in jars in the fridge? I’m hoping to enjoy it throughout this winter.
Rita keep in the fridge for best results 🙂
Looking forward to a new kraut season here in the Northwest. The big basketball size cabbages should be available in about 3 weeks. Love all the great comments I have read on this blog and am thinking of going with some cranberries and cumin or maybe just stick with my traditional juniper berries and Brussels sprouts. Any suggestions?
started mine a few weeks ago, looks awesome. did about 25 pounds of cabbage and mixed in a few pounds of Brussels spouts between the layers. tried it today totally delicious also added caraway seeds
Interesting! Never thought about adding Brussels sprouts, that’s a great idea.
Debby, is it ready? Or will you let it ferment longer?
My last batch molded.
Traditional sauerkraut is made with Juniper berries and cumin seed. Many mistake this with caraway seeds. The juniper berries are put in whole . My Moms made it this way all her life.
I always add a few TBSP of clear liquid (also strained through four layers of quality cheese cloth) from living yoghourt and some Braggs vinegar, both of which add extra probiotics to the mix. I think I found out about this from WestonPrice. I also break a capsule of very expensive probiotics into the mess, but do not know if this adds anything or even survives to spread its goodness.
I add many items, hot fresh chillies, beet matchsticks, a few raisons, chopped figs I have soaked and washed to get ride of sulphates, sweet potato (both white and yellow), and lots of fresh pineapple. Finally, Junipers and other living seeds and spices I also add, and even bunches of herbs adorn my Kraut.
Mine never looks as pretty as the ones I see on line. I want all the colours I can get into it as it seems such may help in health.
My first batch cleared up irregularity problems within weeks and strangely, body odour disappeared. (sorry, but themes the facts)
I sense my well being has improved and I really think the Kraut is the responsible addition to my Paleo diet. I have two meals a day and both have the addition of my Sauerkraut which sits in a smaller mason jar in my fridge.
Namaste and care,
mhikl
Tori please help! I have made it one 2 years ago and it was perfect, the last 3 attempts it immediately molded BADLY in out pantry which stays around 69 degrees. the only think ive done different is the first time i accidentally used too much salt, but it was perfect.
Hi Rob, the best advice I can give is to keep all of your implements and the crock or jar you’re using very clean and sterile. Tips are shared throughout the comments. It’s also possible that you have some existing mold in your pantry that you might not know about. Mold spreads very quickly, so if there is already mold in that environment the fermentation crock can easily pick up the spores and allow them to multiply. Do you have another cool-ish area to keep the crock in?
Doesn’t the salt inhibit mold. That may be why the first batch worked.
Anyone have a GREAT kimchi recipe?
process sourkraut pint jar in boiling water 15min.
“”””””””””‘ “”””” quart jar “” “”” “”” 20 min.
HEAT WELL FERMENTED SAUERKTAUT TO SIMERING 185-210 DEG
PACK HOT INTO HOT JARS COVER WITH HOT JUICE.PLACE IN
CANNER WITH HOT, COVER JARS 1-2″WATER AND BRING TO BROIL AND PROCESS.
“KEEP EVERYTHING SANITIZED”
Thanks, Tori. Look forward to other comments – anyone know how long a kraut jar must be canned?
Wonderful! My first batch after 5 wks fermentation is fabulous. Now, I’d like to send a couple of jars to family (one to PA and one to Germany). I have not canned the kraut, as to not kill what I worked so hard to get, but any suggestions for mailing a 1/2 quart jar. I put a piece of cabbage leaf on top in the jar as a natural cover and I thought of quick canning, i.e. putting it in a water bath for a minute or two just to create a seal. What do you think? Will it keep for a week at variable temperatures? thx
Hi Ethan, that’s a great question. I would be wary of sending anything uncanned… I’m not sure what to tell you here. Maybe another reader will have a suggestion.
I just began ( for the first time ever) cabbage in a crock. the water level dropped down a bit below the top of the cabbage and I see some black mildew. do I need to throw out and start again?
Hi Judy, there should never be black mildew in the fermentation crock, so I’m afraid you’ll need to start over. Next time make sure that the cabbage and the weights are completely submerged in the brine before you begin the fermentation process; you may want to add an inch or two of brine above so the level never drops below the top layer of cabbage.
Love your site Cheers
I prepared the kraut a 1 1/2 weeks age (MLK day). I’ve got the 10 l crock on my kitchen counter where it is pretty warm. I have yet to notice any “fizzy, bubbling sound coming from the pot.” I have not opened not moved to a cooler place, yet. Should I do either?
thanks!
Hi Ethan, as it says in the instructions above: “If you don’t hear anything, don’t worry, it may just mean that the walls of your crock are too thick for sound to travel through. After fermentation has started, move the pot to a cool place, between 59 and 64 degrees, for the remaining fermentation time. If you don’t hear anything after 1 week, go ahead and move the crock to a cooler location without waiting for it to sound bubbly.”
You don’t need anything fancy or pricey. I use a 5 gallon ceramic/enamel pot, you can find these…the one’s with the blue overlay and smallish white dots, at any store. I simply use a stainless steel pot lid that is just a bit smaller than the factory lid. I put same inside of the pot, along with a 5 pound weight atop that….this compresses the cabbage as it ferments.
Simple. I get excellent results….and I haven’t spent one dollar on “special equipment”. I am partial, though, to my 5 pound weight. Its a circular whiteish rock, found along a New Mexico highway. About the same size as an average cabbage head…how appropriate.
Good luck!!!
Hi Tori….I’m saving money to get this crock from your online store! Have you tried making kimchi before? Is this crock good for that as well?
Dave
Hi Dave– awesome! You will love it. 🙂 I do not make kimchi because it is one of the few things in this world my husband can’t stand (truffles are another one). However I don’t see why you couldn’t make kimchi in this crock as well!