Roasted bell peppers are one of my favorite healthy snacks. In this post, I’ve outlined four easy methods for roasting bell peppers with a step-by-step photo tutorial, as well as an instructional video.
These methods can actually be used for any pepper, but the amount of roasting time will vary based on the size of the pepper.
How to Roast Bell Peppers – Easy methods for cooking and charring bell peppers for a rich smoky flavor, from stovetop to oven to grill. Recipe & step-by-step video below!
Roasted bell peppers are tender, smoky, and delicious. They add flavor and texture to a variety of dishes and sauces.
Once you know how easy the process is, you’ll never spend the money on those jarred roasted peppers again. Detailed instructions for how to roast bell peppers below including a step-by-step how to video.
Here are a few of my favorite recipes that include roasted bell peppers:
Recommended Products:
Nutritional information is for 6 bell peppers – values and cook times will vary based on how many peppers are prepared and what cooking method is used.
Video by Entice Films

How to Roast Bell Peppers
Ingredients
For All Methods You Will Need
- 6 bell peppers (more or less as needed)
- Large bowl, paper bag, plastic bag or plastic wrap
- Towel or paper towels
For Oven Roasting Method You Will Need
- Oven
- Baking sheet
- 2 tablespoons olive oil
For Stovetop Roasting Method – Direct or Grill Pan You Will Need
- Gas stovetop burner
- Oven mitt
- Aluminum foil, for lining the burner to keep it clean
- Tongs
For Flame Grill Roasting Method You Will Need
- Flame grill
- Oven mitt
- Tongs
Instructions
Oven Roasting Method
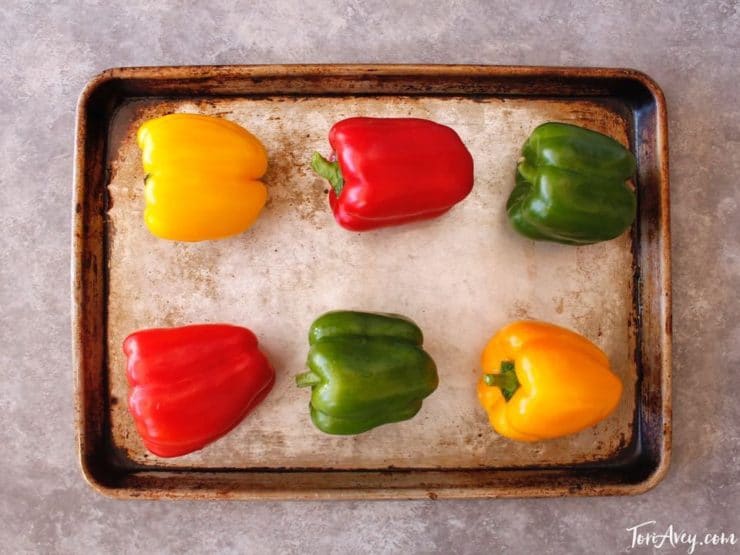
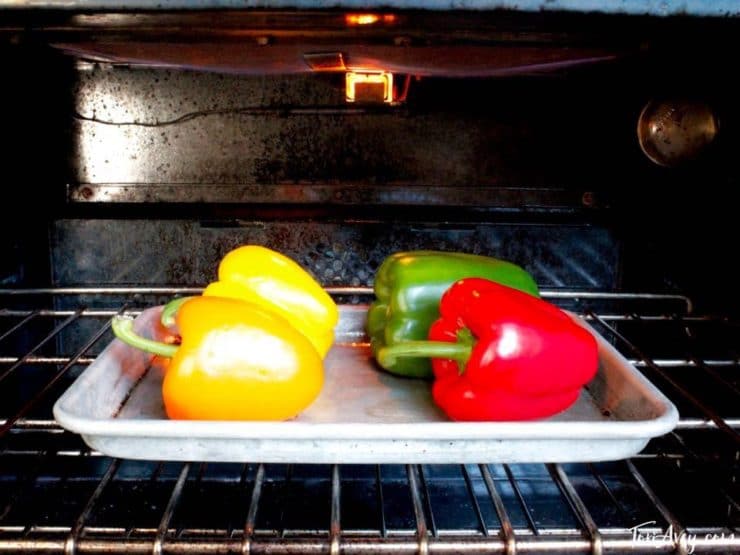
- This is my preferred method for roasting peppers, because you can roast several peppers at once. Preheat oven to 400 degrees. Brush a baking sheet lightly with olive oil. Lay peppers on their sides, stems pointing sideways.

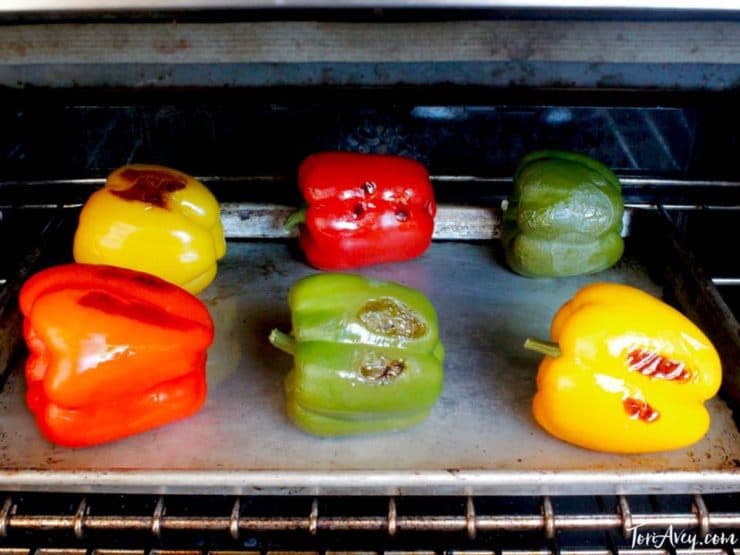
- Put baking sheet in oven and allow peppers to roast for 20 minutes.
- Remove baking sheet. Using tongs, give the peppers a half turn, then place back in the oven for another 20 minutes.
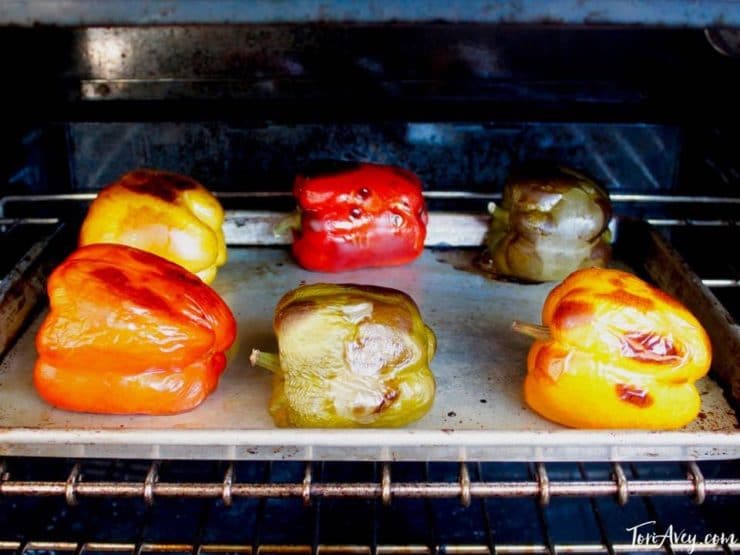
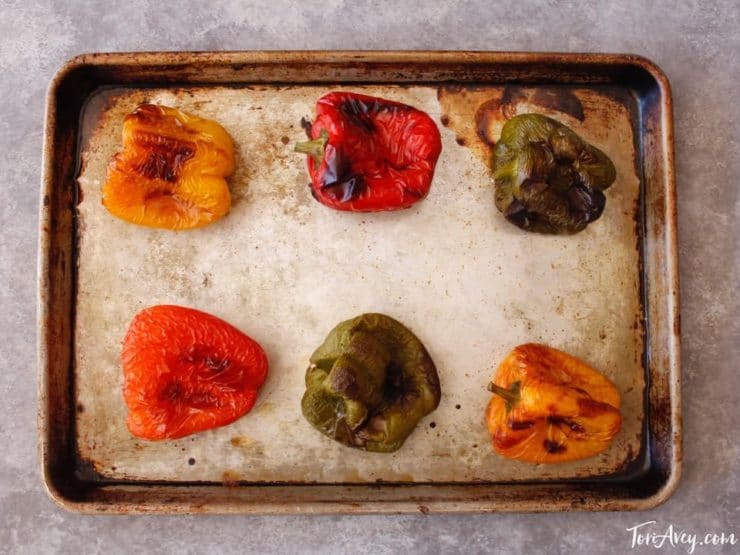
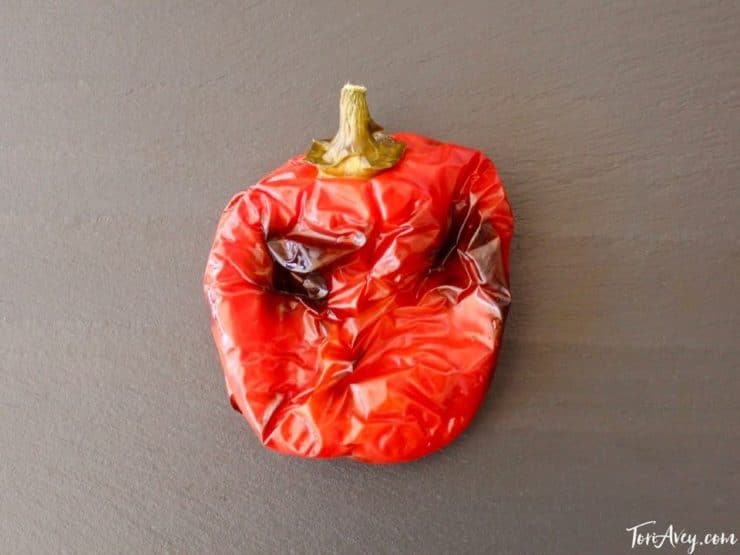
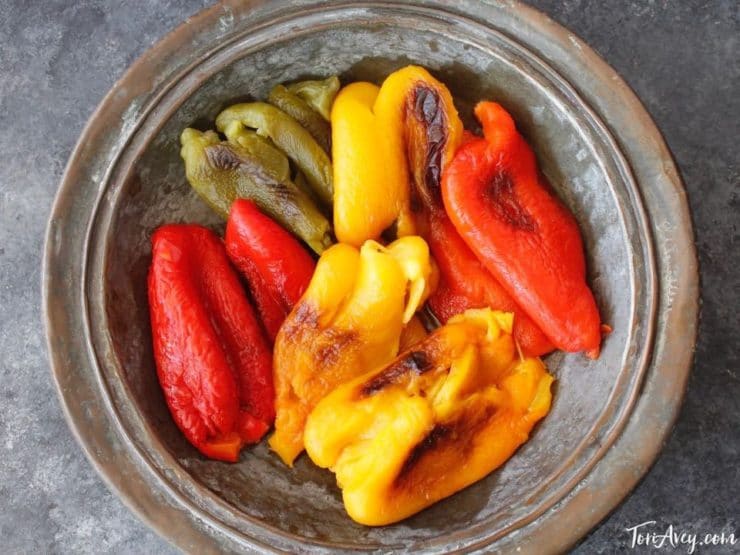
- Check to make sure peppers have fully roasted. The skin should be charred and soft, and the peppers should look slightly collapsed. If they don’t look ready, let them roast for a few more minutes. When they’re done, remove baking sheet from oven.
- You can also use your oven broiler to roast the peppers, which is a faster process that chars them more than regular oven roasting. While it goes faster, you also have to watch it carefully, as the peppers will need frequent turning during the process. If you wish to broil the peppers, I suggest placing the rack in the upper third of the oven so there is 8-9 inches between the broiling element and the peppers. That way, the peppers will be able to soften as they char. When they're too close to the broiler, they will char before they're cooked, which means the flesh won't soften and they'll be harder to peel.
- Preheat broiler to high and place the peppers below the broiler.
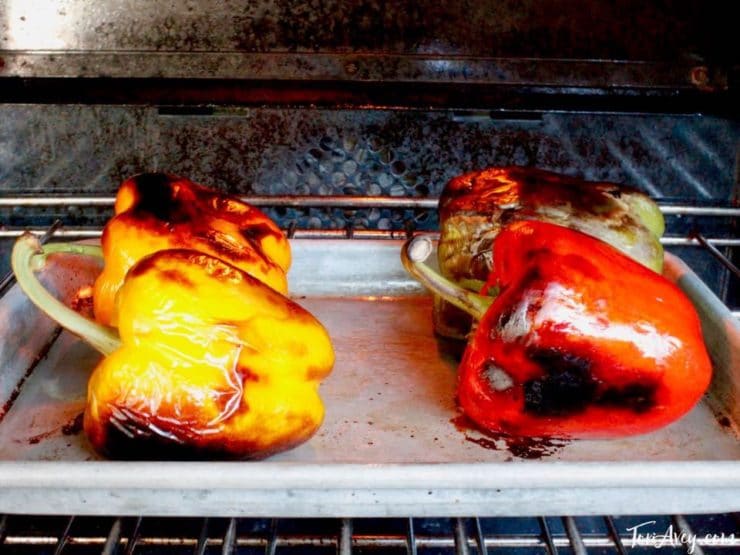
- Let them roast for 20-25 minutes, giving a quarter-turn every 5 minutes, until the peppers are charred, soft and collapsing. The broiler will char them quite a bit, the skin will be very black and crispy– don’t worry, you’re going to peel it off anyway. Remove from the oven.
- Proceed to instructions for “Steaming Your Peppers.”

Stovetop Roasting Method – Direct or Grill Pan
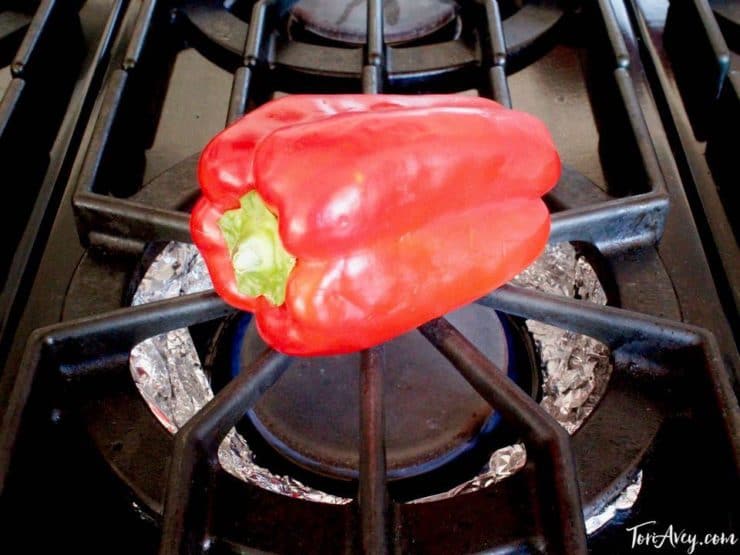
- I typically use this method when I only have one or two peppers to roast. It’s messier than the oven method, but it produces a very smoky rich flavor. There are a couple of ways to roast peppers on the stovetop – on a gas flame, or on a grill pan. If roasting directly on a gas stovetop, you may wish to cover parts of your heating element with foil to protect it from spills.
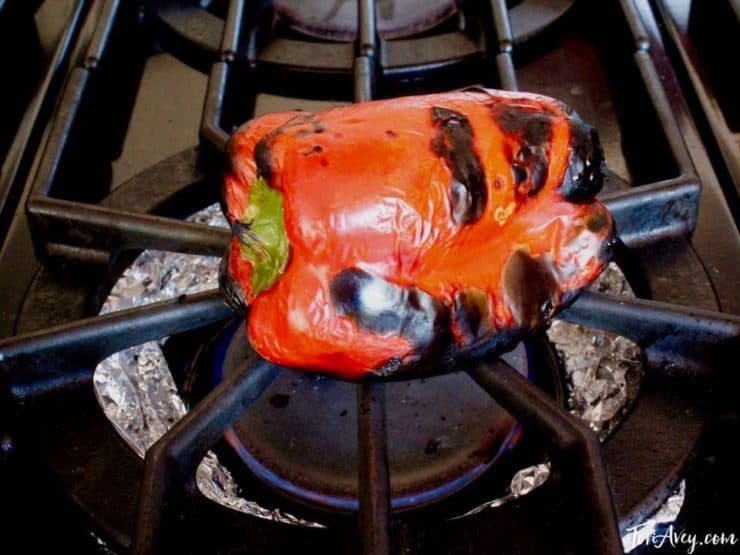
- Turn your gas stovetop flame to medium. Place pepper on the grate directly over the top of the gas flame. Let it roast for 20-25 minutes. Use a pair of tongs to give the pepper a quarter turn every 4-5 minutes.After 20 minutes, use tongs to gently squeeze the pepper. If the pepper is soft and easily yields to the tongs, it is ready. If the pepper still feels somewhat firm, let it continue to roast for a few more minutes until it softens.
- Remove pepper from the stovetop. Proceed to instructions for "Steaming your Peppers."Prepare grill pan according to instructions. My pan requires a bit of water to be placed in the circular chamber. Preheat grill pan over medium heat; brush lightly with oil if it is recommended for your pan. Place pepper on the preheated pan.
- Roast the pepper for 20-30 minutes, giving a quarter turn with a pair of tongs every 5 minutes or so, until the pepper is charred and collapsing. Check water level about halfway through cooking if your grill pan requires it. Skip to instructions for "Steaming Your Peppers."


Flame Grill Roasting Method
- I tend to use this method during the summer when we’re using our gas grill a lot. Roasting over an open flame produces a great smoky flavor. Be sure to wear a protective oven mitt. Place peppers on the open grill over a medium flame. Let them roast for 15-20 minutes, using tongs to give them a quarter turn every few minutes, until the peppers are charred, soft and collapsing.
- You can also use a kitchen/bruleé torch to char your peppers, but it’s a slow process. Using a grill or gas flame is more efficient.


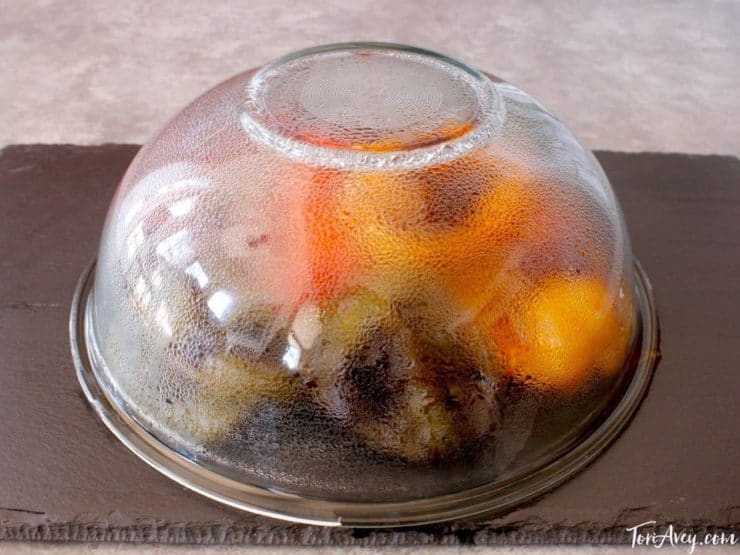
Steaming Your Peppers
- Once you have roasted your peppers, you will need to steam them. This process will help you peel the tough skin from them more easily. There are a few ways to steam the peppers. I like to place the roasted peppers on a flat, smooth surface like a cutting board, then invert a large bowl over the top of them. The bowl traps the steam inside. Steam for 15 minutes.Alternatively, you can place the peppers in a paper bag and seal the top by rolling it closed. I prefer using the bowl method. Whichever method you choose, steam the peppers for about 15 minutes.
Seeding and Peeling Your Peppers
- Once you have roasted your peppers, you will need to seed and peel them. This is kind of a messy process, but it’s well worth the effort. Note that some people like to seed their peppers before roasting. When I have tried this in the past, the results are never as good as when I keep the whole pepper intact during roasting– I recommend roasting the peppers whole and seeding after the roast.
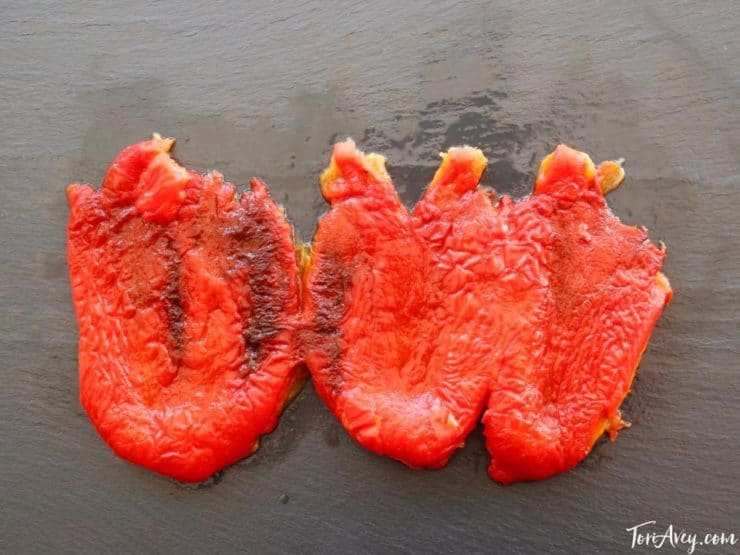
- Slice the pepper vertically from top to bottom and lay the pepper open so it becomes one long strip. Pull the stem from the top of the pepper. The stem and a clump of seeds should loosen easily. Use a towel or paper towel to wipe off any loose seeds that remain inside the pepper.
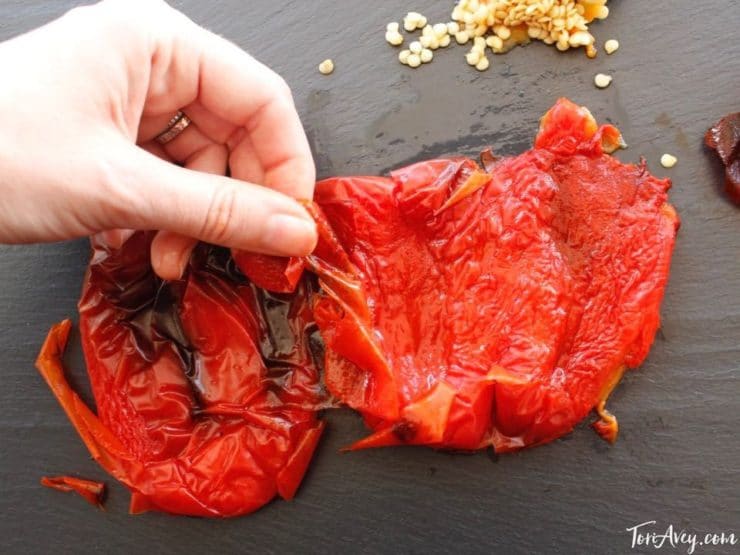
- Flip the pepper over to reveal the skin side. Strip off the charred skin. If you want a more charred flavor, you can leave a few small blackened bits on the skin.
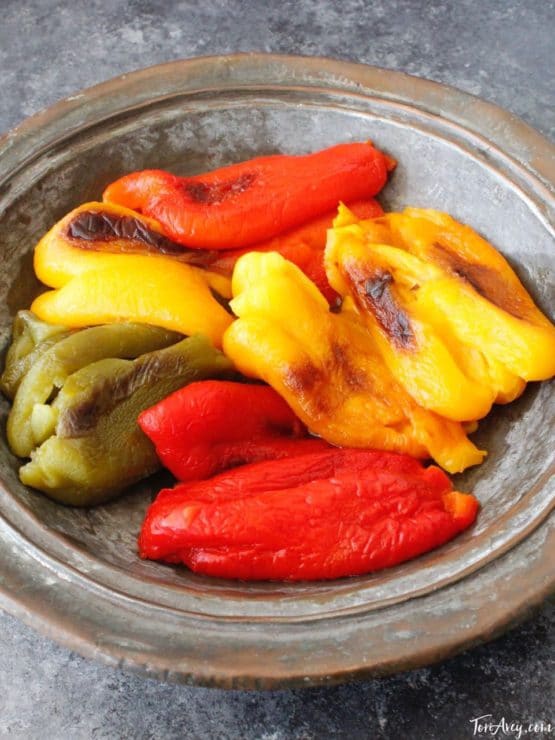
- Alternatively, you can seed and skin the pepper under running water, which will make it easier to get the pepper flesh clean. I prefer not to do this, because I feel the pepper loses some flavor in the process– but if you're in a hurry and don't want to mess up your hands too much, it will speed things up.Once you've peeled and seeded your peppers, you'll end up with soft, sweet, tasty pepper flesh.
- Roasted peppers can be used in a variety of recipes, or snacked on as-is dressed with salt and pepper. They can be added to stews and pasta sauces or chopped into salsa. They can even be mixed with fresh basil and olive oil to create a peppery bruschetta. I have many recipe ideas on my website, just search Roasted Bell Peppers for ideas. Enjoy!

NOTES
Nutrition

tried this recipe?
Let us know in the comments!


This recipe trapped the water inside the bell pepper and resulted in steamed bell pepper rather than roasted. I think cutting in half before roasting would be better as the water evaporates and doesn’t steam the bell peppers
It depends on what you want for your end result. If you are looking for dry-roasted peppers with less moisture, you can certainly do as you suggested. However most recipes calling for roasted peppers require moist peppers (such as jarred roasted peppers), which would be made as written here.
This was so easy and the end result is delicious!
liked the recipe , made it in the oven. turned out fine
Needed Roasted peppers for a recipe and this helped tremendously! I broiled them in oven.
Easy delicious awesome