I am passionate about pesto. My grandparents, who spent their retirement years traveling through the Mediterranean, first introduced me to Italian cooking. Fresh basil pesto was one of the first Italian sauces I ever tasted in my grandmother’s kitchen. From day one, I was hooked. A well made pesto is a flavor symphony – herby, garlicky, aromatic, and nutty. In this post, I’ll walk you through everything you need to know about making an authentic batch of Italian pesto.
Like my grandparents, in the past decade I’ve had the good fortune to travel extensively. When my husband and I explored Italy and the Tuscan countryside, nearly every dish we tasted was made with garden-fresh herbs. It seemed like wherever we went in the Italian Riviera, the smell of herbs was in the air—in particular, basil. I wouldn’t be surprised if basil is considered the “national herb” of Italy. I tasted it everywhere– in salads, pasta dishes, soups, bruschetta, and in other more complex dishes. The earthy, bright and pungent flavor of basil tastes like an Italian summer.
What is Pesto?
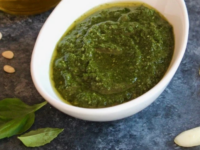
Pesto, a thick sauce made from fresh basil, is served throughout Italy, especially in the Liguria (Genoa) region where it originated.
Here is what the “Oxford Companion to Food” has to say about it:
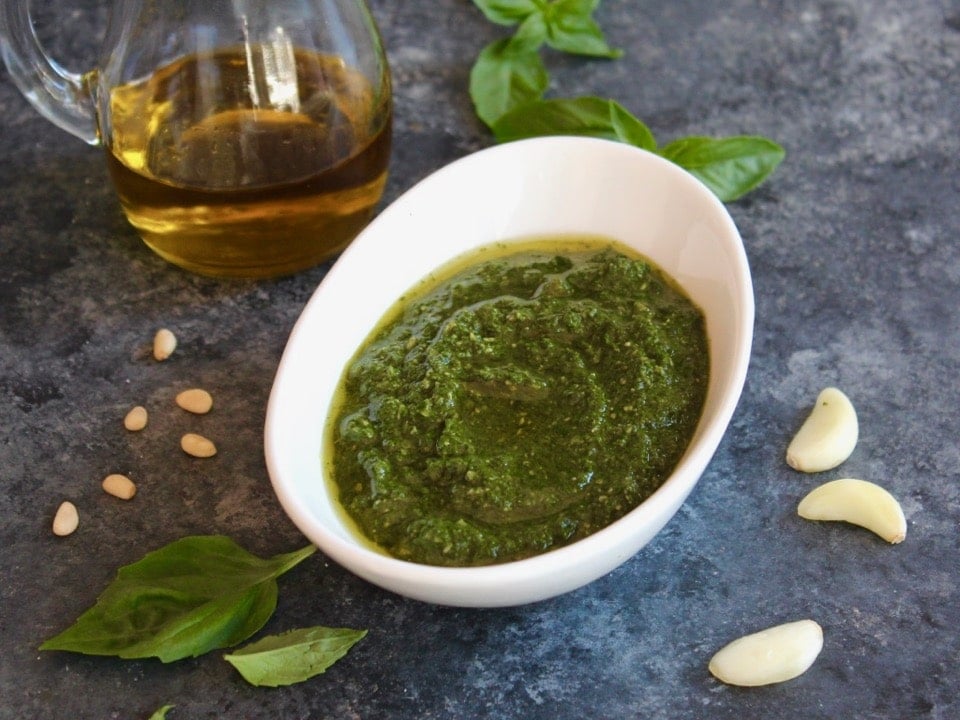
Pesto, the pride of the great Italian sea part of Genoa, is a thick sauce which is excellent with pasta or fish. It does not require cooking, but is one of those recipes where you have to add olive oil carefully and gradually to a mixture which you have pounded with a mortar; the pounded ingredients are garlic, pine nut kernels, grated parmesan cheese (or Sardo from Sardinia), salt, and fresh basil leaves. The flavor of basil is dominant.
Traditionally pesto is made just as the Oxford Companion describes with fresh basil, pine nuts, garlic, salt, and sometimes grated parmesan or pecorino cheese. However, there are many variations of pesto throughout Italy. Some versions incorporate sun dried tomatoes, different nuts, and a variety of herbs to change the flavor of the spread.
While I have a particular fondness for traditional basil pesto, it’s fun to get creative and try new flavor combinations. Once you get the basic idea, pesto can be a really versatile cooking concept that will add an herby fresh flavor to your everyday cooking!
How to Make Authentic Italian Pesto
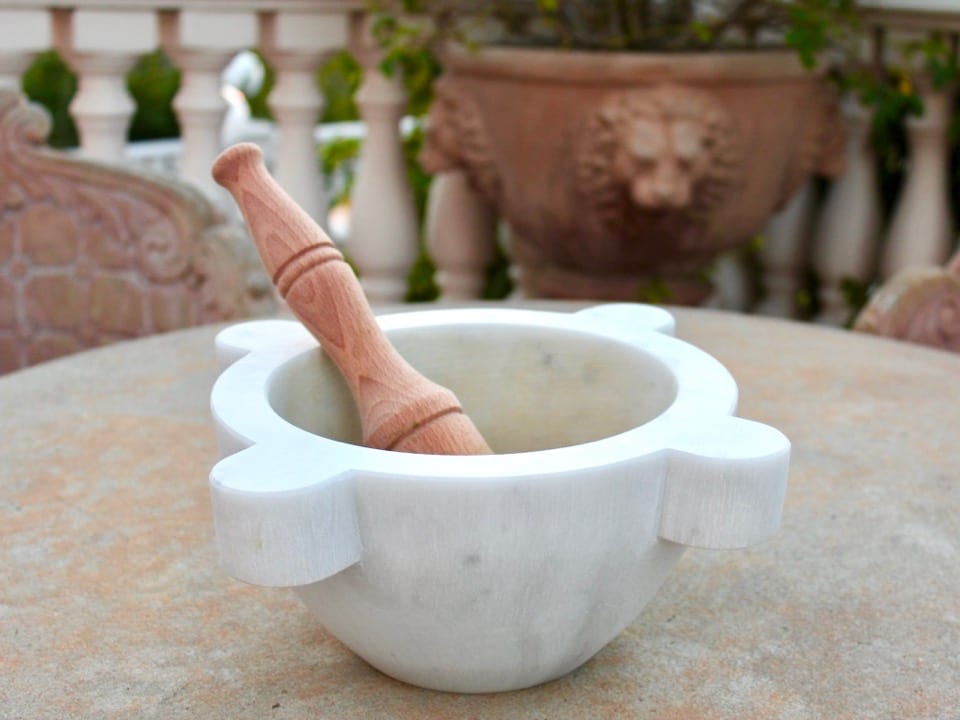
Pesto is actually the word for “pounded,” because the proper way to make it is pounding/grinding it with a heavy mortar and pestle. Most home cooks don’t “pound” their pesto anymore because it’s laborious and time-consuming. Incidentally, there is a good reason to do so. Using mortar and pestle breaks open the cells of the basil and releases more flavor. It also allows the various ingredients to meld better, as they are mashed into one another.
The drawback of a mortar and pestle? It’s work. It takes elbow grease. You really need to want it! But it’s worth the effort in the end.
I use this mortar and pestle, which I purchased from Italy. It only took a few days to ship to the U.S. It’s pricey, but it’s the real deal. This is what Italian chefs and pesto connoisseurs use to make their sauce. It’s quite large and heavy, which means you can make a nice big batch without splashing basil juice all over your kitchen.
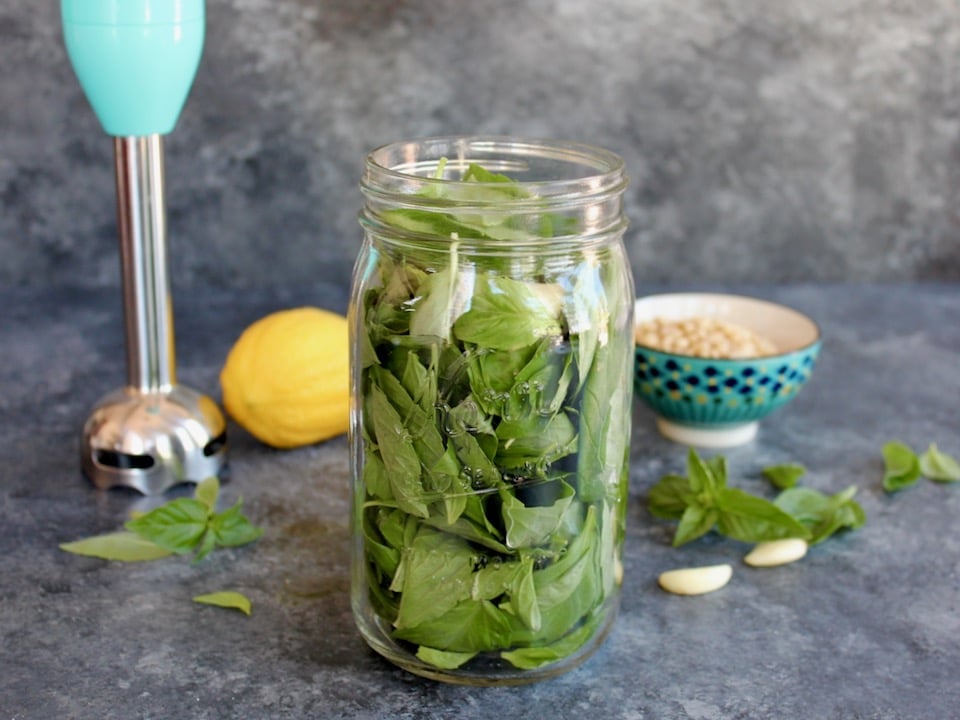
Don’t want to go through the hard work of making pesto by hand? Don’t feel too bad. I have it on good authority from multiple Italian cooking friends that they also make pesto using a variety of devices, from food processor to blender. A mortar and pestle is the way to go if you have the energy for it. However, you can make a perfectly respectable pesto using an immersion blender, a tool that most of us have in our kitchens.
Why make pesto with an immersion blender, rather than a food processor or blender? Immersion blending allows the herbs to be blended far from the motor heat source, giving a more even chop and a fresher flavor.
I’ve given instructions below for making pesto with a mortar and pestle, as well as an immersion blender. Either method will produce an aromatic, delightful pesto sauce. Some chefs swear by mortar and pestle, but the immersion blender produces a very respectable batch of pesto.
Important Tips for Cooking with Pesto
- If you’re adding cheese to your pesto, do so just before you’re ready to serve. If you’re tossing your pesto with pasta or making a sauce, grate the cheese and toss it into the pasta separately to avoid having it become “gloppy.” I usually don’t add the cheese unless I’m serving the pesto as a spread on an appetizer platter, or as a sauce for fish.
- I sometimes use roasted garlic in my pesto because I like the mellower flavor, plus it’s easier on the stomach. Use raw garlic for a stronger flavor and more “bite.” You can also use a combination of raw and roasted garlic. To learn how to roast garlic, click here.
- Pesto can be made ahead before serving. Cover the thick sauce with a layer of extra virgin olive oil and refrigerate; more storage tips below.
- If you’re serving pesto as a pasta sauce, add a little bit of the hot pasta cooking water to the pesto to create a more liquid sauce. Pesto sauce is delicious over linguini or angel hair (capellini) pasta.
Cleaning and Storing Basil Leaves for Pesto
Basil is a finicky little herb. It’s very easily bruised – that’s why you’ll sometimes see black marks on basil leaves. Basil leaves need to be treated with a tender touch to ensure they keep their beauty and freshness.
The best way to store basil is to keep the leaves attached to the stems. Trim the bottom end of the stems and place them in a vase or mason jar of cool water. Remove any herb leaves that would fall below the waterline. Keep the vase at room temperature. Basil likes sun, but you don’t want them in full blast heat – it will last longest in a moderate temperature room with plenty of sunlight.
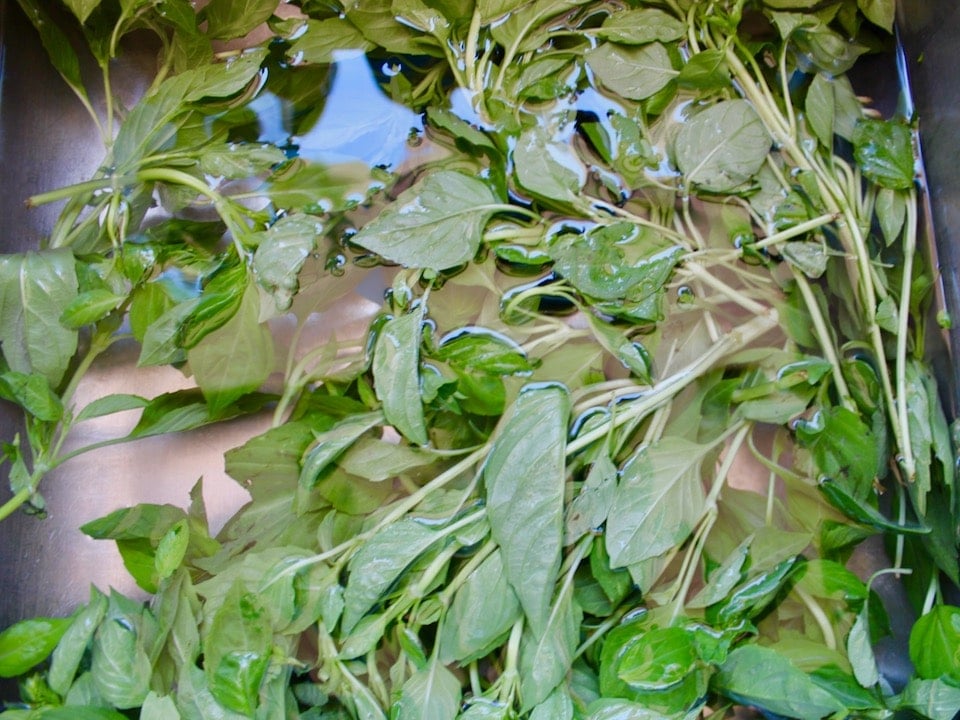
To clean basil without bruising, fill a sink with cold water. Submerge your basil in the water and gently agitate with your hands to loosen any dirt or debris from the stems and leaves. Leave it for a couple of minutes so dirt will sink to the bottom. Lift the basil out of the water, allowing water to drip off. Place the herbs on a rack or on towels to drip dry.
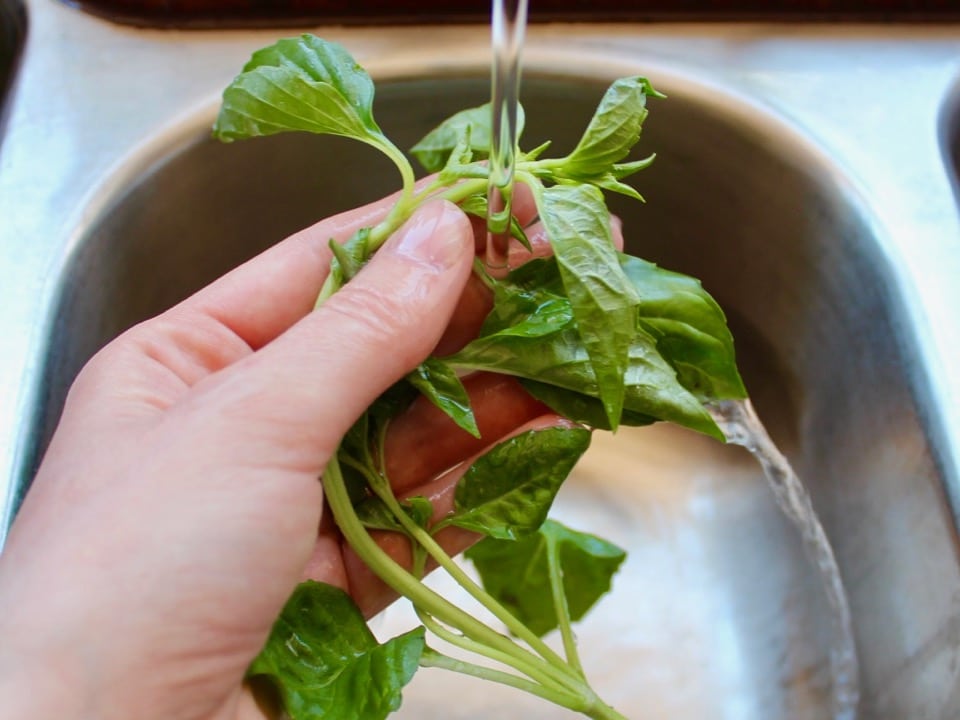
If you notice any leaves with stubborn dirt or mud, you can do another rinse under gently running cool water. Make sure it’s a slow stream, nothing harsh.
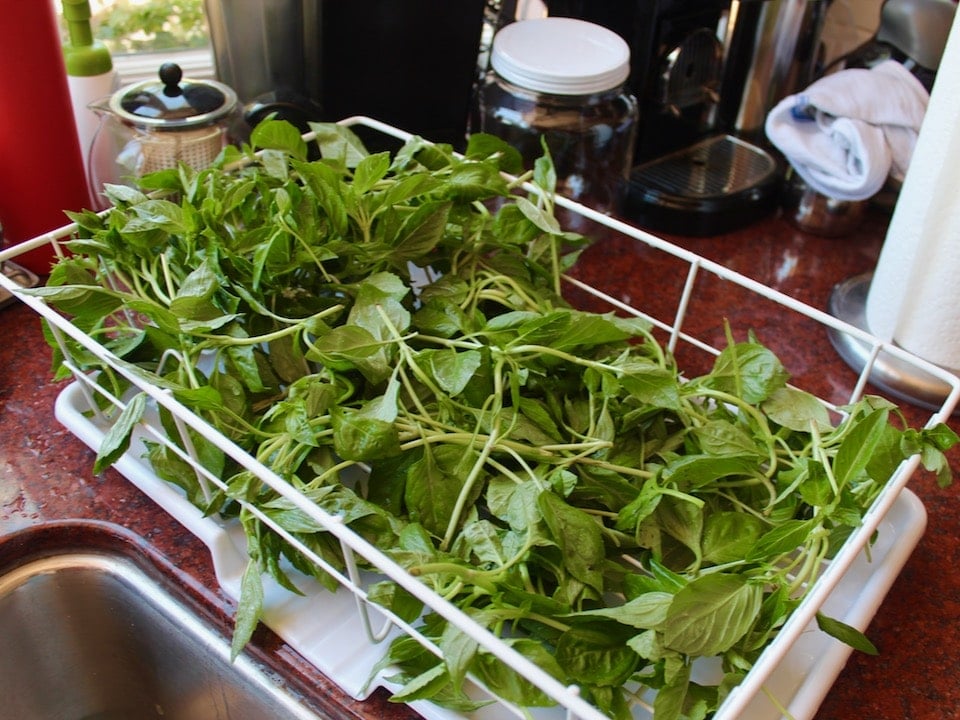
I have a dish rack that I use for drip-drying herbs. I place the basil in the dish rack and leave it for 30-60 minutes, shaking it gently every 10 minutes or so, until it’s dry. This method ensures that the basil stays bruise-free and fresh, while cleaning it of any potentially harmful residue.
How to Store Homemade Pesto
Pesto can be stored in the refrigerator in a covered container for up to a week. Be sure to cover it with a thin layer of olive oil to keep the air off of the surface. This prolongs shelf life and helps keep it fresh.
For longer storage, freeze pesto in ice cube trays, pop out the pesto cubes, and store them in a freezer-safe container until ready to use. You can also freeze pesto in a reusable freezer bag. Lay bags of pesto flat on a baking sheet and squeeze as much air out as possible, flattening the pesto with your hands or gently with a rolling pin until as thin as possible.
Freeze, then you can store the pesto bags on their own (without the baking sheet) piled or stacked. If you’ve managed to make it very thin, breaking off a portion to use is easy – even a very small amount – as needed.
I recommend freezing pesto without cheese. If you want to add cheese, do so after thawing just before using, adding an equal amount of grated cheese to thawed pesto. Add olive oil as needed to liquify the texture.
Ways to Serve Pesto
Here is a list of ways that you can use pesto to add fresh, herby flavor to your everyday cooking.
- Use pesto as a pasta sauce, as in my Ligurian Pasta Trenette recipe.
- Roast or grill fresh vegetables, then spread pesto on top – or marinate vegetable skewers with it.
- Use as a sandwich or panini spread.
- Spread it on fish before grilling, or use it to top pan seared fish.
- Use it as a meat marinade. The version without cheese is great for marinating chicken.
- Dilute with olive oil, add lemon juice, and drizzle it on your favorite salad to make a dressing.
- Spread it on pizza dough with parmesan and bake.
- Mix it into mayonnaise to create an herbed basil mayo spread.
- Stir it into soup for added flavor.
- Add it to a vegetable omelet.
- Mix it into a fresh heirloom tomato salad.
- Add to cooked rice or risotto.
- Blend it into hummus for an herby basil hummus spread.
Recommended Products:
We are a participant in the Amazon Services LLC Associates Program, an affiliate advertising program designed to provide a means for us to earn fees by linking to Amazon.com and affiliated sites. As an Amazon Associate I earn from qualifying purchases.
How to Make Fresh Basil Pesto
Ingredients
Ingredients
- 2 cups fresh basil leaves removed from stems - buds and flowers discarded, firmly packed in measuring cup (3.5 ounces basil if weighing with leaves and stems, or 2.75 ounces basil if weighing only leaves separate from stems)
- 1-2 cloves garlic, or 3-4 cloves roasted garlic
- 2 tablespoons pine nuts
- 1 tablespoon freshly squeezed lemon juice, or more to taste
- 1/4 cup extra virgin olive oil, more or less as needed
- 4-5 tablespoons grated pecorino or parmesan cheese, more or less to taste (optional - fresh grated is best)
Instructions
To Make Pesto Using a Mortar and Pestle:
- If you are using roasted garlic, roast your cloves prior to making your pesto. For instructions, click here: How to Roast Garlic. If using raw garlic, be sure to cut out the green inner part of each clove with the tip of a sharp knife. Also plan to give yourself some time to separate the basil leaves from the stems - it takes a while to complete this preparatory step, but it's necessary. You really don't want stems or flower buds ending up in your pesto.

- In this post, you'll see the mortar and pestle that I own. It’s a splurge, for sure. It was shipped from Italy in record time. I cherish it and use it all the time. The maker offers many different sizes. I recommend using at least a 7 inch for pesto, and at least 8 inch is even better. For reference, mine is 9 inches.

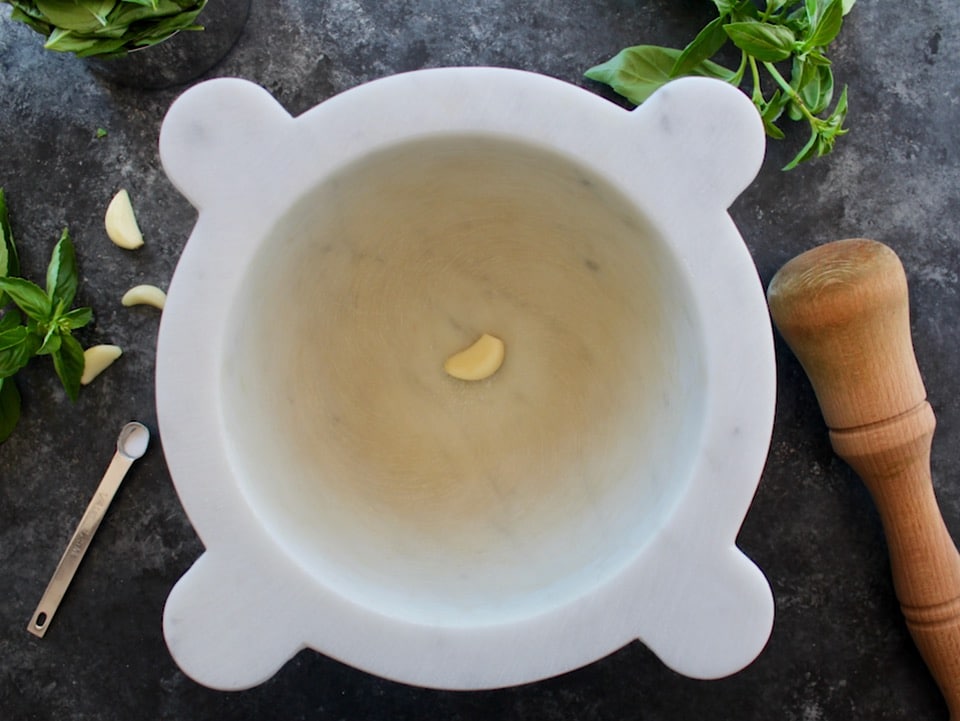
- First, add your garlic and a very small pinch of salt to the mortar. Use 1 clove for a typical pesto, or 2 cloves for a more pungent, garlicky pesto. Use roasted cloves for a slightly sweet pesto, devoid of sharpness, that is easier to digest.

- Use the pestle to pound and grind the garlic into a smooth paste, coating the interior of the mortar with smears of garlic.
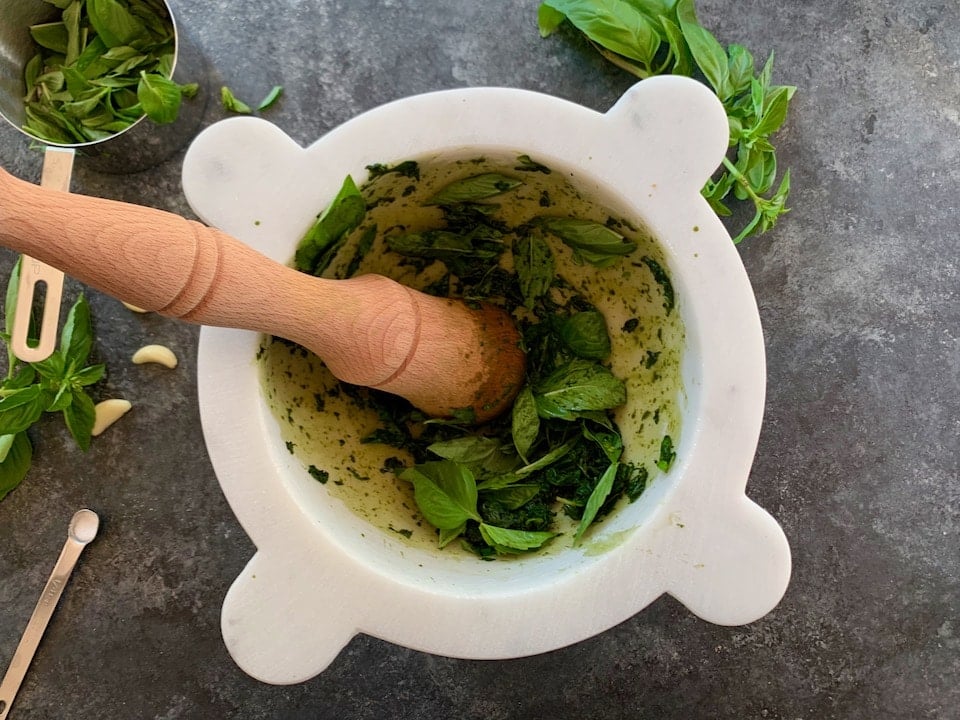
- Next, begin adding your basil. I always add basil early on in the pesto process, because it is the hardest ingredient to pulverize, and you will need the scraping traction of the interior of the mortar walls to help break it down. Start with about a third of your pesto leaves, and another very small pinch of salt.
- Grind the leaves against the walls of the mortar, using a rotational movement of the mortar and pestle to pulverize them as best you can. It will take some time and patience. Have a small silicone spatula handy to scrape the pestle, as well as the edges of the mortar, from time to time. Juice will begin to collect in the bottom of the mortar as the cells of the basil get broken down. Continue adding more leaves, repeating the process until all of the basil has been broken down.
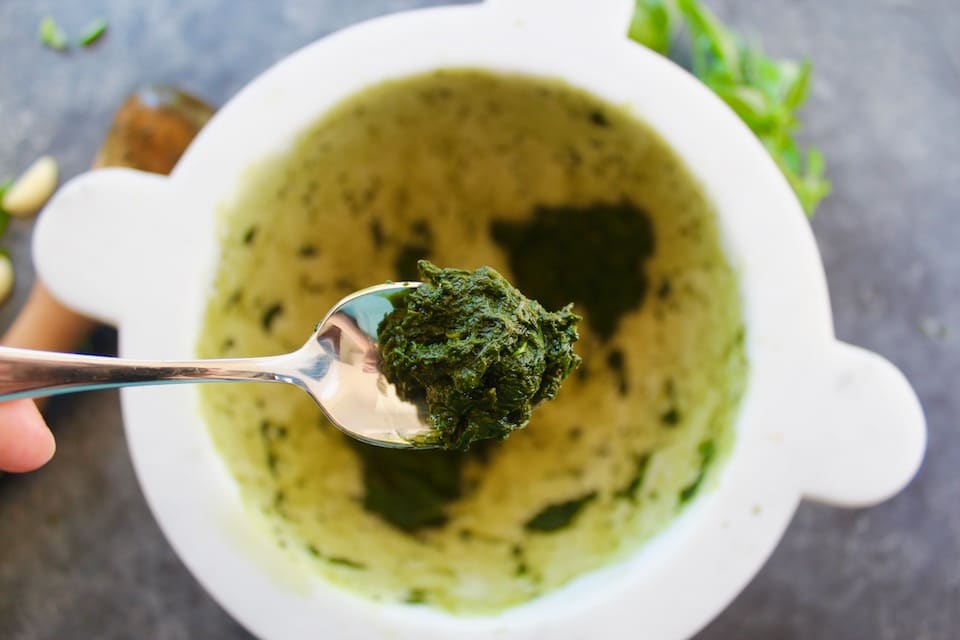
- You're looking for your basil to be mostly pulverized, without pieces of leaves or stems in the mix. If it doesn't seem to be breaking down fast enough, add a little more salt - but careful, if you're adding cheese later the pesto can turn overly salty very quickly.

- At this point, add your pine nuts. You can add them straight to the mortar and grind them into the basil, which is what I usually do. Some cooks like to hand-chop the pine nuts, then stir them in for a more rustic texture.
- As you continue to grind, the pine nuts will give a slightly creamy texture to the pesto. By now, your pesto will be quite thick.When your pine nuts are fully incorporated and broken down to very small bits, you're ready to add fresh lemon juice. Stir in about a tablespoon of juice. This will brighten the flavor of your pesto. The lemon also helps to keep it fresh and bright green.
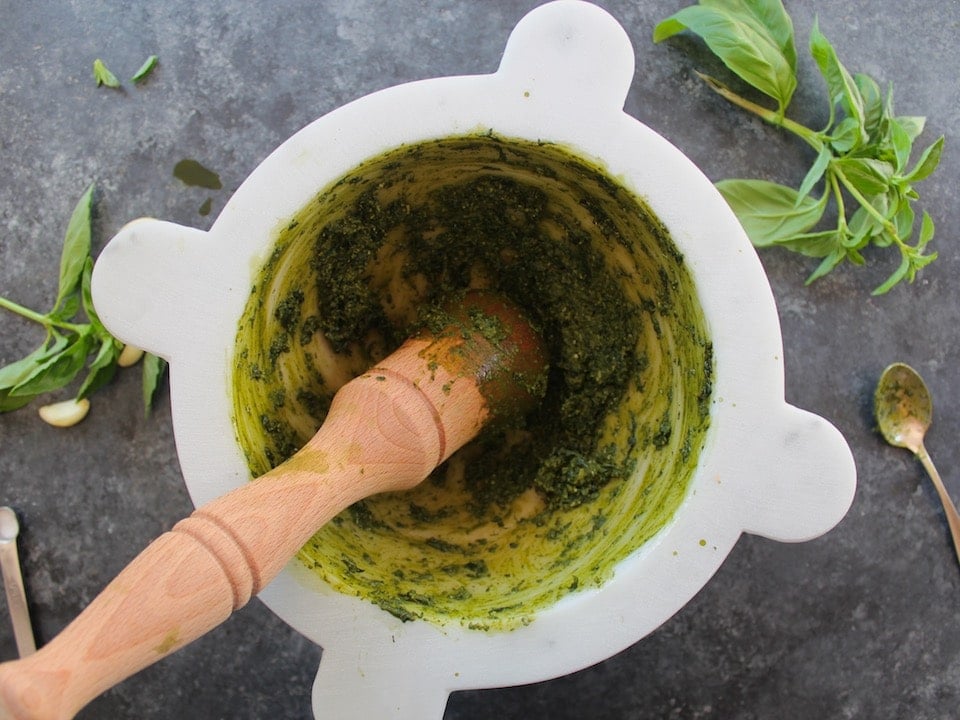
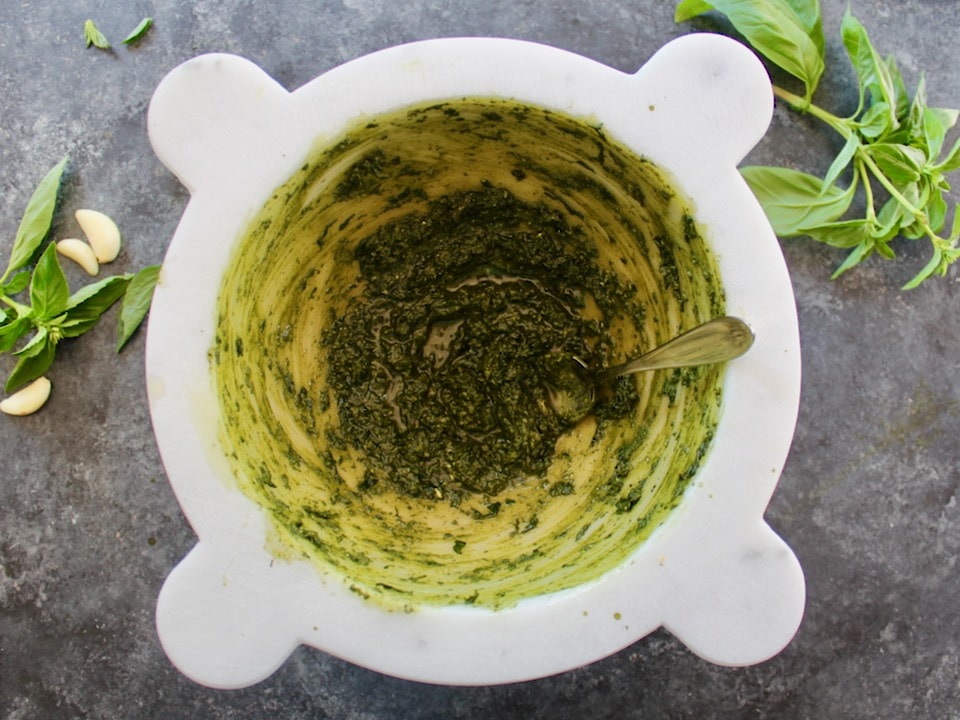
- Now it's time to stir in your olive oil. Use your spatula for this step. I usually use about 1/4 cup or so for a batch of this size. You'll want to add olive oil until the pesto is glossy with a lovely sheen. The oil should almost pool on the surface of the pesto.
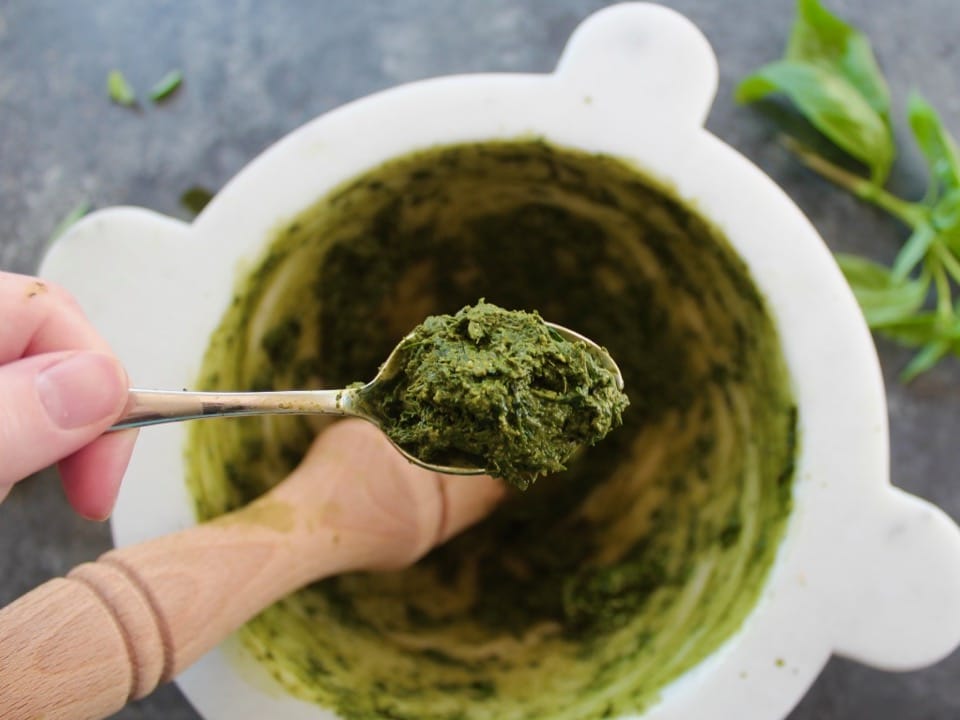
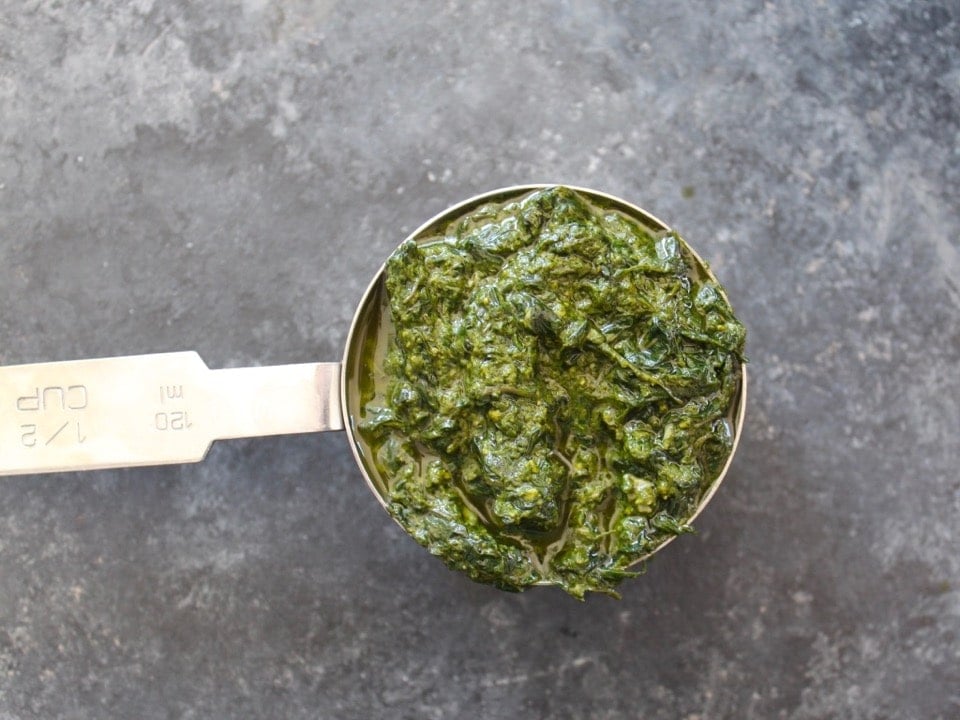
- Scrape the sides of the mortar with a spatula and stir well. At this point, you have a basic, authentic pesto - about 1/2 cup or so (or around 3/4 cup if you've added cheese). If your pesto is cheese-free, add salt to taste at this point - the salt really enhances the flavor and helps to balance everything.Some people like a thicker pesto, while others prefer a more liquid pesto for drizzling. If you’d like a more liquid texture, add more olive oil by the tablespoon until you have the desired texture. Your pesto is now ready to serve.


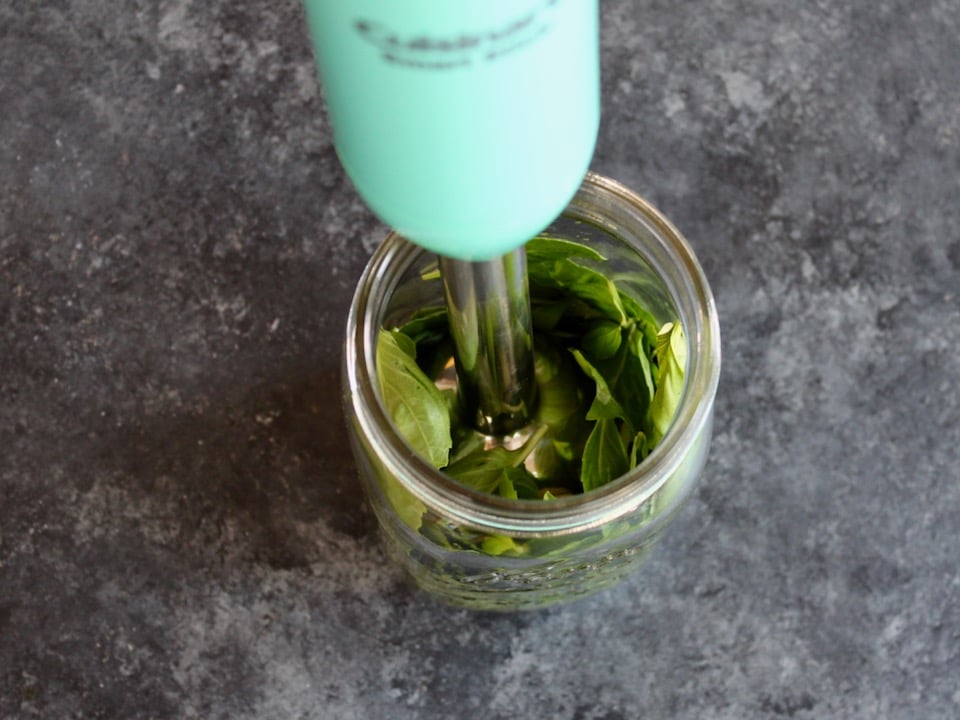
To Make Pesto with an Immersion Blender
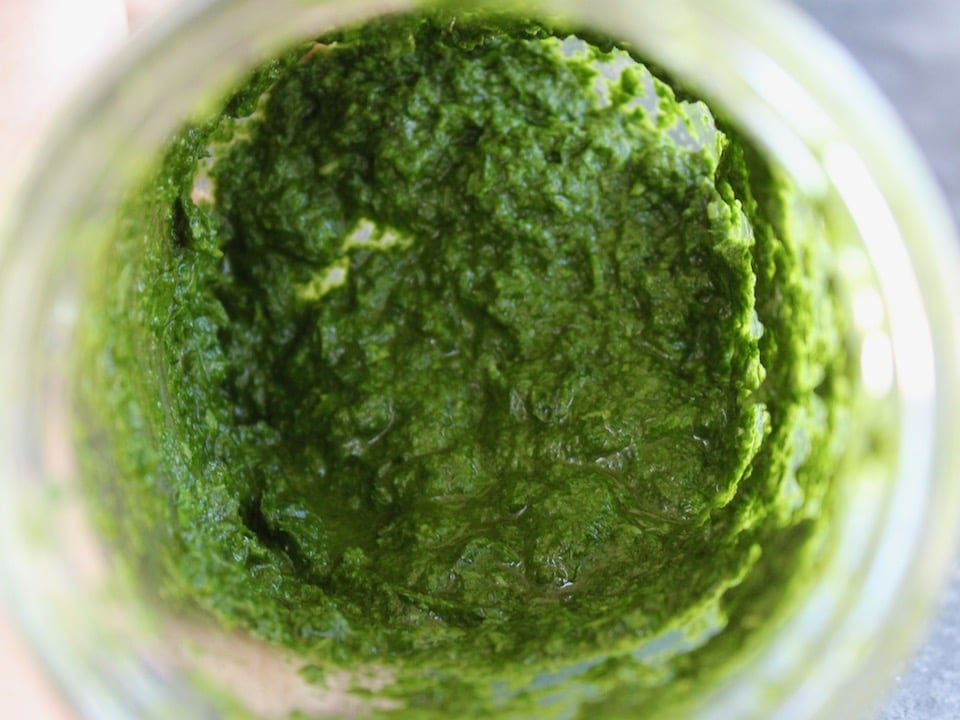
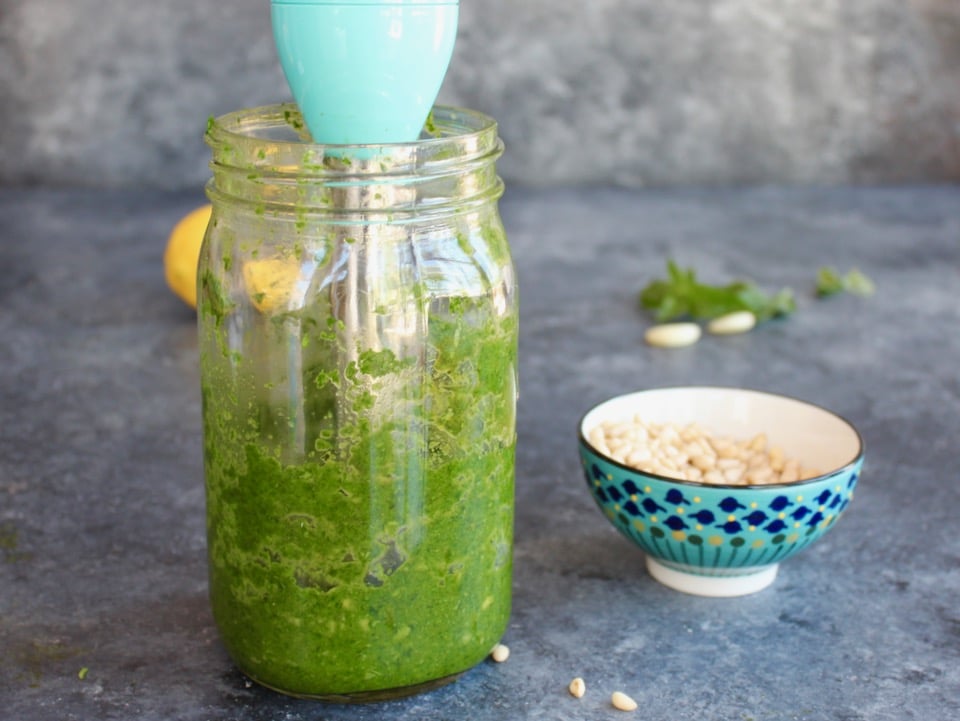
- You'll need your immersion blender and a half gallon mason jar. Add your basil, garlic, lemon juice, 1/4 cup olive oil, and a pinch of salt to the jar.Use your immersion blender to begin pulverizing the ingredients inside the jar, moving the blender up and down and in swirling motions to chop up the ingredients.
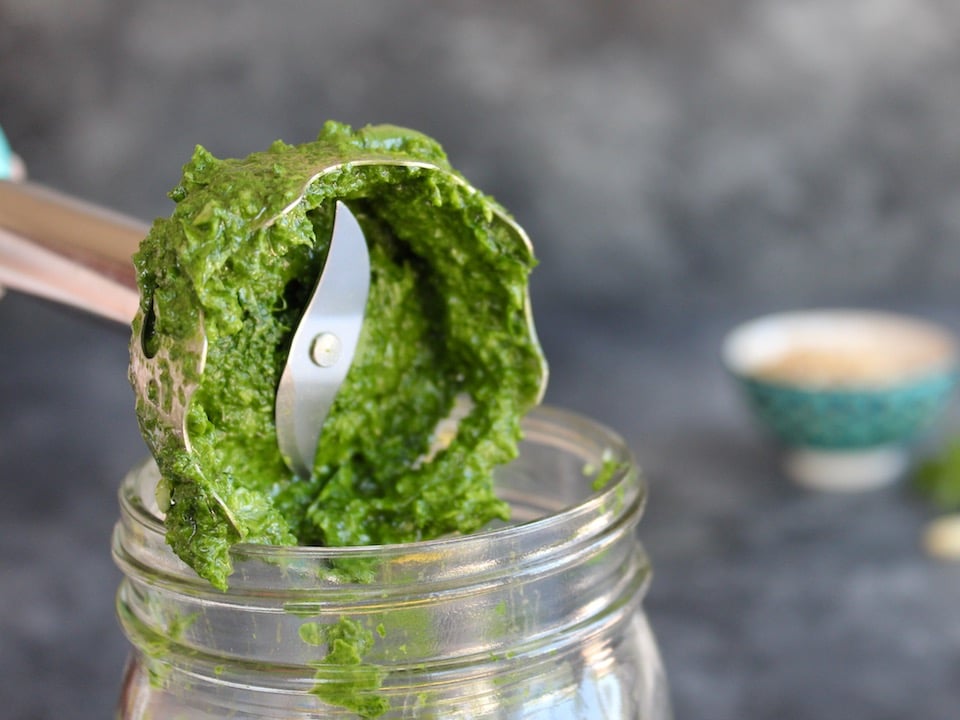
- Scrape the blender with a spoon periodically to free up the blades.
- Continue blending for a few minutes, until the basil is very well chopped with no stem bits or leaves present.
- Add the pine nuts to the jar and continue blending until well incorporated. I save this part for last, so that the pine nuts don't become so pulverized that they take on the texture of nut butter. I like them broken down to little creamy bits, so that the pesto retains some texture.At this point, you'll have about 1/2 cup of pesto. If you're keeping the pesto dairy free, add salt to taste at this point (the salt really helps the flavors to pop). Don't add salt now if you're adding cheese.
- Some people like a thicker pesto, while others prefer a more liquid pesto for drizzling. If you’d like a more liquid texture, add more olive oil by the tablespoon until you have the desired texture. Add more salt to taste, if desired. Your pesto is now ready to serve.
NOTES
Mortar and Pestle
To make pesto the most traditional and authentic way, you’ll want to use a mortar and pestle. The abrasive action of the pestle against the mortar breaks open the cells of the basil, releasing more juices and flavors than when using a blender or food processor. The ingredients also blend together better in the mortar, creating a more vibrant flavor and better texture. It does take elbow grease and upper arm strength, and it is not the fastest way to make pesto, but the enhanced flavor is certainly worth the extra effort. Note: Pesto is a process that takes practice. Even with the same list of ingredients, no two batches of pesto will ever turn out exactly the same. You really need to taste and smell as you go, adjusting the flavors to balance them. I've given very "basic" amounts here, but it's really Important for you to taste and try - that way you'll get a flavor that works best for you!Nutrition


Is fresh basil mentioned in your pesto recipe sweet basil ? I am not familiar with Italian foods. I tried to blender sweet basil with some olive oil. Found no flavour of basil after the blending in comparison with my fresh basil before blending. If you can pls tell me why? And what went wrong? Pls help
Hi Aska, Tori’s assistant Ashley here. I was not familiar with sweet basil so I did a bit of research and it looks like sweet basil is another name for common basil. The basil used in this recipe is very fresh garden basil. If the basil you use from your garden has a nicer flavor, I would suggest using that. Hope this helps!
While making my pesto, I add a can of tomato paste. This changes the color and adds a different taste to the pesto.
Tomato paste, especially store bought has a bitter taste. The evaporation and acid used during making paste creates this bitterness. It needs to be cooked to purge that taste and unlock the full flavour of the tomato and other ingredients.
Using tomato paste in pesto (especially as much as a can) will leave a very bitter taste and the heat from the pasta won’t be enough to get the job done, like cooking the eggs in carbonara for example.
For red pesto either use sundried tomatoes (homemade always best, use the olive they’re stored in as well) or red bell peppers.
Peppers could either be charred then skins removed, oven baked or caramelised. Cool down either method before adding to the pesto mix.
Thanks for the information on pesto. I have plenty of basil from small leaved to large leaves. I have also grown in plenty the basil classic, thai basil. I have also other herbs such as oregano, marjorum(which I spread on salads), I have also arugula both wild and cultured, They taste great. Can you please share something how to use fresh organo,I have used them only on omlets. Great. Waiting for your comments please.Mahfuz
I’ve been looking for a pesto recipe that was traditional..thanks for this!
See my Pesto question under the picture of the bowl of guacamole that looks like Pesto ! Oy. Basically, my digestive system also fares better with cooked garlic as well … so in lieu of roasted garlic… to whip up some real quick…what if I “quick cook” then cool the garlic in the olive oil (or maybe just a little oil) before drizzling into the basil ?
Hi Tori,
I loved making basil pesto.We can make pesto with cilantro also. Can you tell me if basil pesto can be used as a a spread in sandwithces and breads? Is basil healthy and safe?Please show some receipe where thymes can be used, I have plenty of fresh thymes growing.Thanks.
Mahfuz
love the blog! i have been wanting to make pesto dip from scratch for what feels like ages, but i always hesitate because with only 2 of us at home, we wouldn’t eat it fast enough… how long would you say the dip keeps in the fridge? I would totally try your freezer option though! thanks so much for your recipes and stories!!
Hi!! I don’t like cheese so when I make pesto (usually with almonds because that’s what I have on hand), I will throw some tofu into the food processor. It makes it creamy without any dairy!!!
Thank you for all of your great recipes! You’re the first blog I go to for ideas.
Shana Tova!
Great idea Tammy, thanks!
Maybe it’s just me, but I don’t see the red hyperlink for the roasted garlic instructions.
Hi Margaret, you should be able to see it now. If you still can’t, click here:
How to Roast Garlic
or copy and paste this link into your browser:
https://toriavey.com/how-to/how-to-roast-garlic/
Yum I love pesto! I like that you roast your garlic, I am going to have to try that next time.
Pesto and Pistachio Fish (Tilapia, Sea Bass)- amaze your friends with this easy one:
Spread fresh pesto on the fish
“bread’ the top of the fish with crushed pistachio nuts
Bake as you would bake the fish
Enjoy!
Shabbat Shalom
Hi, Tori! I grew so much basil in my garden 2 years ago, that I still have about 10 containers of pesto in my freezer. After 2 years, the flavour is not as intense as when fresh; I compensate by using more. I didn’t make any last year and this year, I have 6 plants to make a smaller batch later in the season. I like to make it with sun-dried tomatoes – yummy! Will try your idea of roasting the pine nuts next time.
In a B&B in the CInqua Terra, I learned to make pesto with basil,italian parsley and roasted walnuts. A delicious new twist.
THe lemon juice addition sounds great I will try it next time.
A hint for keeping the ice cube try unstained spray with a ‘Pam’ like product before putting in the pesto.
I love your blog.
Hey Sam! I haven’t tried it with walnuts but I’ve heard it’s delish. Love variations on the pesto theme. Great idea on the nonstick spray. 🙂
I had basil Pesto for the first time about 3 years ago and now I try to make sure that I have some in the house all the time as it is so good on so many differant things. Thank you for publishing on how to make it now I will not buy it I will make it instead and not be so tight using it. Thanks again and God Bless you you are doing such a great job.
Thank you Betsy! Your comment made my morning. 🙂
Your blog is inspiring me to get back into my kitchen! When I had a garden I made pesto all of the time because basil grows like a weed when it gets going. Pesto is one of the first things I mastered. I agree, once you get the hang of it you can take liberties with ingredients and I most often don’t measure anything and just go by look and smell. Thanks for the inspiration, as always! I’ll be purchasing some basil plants and anxiously awaiting my “pesto summer”
Erika, I have to tell you, it totally felt like summer in my kitchen this week. Our weather is warming up here in SoCal, and it totally put me in a pesto mood. It really tastes like summer!
The most traditional Italian (Ligurian) way of making pasta with pesto is with potatoes. I have done this many times and it is really a great way to serve it. Cut the potatoes into half inch cubes (I have also seen it with thin slices, but I like the chunks better). Place the potatoes in a large pot of salted water (don’t be conservative with the salt, some will go into the potatoes and you still want some in the water when you add the pasta). Bring to a boil and cook for about 20 minutes until the potatoes are tender. Then add the pasta. Cook until al dente. Drain the pasta and potatoes but reserve some of the cooking liquid! Add the pesto to the pasta and potatoes mixture and a few tablespoons of the cooking liquid. Toss and enjoy!
Ahhh Phillip, you’re one step ahead of me! I’ll be posting a recipe for Ligurian Pasta Trenette tomorrow. You’re right, it is a wonderful way to serve pesto, and so easy too! 🙂
I love pesto! I just wanted to say that I have frozen it with the cheese for years. I make a big batch in the fall, freeze it in small containers, and have it all winter long. Before freezing, I drizzle a thin layer of olive oil over the pesto. I also find that it keeps in the refrigerator for a while after thawing. Next time I make it, I will add the lemon juice and zest. Sounds great.
Thanks for the tips, Phyllis! So great to have pesto during the winter… it’s like a little taste of sunshine. 🙂
Hi Tori,
You say you like to use roasted garlic in the pesto. Tell us how you roast the garlic.
Thanks.
Alice.
Hi Alice, great question! In the recipes, you’ll notice that the words “roasted garlic” are highlighted in red. They are links. If you click on one of the links, it will take you to a blog I wrote about roasting garlic. That blog explains the process step-by-step.
Yummm delish… Thank you for the vegan one! <3
You’re welcome Coco, I actually thought of you as I was mixing it! 😉