A few months ago I wrote up a short post on a new food “trend” with ancient roots – fermentation. Many of you expressed interest in learning more about the process. I’ve never done any fermenting at home before, but your interest inspired me.
For my first fermentation adventure, I decided to take a crack at homemade sauerkraut. Together with my kitchen assistant Gary, who happens to be a farm trained, do-it-yourself culinary school grad with lots of fermenting experience, we fermented a crock of cabbage to make homemade sauerkraut.

iStock.com/vertmedia
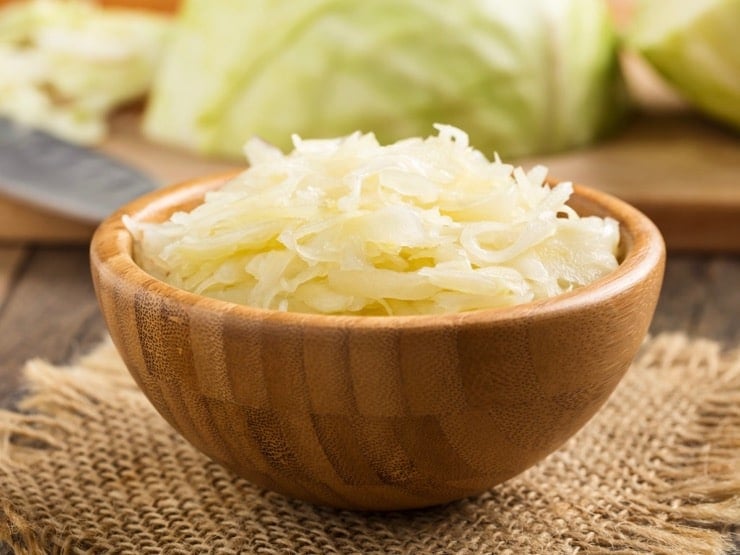
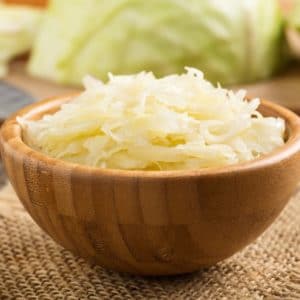
Sauerkraut, a combination of the southern German and Austrian words “kraut,” meaning cabbage, and “sauer” meaning sour, literally translates to sour cabbage. It is created by fermenting cabbage over a long period of time.
There are several health advantages to homemade sauerkraut. It’s high in enzymes and vitamin C, both of which are lost during the heating and pasteurization of store-bought sauerkraut. It’s also low calorie and easy to digest.
As I was learning about the fermentation process, I became curious about the difference between fermenting and pickling. The most obvious difference is that fermentation creates acid, while pickling requires an added acid, for example vinegar. Both serve as a preservation technique, the science is just a bit different.
Sauerkraut takes about 4-6 weeks to make. Since it’s a “hurry up and wait” kind of thing, I am documenting the adventure here on my blog. I will walk you through what we did, step-by-step, so you can try it at home.
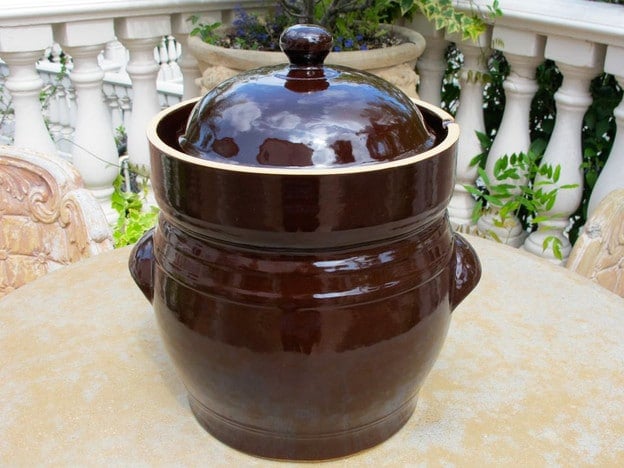
First thing’s first– I bought a crock. A big, honking fermentation crock. It really looked so much smaller online. At first, I was dismayed.
After the initial shock wore off, I decided the size was a plus… it means you can make a large batch of fermented veggies at the same time. With the amount of time it takes to ferment, why not make a big batch that will last you several months? And I do mean a big batch. We sliced up enough cabbage to create a decade’s supply of sauerkraut. Seriously.
If you too would like to be the proud owner of a ginormous fermenting crock, here is the one I’m using. Keep in mind that it’s pretty heavy/substantial and kind of awkward to handle. It also comes in a smaller size, which is likely a lot more manageable. There’s an even larger size, but that would require some serious fermentation love.
You will also need a set of weights to help weigh down whatever you are putting in the crock. We used 10-15 liter stone weights; for a smaller crock, use 5 liter weights.
Crocks can be a bit pricey, so if you’d rather not invest in one, there are some less expensive options. You can use just about any sterilized container, taller than it is wide, made from enamel, ceramic or food grade plastic.
Once you have chosen your vessel, find a plate that will cover the majority of the cabbage. To make sure that the cabbage stays submerged in the brine, a key component of fermentation, you will need to make a weight to place on top of the plate.
The simplest option is to place plastic storage bags filled with salt water on top. You can then cover your container with plastic wrap or a lid.
Once we cleaned out the crock, we got to work. With Gary and Ashley’s help and experience, I felt more confident in outlining the process for you here. I’ll check back with you in a few weeks and let you know how our sauerkraut turned out.
Meanwhile, here are a few books that helped us learn the basic fermentation process:
Preserving Food Without Freezing or Canning
Since I’m fairly new to fermentation, I decided to start with a basic sauerkraut, which only requires salt, cabbage, and water. Spices can be added to make a flavored sauerkraut or kimchi. If you feel like experimenting, the same method can be used for other vegetables, including cucumbers, onions, beets, carrots, kohlrabi, red cabbage, and rutabaga. You can even combine a variety of vegetables in a kraut medley if you’re really feeling adventurous.
We are a participant in the Amazon Services LLC Associates Program, an affiliate advertising program designed to provide a means for us to earn fees by linking to Amazon.com and affiliated sites. As an Amazon Associate I earn from qualifying purchases.
How to Ferment Cabbage and Make Sauerkraut

Ingredients
- Fermentation crock
- Cabbage - amount varies based on your needs we used 3 large heads
- Large mixing bowl
- Kosher salt
- Kitchen scale
- 2 fermentation weights
- Medium saucepan
Notes
Instructions
- Start by boiling 6 cups of water with 1 tbsp of kosher salt till salt is dissolved. Allow to cool.
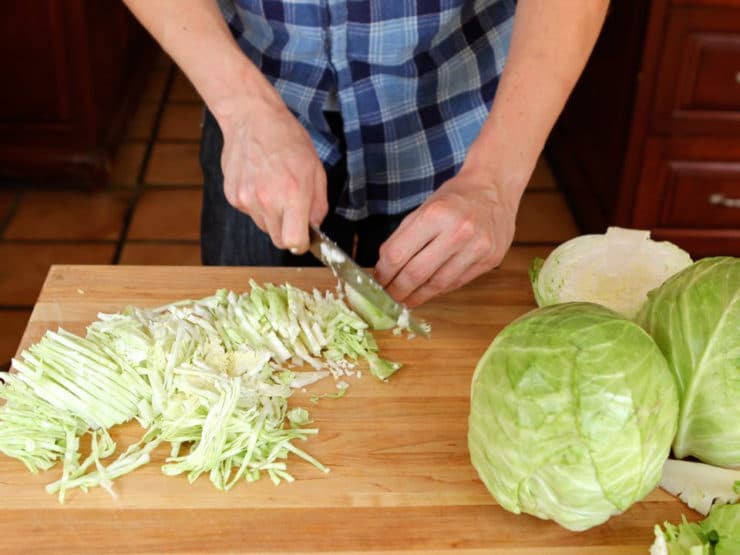
- Meanwhile, clean your cabbage and pull off 5-6 of the external whole leaves, set aside. Shred the remaining cabbage - for instructions on shredding cabbage, click here.

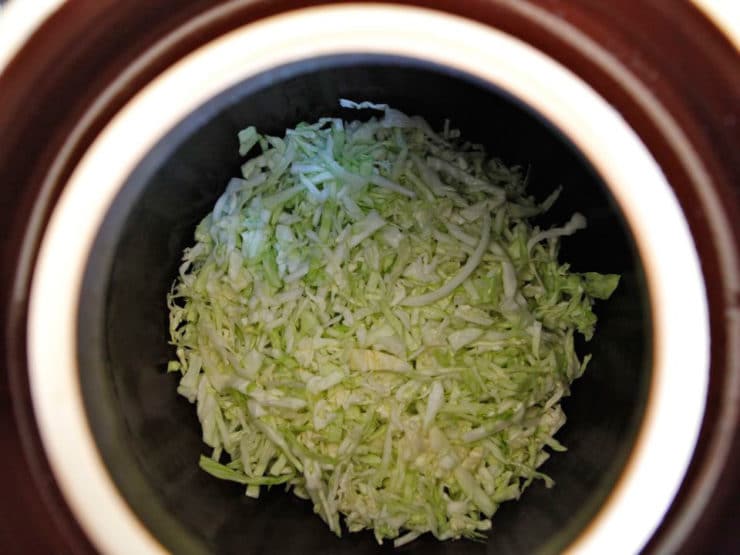
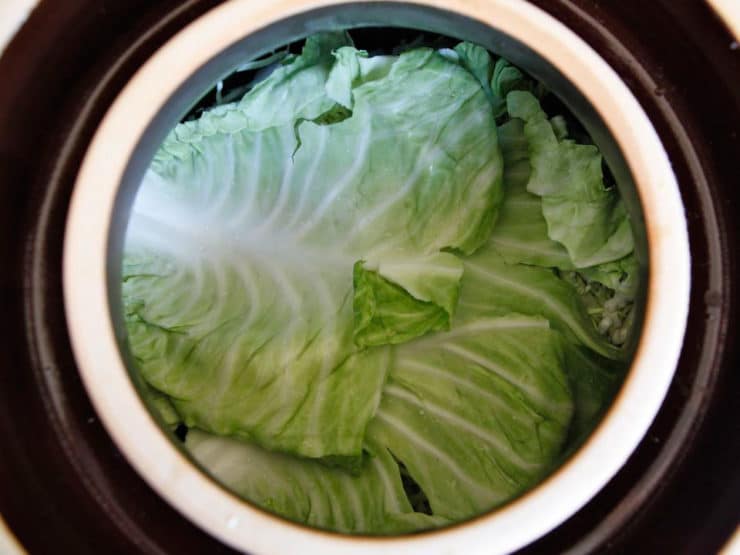
- Cover the bottom of your fermenting pot with 3-4 whole cabbage leaves. You will only need two layers of whole leaves in the crock, one on the bottom and one on the top.
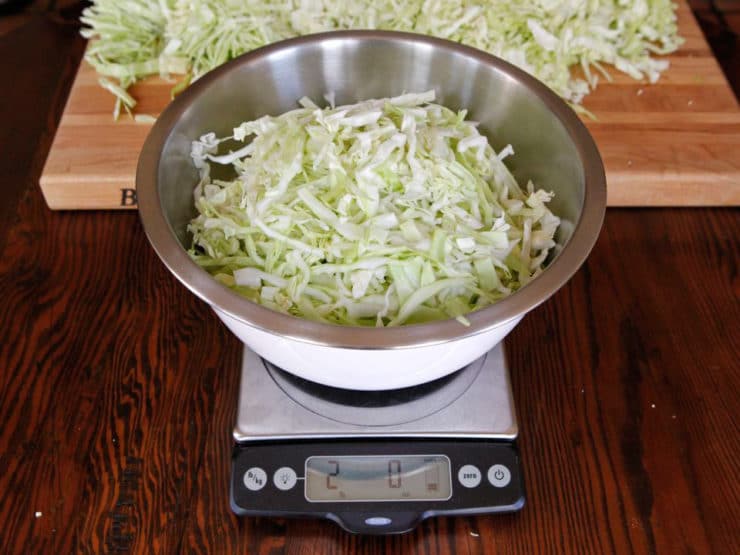
- You will need to salt the shredded cabbage before adding it to the fermentation pot. We found this is easiest to do in smaller batches, to keep the salting amount consistent and mixed throughout the fermentation crock. Measure out 2 pounds of shredded cabbage into a bowl (we zeroed our scale with the bowl on, then measured a 2 pound batch).
- Use clean hands to toss the shredded cabbage in the bowl with 1 tsp kosher salt.
- Place the salted, shredded cabbage into the fermentation pot on top of the whole leaves.
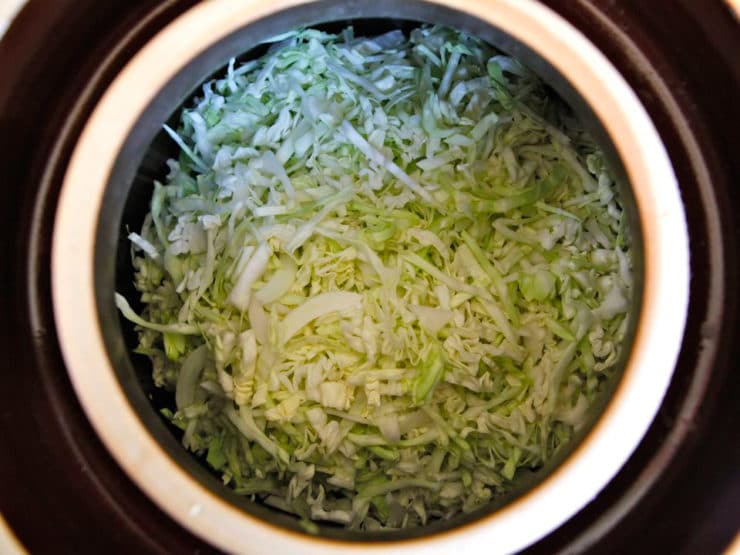
- Measure out another 2 pounds of the shredded cabbage and mix with 1 tsp of salt, then add to the fermenting pot. Repeat this process in batches until all of your shredded cabbage has been salted and added to the pot. Pack down the cabbage tightly, but do not crush the cabbage strips.
- Cover the top of your shredded cabbage with remaining whole cabbage leaves. These leaves will help to collect the yeast that may accumulate at the top of the crock, and can easily be removed and discarded after the fermentation process is complete.
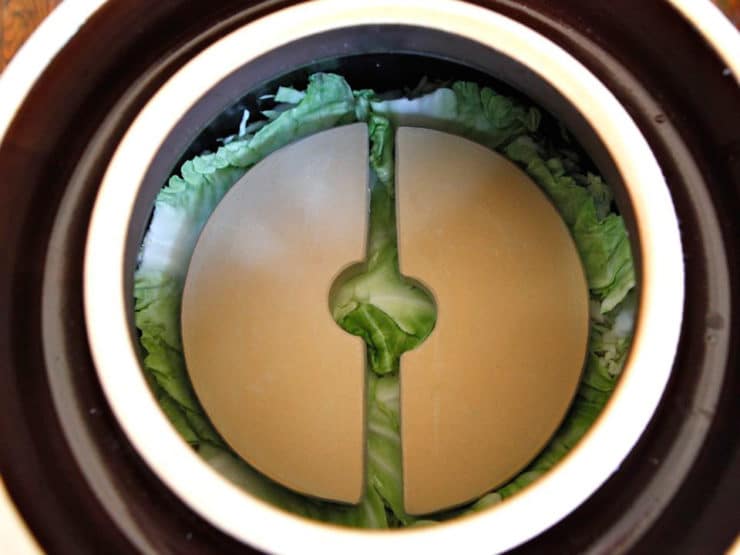
- Place stone fermentation weights on top of the whole cabbage leaves and press down, but not too hard. You don’t want to damage the cabbage.
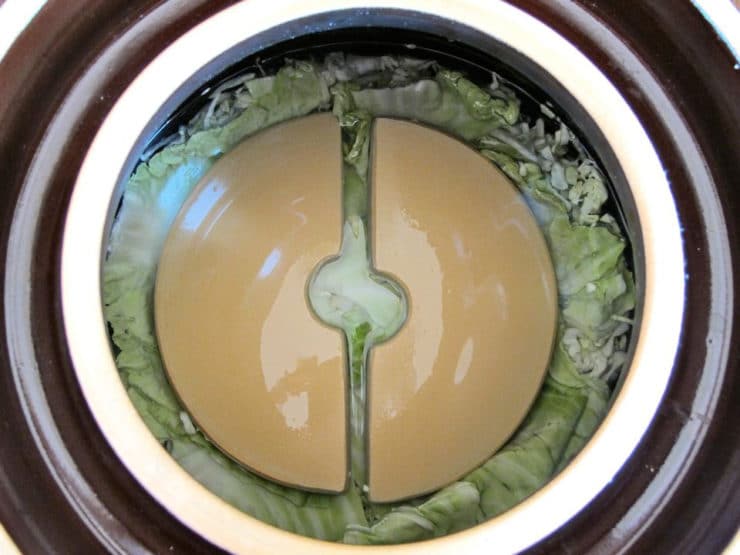
- Cover the fermentation crock with a lid. The salt will naturally draw some water out of the cabbage. After a few hours, check to see how much liquid has accumulated inside of the pot. It should be about 1-3 inches above the cabbage. If this hasn’t happened, add cooled, boiled salt water to the pot. We ended up needing about 3-4 cups of salt water. Pour it over the cabbage till it is submerged (you may not need to do this if your cabbage has created enough natural liquid). Reserve the remaining salt water.
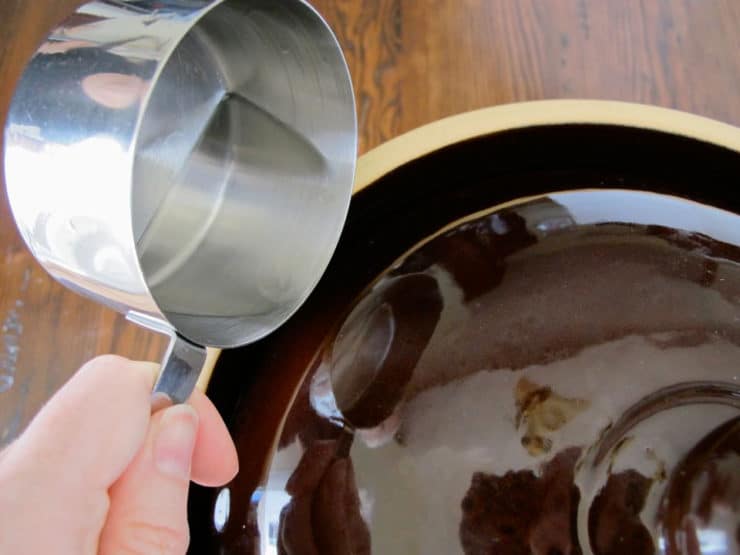
- Once the water level is where it should be, cover the pot and fill the channel around the lid with cooled salt water to create an airtight seal. This will keep oxygen out of the pot. Once this has been done, do not open the fermentation pot for at least 2 weeks. No peeking! Reserve the remaining salt water brine in a sealed container in the refrigerator; you will need it over the course of the next several weeks.
- For the first few days, store the pot in a warm place, between 68 and 72 degrees. After a few days have passed, listen for a fizzy, bubbling sound coming from the pot. This is good and means that fermentation has begun. If you don't hear anything, don't worry, it may just mean that the walls of your crock are too thick for sound to travel through. After fermentation has started, move the pot to a cool place, between 59 and 64 degrees, for the remaining fermentation time. If you don't hear anything after 1 week, go ahead and move the crock to a cooler location without waiting for it to sound bubbly.
- Check your water channel regularly to make sure that it's filled with salt water. At times, the pressure which builds up inside the crock can cause suction, which pulls the channel water into the crock (it happened to us a few days in). If this happens, pour more of the salt water into the channel to keep it full.
- After the first 2 weeks, check your sauerkraut’s brine level and skim off any yeast or bubbles that have gathered near the top. Be sure that your cabbage is always submerged in the brine. Fermentation breeds strange sounds and smells, so try not to worry about those. Close the fermentation crock again and refill the channel with salt water.
- Your sauerkraut should be ready in about 4-6 weeks. You will know for sure once bubbles no longer appear in the liquid. The longer you allow the cabbage to ferment, the tangier the flavor will be.


UPDATE: Our kraut turned out great! It took about 5 weeks to achieve the flavor and texture I was going for. This sauerkraut was so much better than the store-bought kind… it was salty, pungent and the lactic acid made it tingle on my tongue. It’s delicious and way cheaper than store-bought probiotics. Good for your gut, good for your tastebuds… can’t beat that!
Have you tried fermentation before? Did it turn out the way you hoped it would? What is your favorite fermented f


Friends of mine make sour kraut every year . This year it did not turn out it was not properly fermented. What could be the cause? I am Wondering if The cabbagr was treated beföre it reached the market
I made several batches in a gallon jar and was very pleased. Santa brought me a real crock and I just started a huge 4 cabbage batch. My spice combo is 1 Tblsp. juniper berries, 1 Tblsp. allspice berries. So far my favorites recipe is pork cops, Granny Smith apples and sauerkraut cooked slowly (325) for 3 hours. Absolutely delicious. I need more recipes because my volume is fixin’ to increase.
I like seared spareribs simmered in sauerkraut for a couple hours. We put the kraut over buttered mashed potatoes
Another is reuben rolls made with corned beef, sauerkraut and Swiss cheese. Make it cabbage roll style and bake covered for 45 min.
I have made your recipe 3 times, the first time in the Spring of 2017 and twice in the fall/winter 2017 and I just pulled the last batch out about 10 days ago and I am about to start batch 4 today. I absolutely love your recipe and how easy it is. I have about 4 quarts in the fridge right now. I have been letting mine go a few days over 6 weeks and it is sweet and tangy. My biggest struggle is finding a cool spot to leave it. I live in Southern California and a basement is not an option nor is a closet as I just don’t have the space. It sits in my dining room on a north corner and I keep an indoor/outdoor thermometer next to it. I do have to fill up the water seal frequently, but other than that it is one of those things you can set and forget. My friends and family love what I do with it. Store bought sauerkraut is a thing of the past for us.
Awesome Debbie! I’m in SoCal too. A dark pantry works for me. 🙂
Hey Debbie,
I just started my first batch of sauerkraut with this recipe.I also live in SoCal, and I’m a home brewer.Try leaving the fermenter in a bathroom, or a closet that is cool.I hope this helps.Cheers!?
How do you store the kraut after the fermintation process?
Hi John, I usually store mine in sterilized mason jars in the refrigerator.
I am excited to try this. I have been wanting to do sauerkraut and pickling. I decided to start from scratch so I made a small pickling crock (i am a professional potter) My crock will be done tomorrow and I will start my first batch. I bought a crock too but want to use my own first. I am hungry just thinking about it!
We make
I forgot to save cabbage for the top and the bottom can I use cheesecloth instead?
Hi,
thanks for your great info. Was following your recipe and realize I don’t have a water channel on my crock. Can it still work?
Is the difference between using a crock and using a mason jar basically just the size of the ferment? Does using something like a crock change the flavor of the end product at all? Thank you for sharing your recipe! I definitely can’t wait to try this at home!
Hi Billy, Tori’s assistant Ashley here. People who do a lot of fermenting often prefer a crock for it’s size. It also gives more depth to the flavor. But a jar is just fine and will also give great results!
Hi all!
I’ve used this recipe for the last 3 years and it has turned out perfectly every time. Because I’m using the fermentation method rather than adding vinegar and canning it, I normally store it in glass pints and put them in the freezer. It doesn’t kill off the lactobacillus like it does through the cooking process which is so much better for your health. I DON’T own a ceramic crock and have used a 5 gallon pickle container each time with a plate that fits down over the top of the cabbage leaves, and a very clean brick wrapped in foil to hold the plate down on the top. Even with my rather off beat method of making sauerkraut, it still works. The first time, I was a bit worried because no bubbles or fizzing but I persevered, waited the six weeks and it turned out amazing anyhow. Thanks for the recipe!
I suggest a bit of research on the foil. Especially in light of the association of Alzheimer’s and aluminium. I wouldn’t use it. My dad just put a clean rock on top of a ceramic platter. Just a footnote, no pun intended, at the age of 5 my older brother scrubbed my feet and made me the “stomper” in our 55 gallon rain barrel of kraut, as dad shredded the cabbage with our antique shredder and filled the barrel. He and my 11 siblings claimed it was the best kraut ever. Guess he should know, he was German!
Hi Eisel
You seem to be knowledgeable in this area and I am not!
I found one of those crocks at an estate sale. The next day, five weeks ago I went and bought four heads of cabbage. I followed the instructions. It burped, etc.
Opened it at two weeks no scum.
I opened it again and it smells good, so I put it on a slice of good rye bread with a sliver of beef off of tonight’s pot roast.
1. Is it supposed to be crunchy?
2. My cabbage is wider than commercial sourkraut. Is this okay?
3. It’s a lot of kraut… can I leave it the crock as long as the brine covers it?
I live near Memphis and understand southern cooking, creole etc, we have a family tradition of homemade kraut, but
my aunts have passed on twenty five years ago.
It taste good – I guess it’s okay?
Jack
Hi, I am making pickles for the first time in a fermenting crock. I put in gherkins, garlic, dill and pickling spice. I missed the part about not peeking and peeked 2x (on day 2 and 3). Will my pickles be OK? Thanks! What could go wrong? Can you get botulism?
Just make sure to taste them on day 6 . My water sealed crock is a few days faster than the open crock ! It’s best to keep it sealed but I don’t think you should worry about peeking. I’ve used open crocks since the 80’s and only five years with a sealed one. Good luck .
Dr. Jonathan Lamb, professor at Vanderbilt University, recounts that CPT James Cook took 7,860 pounds of sauerkraut on his voyage to the South Seas and not one of his sailors died of scurvy while they were gone. While Cook used the fermented vegetable to keep his crew healthy during the long sea voyages, he was not the first explorer to do so. Some researchers believe that fermented foods came into Eastern Europe because of the raids of Genghis Khan. Asian peoples eat kimchi. Many service members have been introduced to this dish while serving overseas in Korea. I make a very simple version that does not have the pungent aroma found in more ethnic versions. Historical records have shown that the workers building the Great Wall of China ate fermented cabbage during the cold seasons when fruit was not available. Talk about a stressful and intense work environment, that would have been it.
Levels of vitamin C in fermented sauerkraut range from 57 to 700 mg per cup. Now, before you go running out to buy multiple flats of canned sauerkraut, remember that heat decreases the level of vitamin C in veggies. The type of sauerkraut Im talking about here is the lacto-fermented kind that uses no heat in the process. Raw cabbage has a moderate amount of C in it, about 30 mgs, but the level spikes when lacto-fermentation is done. Red lacto-fermented cabbage has been found to have the highest C values, at around 700 mg per cup. This type of sauerkraut has the fiber and the probiotics that improve digestion and maintain bowel health and protects against many diseases of the digestive tract. Traditionally, lacto-fermented sauerkraut has been used in studies in Europe as an aid to cure stomach ulcers.
Lacto-fermentation of the cabbage is not a fast process. It occurs over days and weeks. The cabbage is sliced thin and layered with water and salt, left at room temperature with a weight to press down the cabbage and keep it under water. A breakdown of the sugars happen, and then the process of growing the probiotics occurs. It is then packaged into jars in its own brine solution, and it can then be refrigerated to preserve the vitamins and enzymes. The Lehmans Non-electric catalog from Kirdron, Ohio has sauerkraut crocks and various books on making and storing sauerkraut. Note that it is not only cabbage that can be fermented. Other vegetables, such as red beets, turnips, red peppers, daikon radish, and carrots all have vitamin C levels raised when fermented in the traditional way.
As I stated earlier, it only takes about 10 mg to keep scurvy at bay; however, you will need considerably more in your diet to function at the optimum level needed in a SHTF scenario. Whether you get it from multi-vitamins, supplements, or in your daily food, you should have a plan for it.
I read through post I learned a lot thank you Larry t . I found at garage sales good size ceramic canisters that works with making krout cheap to Larry t
Thanks for the post. We love sauerkraut and I’ve been making it for 30 years from a foolproof recipe pased down by my grandmother from eastern Europe and it has never failed or molded, or had anything that had to be skimmed off the top. Plus, the sauerkraut juice is just as healthy and delicious as the sauerkraut and kept many colds away over the years. I make it every few months in large glass wide mouthed jars (walmart or target). My jar can hold Two medium sized heads of cabbage. The process is Super simple. Put 3-4 peeled garlic cloves in the bottom of the jar with a few sprigs of washed fresh dill or about a teaspoon of dill seed (or caraway), put a few handfuls of shredded cabbage in the jar, sprinkle lightly with sea or kosher salt and pack it down tight, repeat until jar is almost full – about an inch and a half from the top. Now fill with filtered water. I cover with fabric mesh held with a rubber band in place for air flow. Every day, once or twice a day, pour the brine water into a big bowl, then pour the same brine water back again. The aeration moves everything around evenly (i.e. The white stuff that forms on the bottom of the jar gets redistributed throughout and helps ferment it faster. Depending on the temperature, it will be ready in 5-10 days. May have to top it off with extra brine water to make sure the cabbage stays submerged. I keep mine on the kitchen countertop with a plate underneath the jars to catch any spills and until ferment is done, then put it in fridge with a tight lid to keep the smell in. It keeps for months and our favorite way to eat it is as is, dressed with some olive oil.
Hi Erica,
My name is Darlene I got a big glass jar about 3 gal. I think and u put 6 to 7 lbs not weighed just approximately 3 tbs pickling salt to app 5 lbs. Had to add some brine and this is by no means full m a little less than half full. No bubbles I have a bag of brine I n it and then a saucer on top of that. I put foil over the top and then the glass lid that just sets on top. I probably didn’t search enough but can you help since you used a jar too. Thank you.
This is what I was looking for thanks for posting.
I’d avoid using foil as the salt can react with the metal to give a bad taste – though I have not tried the foil… just because I think metal and brine is a bad idea.
What temperature do you use for fermentation? We are from south Florida and the temperatures that have been mentioned are much lower than we experience without refrigeration. Anneg
South Florida doesn’t provide for the fermentation temperatures that are mentioned in your blog or the comments. The cost of air conditioning is prohibitive and we don’t have cellars. What suggestions are there for fermentation (which I could in a small bar refrigerator) do you have? However, it seems that air flow is necessary for the process which wouldn’t happen in the bar refrigerator.
Has anyone ever seen large amounts of salt resembling a spider Web on the outside of the fermentation lid? Been at this a while and happens every time I make a batch. Doesnt ever taste too salty in the end though.
I needed to add about 14 cups of brine to a 10 liter polish crock. The initial liquid never showed after 4 hours. Does this sound right?
Dennis
Bonney Lake, Washington
Great post! I adore sauerkraut, but haven’t had much luck trying to make it. I used a mason jar though as opposed to a fermenting crock; is there a big difference between using a crock and a jar? It seems to me that a crock would be better because it would protect the kraut from the light and maybe keep the environment more stable?
The crock is more temperature stable and allows you to make a much bigger batch at once.
This is an airtight method and yes, it takes 4-6 weeks. However, you can air ferment your cabbage is 3 days. You need an enameled stock pot. Mix chopped cabbage with salt and put in th pot under a weight. The difference: it has to be mixed daily to let th air in. In 3 days put in jars and refrigerate. This is how it’s done in Russia.
Going through your wonderful article, I clicked on the link to the pot you bought and it is not the same as yours. Do you have the name of yours? I like that it has a wider top. Some of the ones I have been looking at have a narrower top. Hard to see in. Good friends gave us her Grandmother’s huge Redwing Crock, 24″ across and about 3 1/2′ tall. We like making kraut in it, but it’s so big and heavy. We were thinking about buying a smaller one… the 15 liter size would be perfect for us.
I think they modified the style of the crock we were using, I am not sure if they still offer the style that I have. If I find it I will post!
Tori,
How many liters is your fermenting crock? I may have missed it but I do not want to get too small .
Hi Lynn, mine is 10 liter. Here is a similar crock: https://www.amazon.com/TSM-Products-31061-Fermentation-10-Liter/dp/B00JG7CHLI?tag=theshiintheki-20
Thanks for such a detailed blog. The first problem I have in this recipe and tonnes of them online is the easily ignored fact about not giving proper measurements when saying 6 cups of water. How much exactly is a cup measure as??!! Every house has a cup with a different volume. Why don’t you give a proper measure for your “cup”! And in general my disappointment of finding the usage of “cup” so prevalent in almost every recipe/website I see. It really does wreck your effort if you use the wrong volume in the cup!
S D’Souza, I can see that might be confusing – however a “cup” is a standard measurement in America, so when you read cup it is always the same volume – 8 fluid ounces or 235 milliliters.
I agree, the metric system is easier to use for liquid and dry ingredients.
All the measurements given in the recipe are standard English measures – pounds, teaspoons, inches, even temperatures in degrees Fahrenheit. Wouldn’t it follow that the cups would indicate a standard English measure? As far as “metric is easier,” I have found that those who use the metric system are much more familiar with converting to standard English measure than the other way around. Let me assure you, in the United States, the metric system is *not* easier to use. We can’t even buy measuring cups, spoons, etc. in metric measures.
Just an FYI for this thread- I am working on converting all of my recipes to a new system, which will give users the option to choose metric or standard measurements, as well as adjust amount of servings.
I’m thinking of fermenting in a five liter crock and then transferring to jars in the fridge after six weeks as the crock is too big. Will the sauerkraut still need to be totally submerged in brine with weights, or is it okay to store it dry after the initial fermentation has taken place?
I’ve had good luck by fermenting in a large container then transferring to quart jars and storing in the fridge for at least 2 months. I do not heat seal jars, just clean jars with screw on lids. Delicious