Falafel! It’s one of my all-time favorite snacks. This homemade falafel recipe has hundreds and hundreds of positive reviews. Why? Because it’s just that delicious!
Making authentic, traditional falafel is an interesting process, and it may be brand new to you. Never fear! I am here to walk you through each step, so you can achieve crispy, tender, tasty falafel every single time.
What is Falafel?
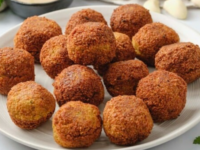
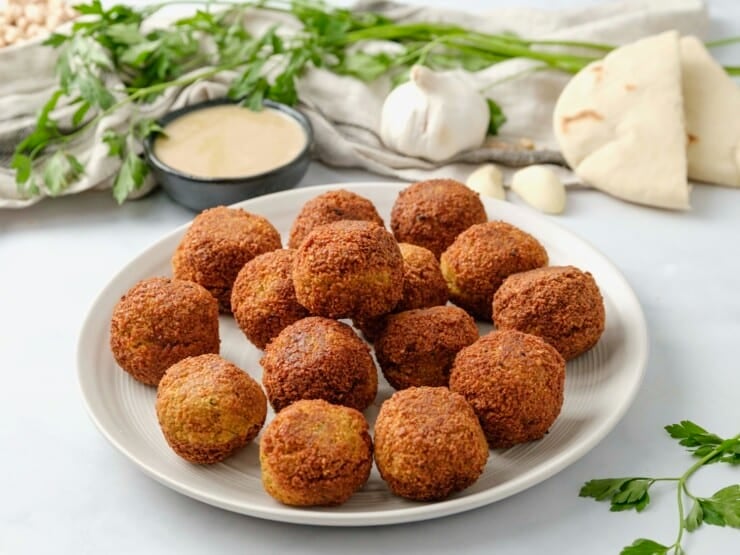
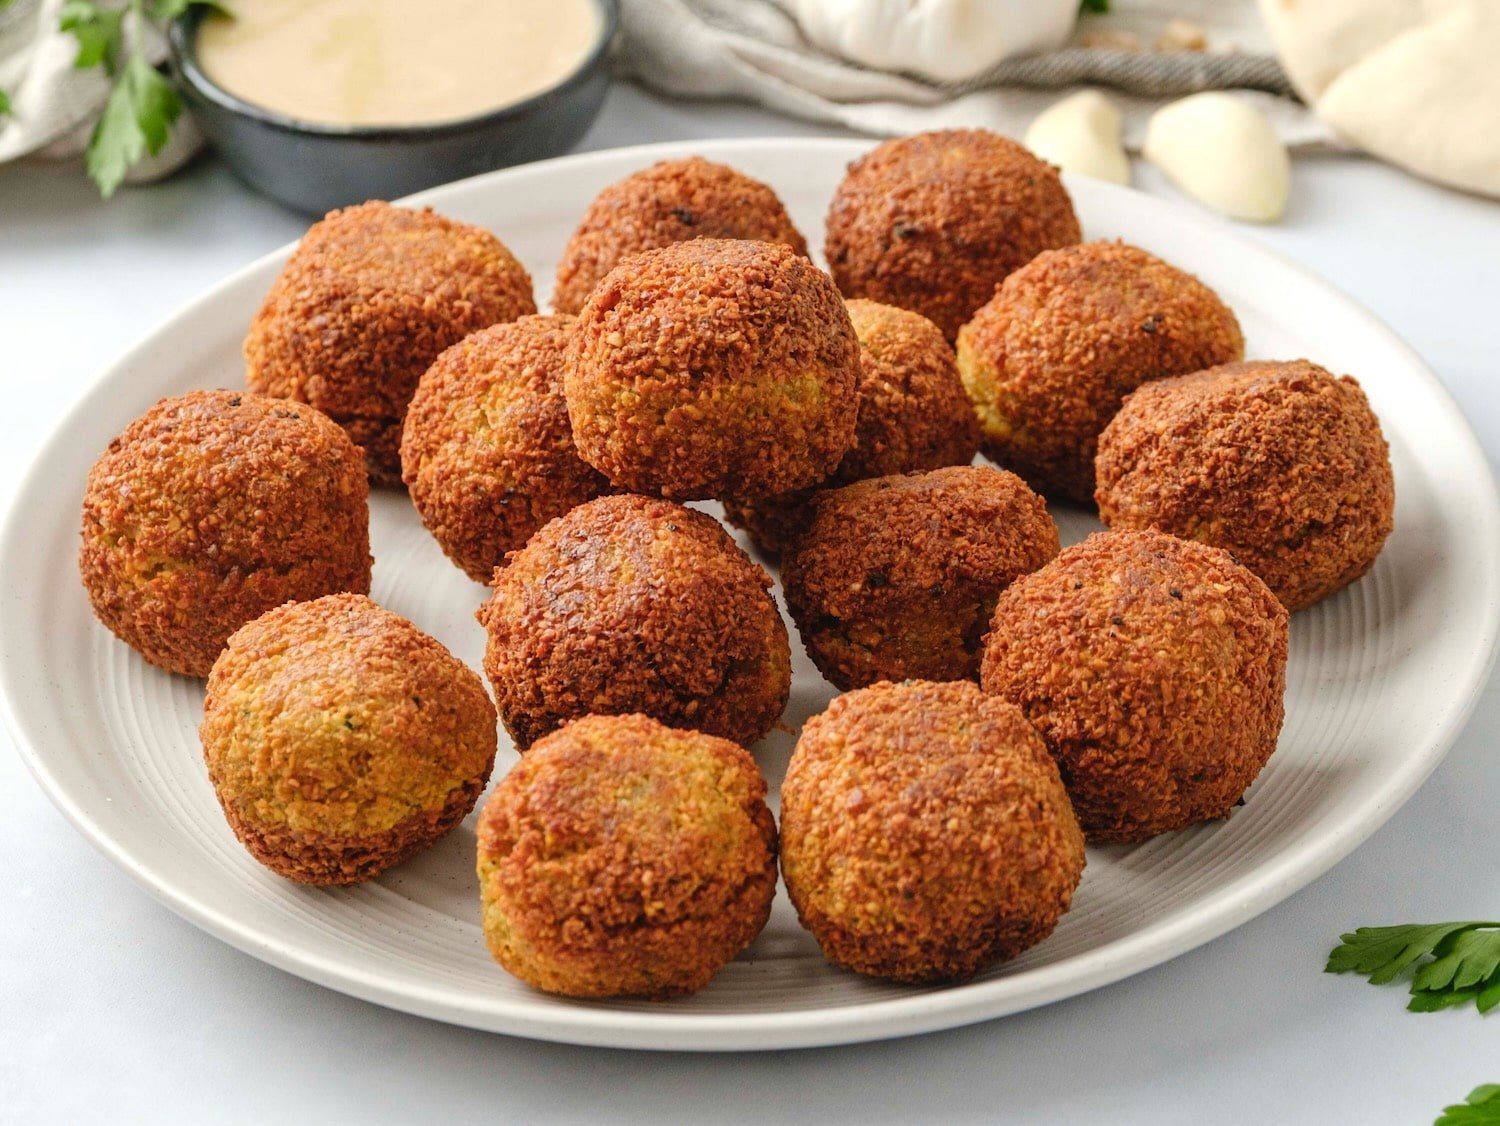
Falafel are crisp and delicious deep-fried legume fritters made with beans, spices, onions, and herbs. Legumes are well-soaked, then ground up and mixed with other ingredients. Next, the mixture is formed into small balls or patties, then fried in hot oil. The pre-soaked legumes are cooked during the frying process.
Most falafel today is made with chickpeas (aka garbanzo beans). However, in Egypt and other areas of the Middle East, fava beans are the legume of choice. It is often served alongside other popular regional Mediterranean recipes like hummus, as well as shawarma made from lamb or chicken.
The History of Falafel
This Middle Eastern food has a very long history. The word falafel may descend from the Arabic word falāfil, a plural of the word filfil, meaning “pepper.” Legume fritters, including versions made with fava beans and lentils, have existed in the Middle East for thousands of years.
According to The Encyclopedia of Jewish Food, written by my friend Gil Marks: “The first known appearance of legume fritters (aka falafel) in the Middle East appears to be in Egypt, where they were made from dried white fava beans (ful nabed) and called tamiya/ta-amia (from the Arabic for ‘nourishment’); these fritters were a light green color inside. Many attribute tamiya to the Copts of Egypt, who practiced one of the earliest forms of Christianity. They believed that the original state of humankind was vegetarian and, therefore, mandated numerous days of eating only vegan food, including tamiya.”
Likewise, the Torah, the Song of Songs, the Mishnah, and the Talmud all mention deep-fried lentil fritters, known as “ashishim.” This means early forms of falafel were enjoyed in this region since biblical times, at least. That’s some pretty ancient falafel!
Ingredients and Notes
Please be sure to scroll down to the recipe card for the complete details!
- Chickpeas – I use chickpeas because they’re easy to find, and they’re tasty! Follow my tips to cook and soak dried chickpeas. Do not use canned chickpeas; they will not give you the proper result – you need to start with uncooked chickpeas. If all you have on hand are canned chickpeas, try this very delicious and falafel-like spicy panko chickpea patties recipe instead!
- Onion and Garlic – These ingredients add a pungent, sweet, savory taste. I like white onion, but yellow onion will also work. Then, I use roasted garlic cloves for extra depth.
- Herbs and Spices – Fresh parsley, salt, ground cumin, ground coriander, black pepper, cayenne pepper, and ground cardamom create the warm, savory flavor found in falafel recipes all over the world.
- Flour – Use all-purpose flour or chickpea flour to keep this recipe gluten-free. This absorbs any excess moisture and helps the falafel balls hold their shape.
- Leaveners – I use baking soda in the soaking water for the chickpeas to help soften them. You can also add baking powder in the falafel balls. This helps to create super tender, fluffy falafel.
- Oil – Use a neutral oil with a high smoke point for frying. I prefer avocado oil, but grapeseed oil, sunflower oil, canola oil, and peanut oil all work.

How to Make Authentic Fried Falafel Balls
Homemade falafel can be a little time-consuming. So, make sure to read through the entire recipe and plan ahead accordingly!
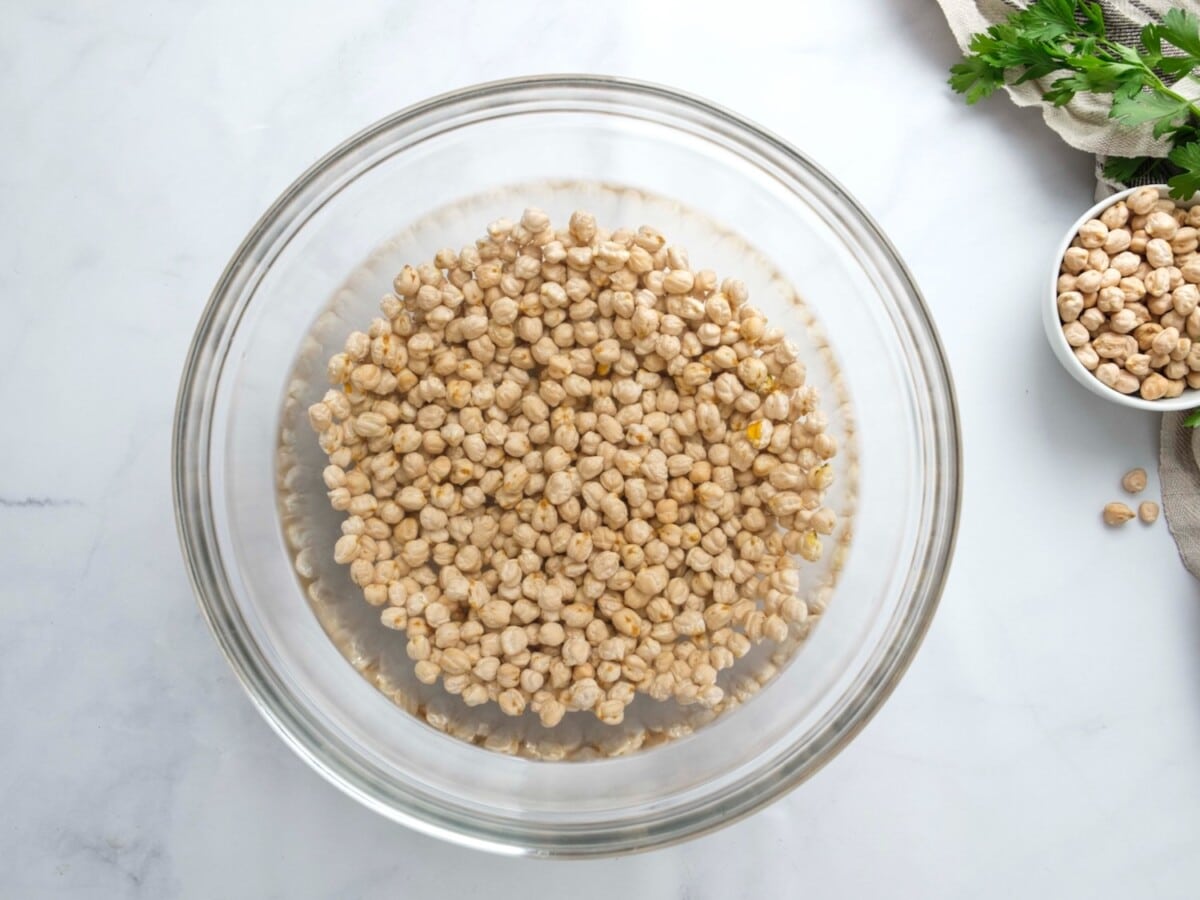
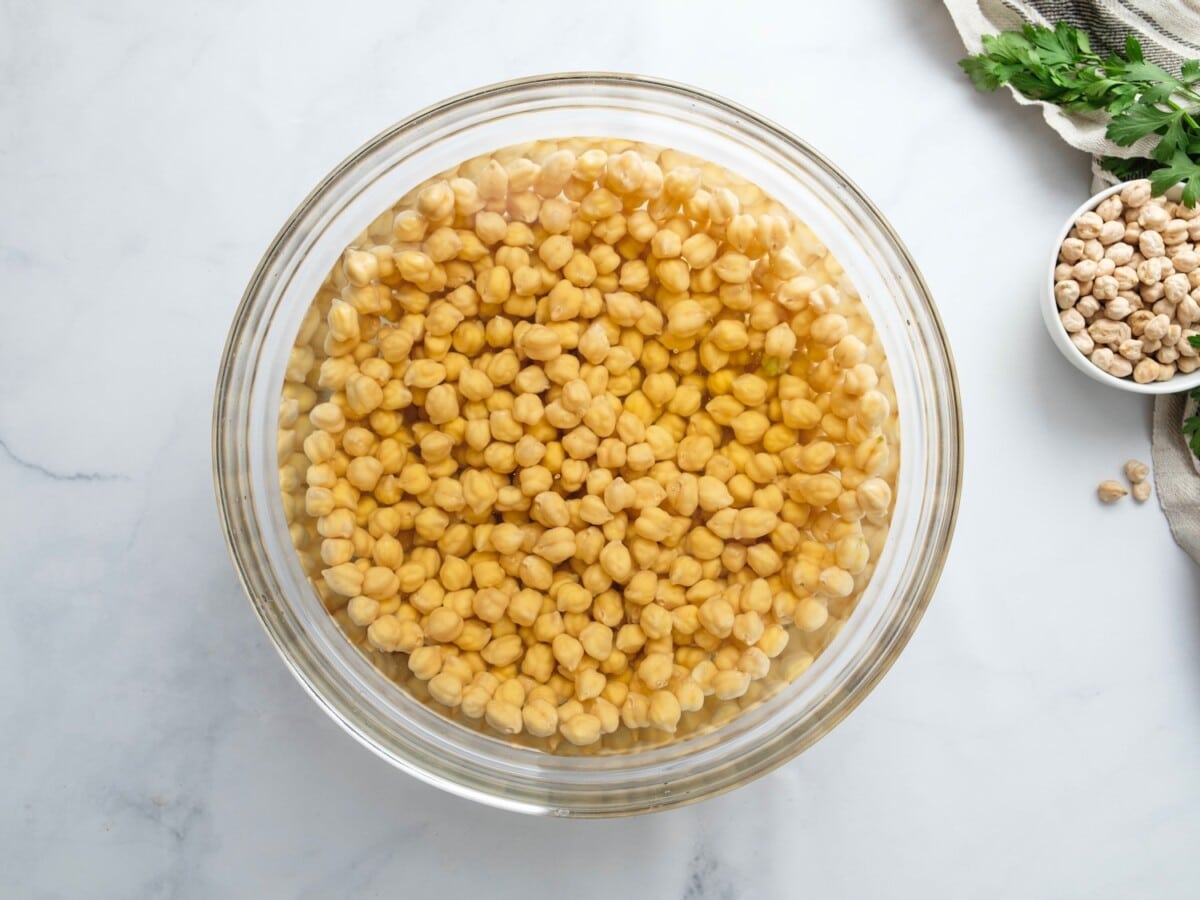
- Soak the chickpeas. Submerge the chickpeas in cold water, and add baking soda. Cover the bowl, and chill in the fridge for at least 12 hours or ideally up to 24 hours. This helps soften them, making them easy to blend.
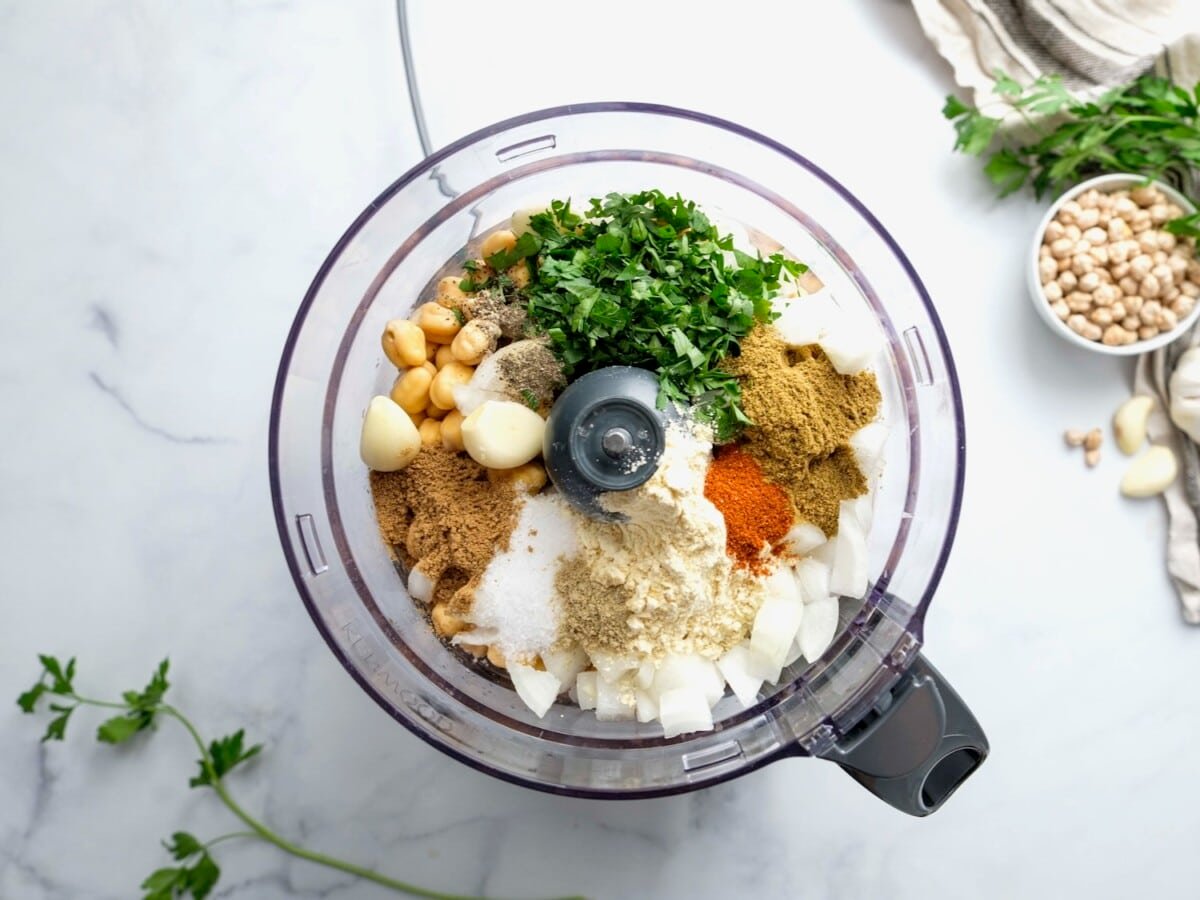
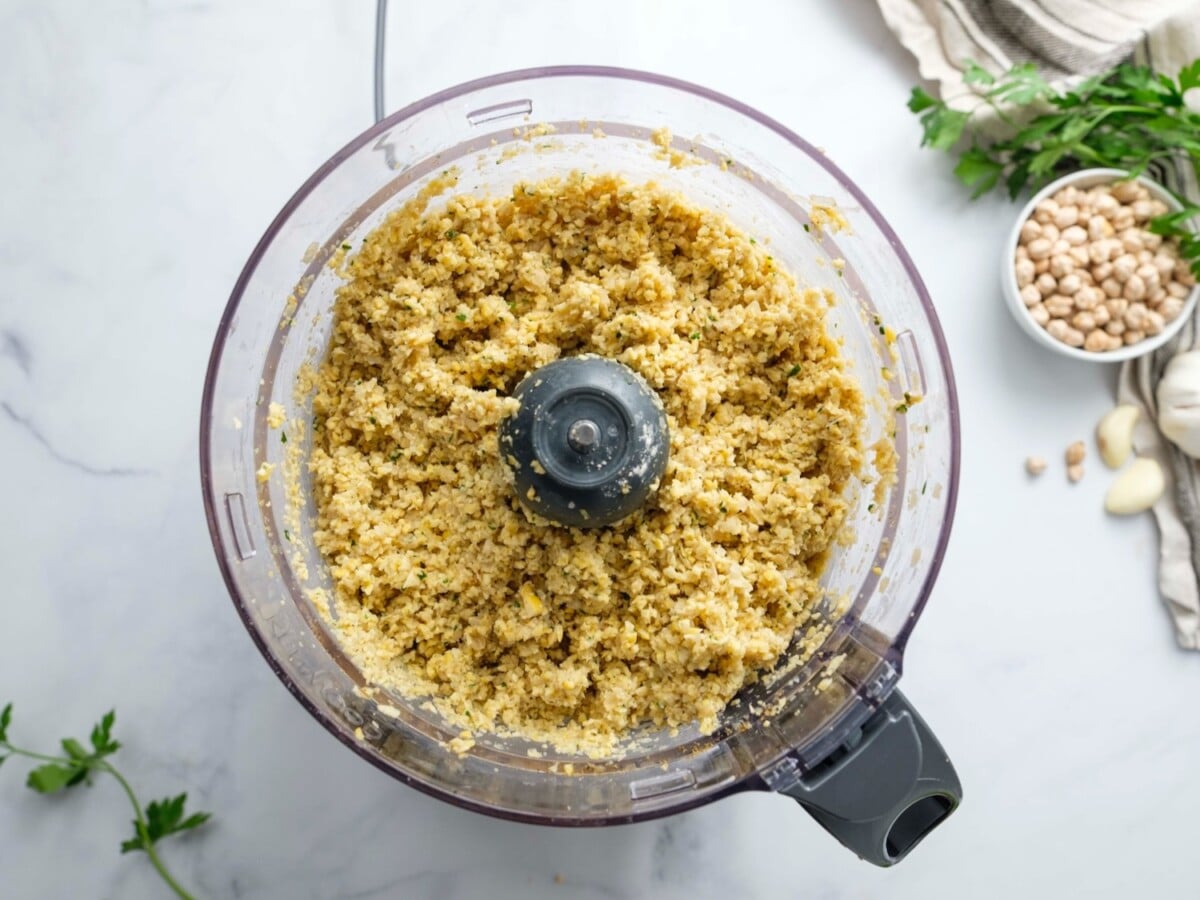
- Combine and blend. Drain and rinse the chickpeas. Then, add them to a food processor along with the other ingredients. Pulse until a rough, coarse meal forms. Stop and scrape the sides of the bowl as needed to ensure all the ingredients are well incorporated. Be careful not to overprocess! The mixture should have a paste-like consistency, but shouldn’t be so smooth that it turns into hummus.
- Chill. Transfer the chickpea mixture to a bowl, and stir with a fork to remove any remaining chunks. Then, cover and refrigerate for 1-2 hours.
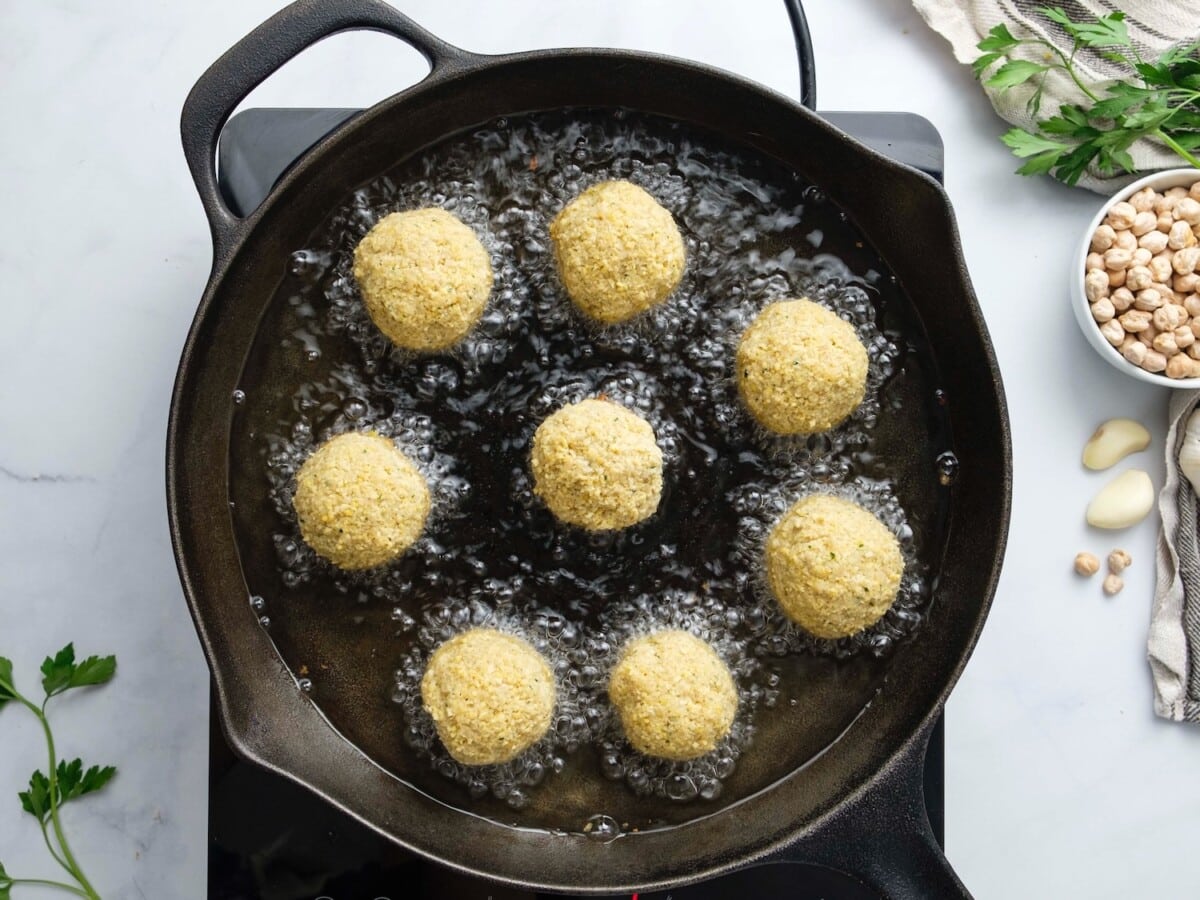
- Fry. Heat oil in a skillet over medium heat. In the meantime, portion the falafel mixture into equal-sized balls or slider-shaped patties. Then, fry on each side until golden brown, working in batches as needed. Drain them on a paper towel-lined plate, and enjoy!
Tori’s Tips for the Best Crispy Falafel Recipe
- Divide the mixture. If you have a small food processor, divide the falafel ingredients in half before pulsing.
- Use a deep fry or candy thermometer. The ideal temperature to fry falafel is between 360 and 375 degrees Fahrenheit. The best way to monitor the temperature is to use a deep fry or candy thermometer to check the oil before frying.
- Portion evenly. I like to use a tablespoon or a falafel scoop to portion the falafel balls into equal-sized pieces and roll them between wet hands.
- Test a single falafel before frying the rest. I like to fry a test one in the center of the pan. If the oil is at the right temperature, it will take 2-3 minutes per side to brown (5-6 minutes total). If it browns faster than that, your oil is too hot, and your falafels will not be fully cooked in the center. Cool the oil down slightly and try again.
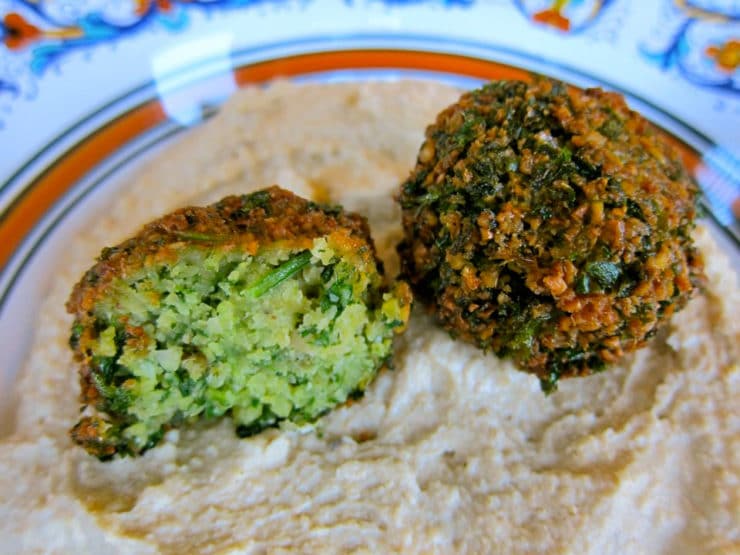
- Add flavor. I like to dip my falafel balls in sesame seeds before frying for a little extra crisp and nutty taste. However, I’ve also tested different flavor variations, adding chopped parsley or fresh cilantro or turmeric, and they all taste great. (See the recipe card below for details!)

Serving Ideas
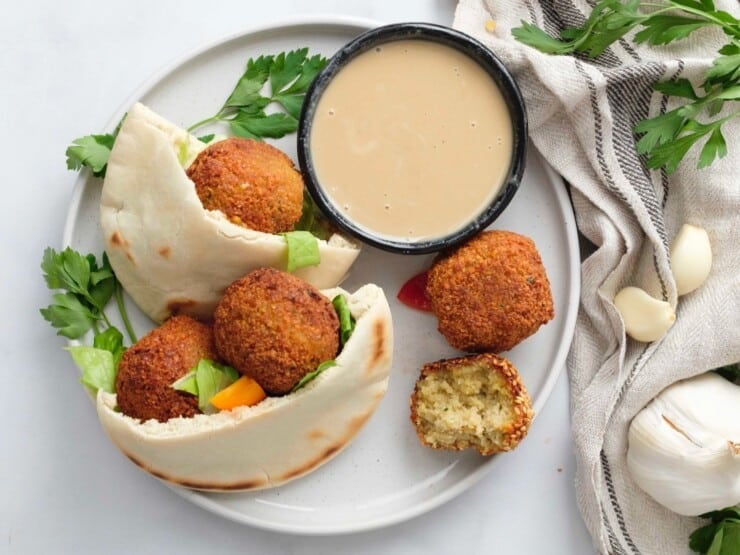
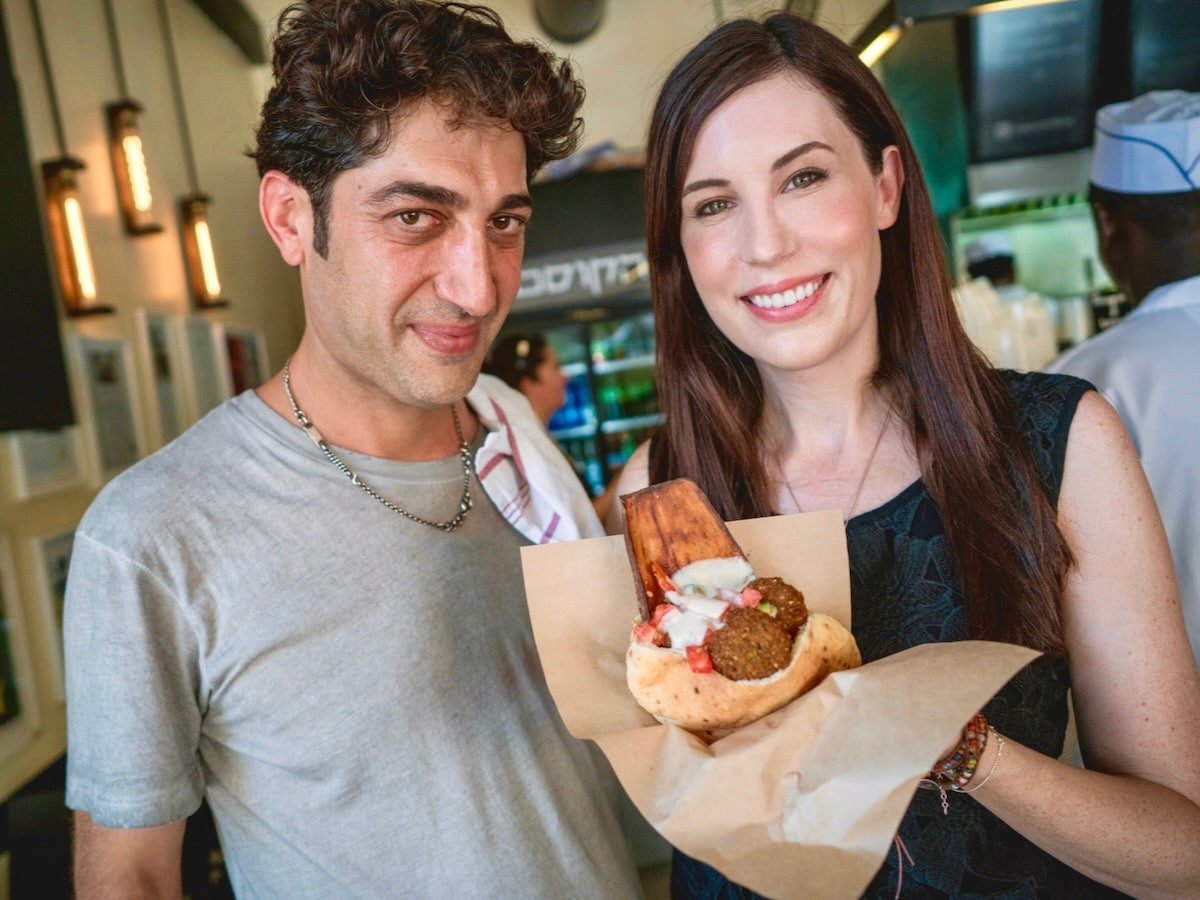
My favorite way to serve homemade falafel is as a falafel sandwich. To do so, I use flatbread or slice warm pita bread in half to form two “pockets.” Then, I stuff them with the falafel balls and add-ons such as tahini sauce, Israeli salad, hummus, baba ganoush, or tabouli, and vegetables like shredded lettuce, tomatoes, red onions, and dill pickles.
Sometimes I also like to add sprouts, cucumber slices, roasted peppers, roasted eggplant slices, sunflower seeds, French fries, feta cheese, and yogurt or tzatziki for extra taste and texture.
Or, start with a large bowl and a base of lemony saffron couscous, cauliflower couscous, quinoa, or saffron rice, then add fresh veggies and all your favorite toppings.
Falafel balls are also great to serve as an appetizer or side dish with dips and main courses. Or, add them to a mezze platter for a party spread.
Falafel
Ingredients
- 1 pound dry chickpeas (also known as garbanzo beans) – you must start with dry, do NOT substitute canned, they will not work!
- 1/2 teaspoon baking soda
- 1 small onion, roughly chopped
- 1/4 cup chopped fresh parsley
- 3-5 cloves garlic (I prefer roasted garlic cloves)
- 1 1/2 tablespoon flour or chickpea flour
- 1 3/4 teaspoon salt
- 2 teaspoon cumin
- 1 teaspoon ground coriander
- 1/4 teaspoon black pepper
- 1/4 teaspoon cayenne pepper
- Pinch of ground cardamom
- 1 teaspoon baking powder (optional – makes the falafel more fluffy)
- Vegetable oil for frying – avocado oil, grapeseed oil, sunflower oil, canola oil, and peanut oil all work well (I prefer avocado oil)
Instructions
- One day ahead: Pour the chickpeas into a large bowl and cover them by about 3 inches of cold water. Add 1/2 tsp of baking soda to the water and stir; this will help soften the chickpeas. Cover the bowl and let them soak overnight in a cool, dark place or chill in the refrigerator. The chickpeas should soak at least 12 hours and up to 24 hours, until tender (change soaking water for fresh water after 12 hours).

- They will double in size as they soak – you will have between 4 and 5 cups of beans after soaking.
- Drain and rinse the chickpeas well. Pour them into your food processor along with the chopped onion, garlic cloves, parsley, flour or chickpea flour (use chickpea flour to make gluten free), salt, cumin, ground coriander, black pepper, cayenne pepper, and cardamom. Note: if you have a smaller food processor, you will want to divide the ingredients in half and process the mixture one batch at a time.
- Pulse all ingredients together until a rough, coarse meal forms. Scrape the sides of the processor periodically and push the mixture down the sides. Process until the mixture is somewhere between the texture of couscous and a paste. You want the mixture to hold together, and a more paste-like consistency will help with that… but don't over-process, you don't want it turning into hummus!
- Once the mixture reaches the desired consistency, pour it out into a bowl and use a fork to stir; this will make the texture more even throughout. Remove any large chickpea chunks that the processor missed.Cover the bowl with plastic wrap and refrigerate for 1-2 hours.Fill a skillet with oil to a depth of 1 ½ inches. Use cooking oil with a high smoke point (oil suggestions can be found in the ingredient list). Heat the oil slowly over medium heat. The ideal temperature to fry falafel is between 360 and 375 degrees F; the best way to monitor the temperature is to use a deep fry or candy thermometer. After making these a few times, you will start to get a feel for when the oil temperature is "right."Meanwhile, form falafel mixture into round balls or slider-shaped patties using wet hands or a falafel scoop. I usually use about 2 tbsp of mixture per falafel. You can make them smaller or larger depending on your personal preference. The balls will stick together loosely at first, but will bind nicely once they begin to fry.
- If the balls won't hold together, place the mixture back in the processor again and continue processing to make it more paste-like. Keep in mind that the balls will be delicate at first; if you can get them into the hot oil, they should bind together and stick. If they still won't hold together, you can try adding 2-3 tbsp of flour or chickpea flour to the mixture. If they still won't hold, add 1-2 eggs to the mix. This should fix any issues you are having.Before frying my first batch of falafel, I like to fry a test one in the center of the pan. If the oil is at the right temperature, it will take 2-3 minutes per side to brown (5-6 minutes total). If it browns faster than that, your oil is too hot and your falafels will not be fully cooked in the center. Cool the oil down slightly and try again.
- When the oil is at the right temperature, fry the falafels in batches of 5-6 at a time until golden brown on both sides. Once the falafels are fried, remove them from the oil using a slotted spoon. Let them drain on paper towels.
- Serve the falafels fresh and hot; they go best with a plate of hummus and topped with creamy tahini sauce. You can also stuff them into a pita.
- SESAME FALAFEL VARIATION: After forming the balls or patties, dip them in sesame seeds prior to frying. This will make the falafel coating crunchier and give it a slightly nutty flavor.

- HERB FALAFEL VARIATION (GREEN FALAFEL): Add ½ cup additional chopped green parsley, or cilantro, or a mixture of the two prior to blending.
- TURMERIC FALAFEL (YELLOW FALAFEL): Add ¾ tsp turmeric to the food processor prior to blending.
- HOW TO MAKE A FALAFEL PITA: Making a falafel pita is actually really simple. The two main ingredients are pita bread and falafel. Cut the pita bread in half to form two “pockets.” Each pocket is a serving size. Stuff the pocket with falafel, as well as any add-ons you fancy.Here are some traditional add-ons that can be added to your pita: tahini sauce, shredded lettuce, diced or sliced tomatoes, Israeli salad, onions, dill pickles, hummus, tabouli.Here are some less traditional add-ons that are also tasty: sprouts, cucumber slices, roasted peppers, roasted eggplant slices, sunflower seeds, french fries, feta cheese, yogurt, tzatziki.


NOTES
Nutrition

tried this recipe?
Let us know in the comments!
If you enjoyed this recipe, I’d love it if you left me a star rating and comment below. Also, don’t forget to share and tag us on Facebook and Instagram!
FAQs
This recipe is best served right away. However, you can store cooked leftovers in an airtight container in the fridge for 2-3 days.
I’ve never tried freezing this recipe, but some readers have had good luck with freezing both the uncooked chickpea mixture and the cooked falafels.
Personally, I don’t like baking this recipe, finding that it tends to dry out. However, if you want to give it a try, prepare and shape the falafel dough into patties as usual.
Then, arrange them on a greased or parchment-lined baking sheet, and brush the top of each falafel patty with extra virgin olive oil. Bake in the oven at 400 degrees Fahrenheit for 20-25 minutes, turning halfway through, until golden. If you read through the comments, you’ll see tips from some readers who have tried this method with some success.


We made these again today. Irresistible!
i’ve made this so many times and have been remiss in not leaving you a comment on how fantastic your recipe is! thank you!
I left the mixture in the fridge overnight when I got distracted which was fine. then I used an ice cream scoop with the lever that pushes the ball out and it worked great. Much less mess. Use your palm to firm it in.
Also forgot the parsley but it was yummy anyway. baking powder helps if yours are dense.
I went against my instincts and followed the recipe exactly – and they’re bland. Good texture, but needs at least double the dry spices, parsley, and garlic. But like I said, good texture and technique so I’ll be making these again but spiced more aggressively.
Also, pay attention to the directions that say to add more flour if the mix is too wet, otherwise the centers will remain raw. Test fry a couple first.
Recipe turned out perfectly! I air fried the first batch at 400 degrees (preheated) with just a spritz of olive oil and they were perfectly browned with no turning and not dried out. It wasn’t that difficult and I wish I’d made this sooner. I will be making it often now. Tori, thank you for your wonderful website and recipes. Your sharing details of the history of recipes and delicious results make a beautiful combination. Thanks!
How long did you cook them in air fryer?
These are the best falafel I have made so far. I’m fairly new at it, but I’ve followed this recipe twice and it was very good and repeatable. Next time I will increased the parsley just for a little variety. One thing that I wish recipe bloggers would do is repeat the quantities within the instructions. I am constantly scrolling up and down between the instructions and the recipe ingredient measurement. Bad memory, I guess, but it would be so much easier. Thank you
I don’t make it a habit of leaving comments on recipes (though I probably should), but I absolutely had to come back and thank you for this amazing recipe. The falafel turned out better than I could have even imagined. I was nervous about using the (only) soaked chickpeas, but it was perfect. I went with the green recipe, throwing in a full bunch of parsley. I had a tough time not eating the “dough” because it smelled so good. I served them up in a pita with homemade hummus, tomato, and a lemon-garlic tahini sauce. It was heaven!
Could not stop eating these! Delicious!
This recipe is excellent. I usually use xanthan gum instead of flour as the binding agent, and my husband thinks it’s better that way, so if you have xanthan gum and not chickpea flour it’s something you could try.
Man, this falafel is excellent!
I’ve tried multiple falafel recipes before but this is by far the best. I made the recipe exactly as written with a smidge more flour for binding. They worked out perfectly. Thank you!
I absolutely loved the texture and the taste was on point. I do want to say the mixture was a bit wet initially, I added about 3 additional tbs. Of garbanzo bean flour this gave it a slightly tighter hold. Also it fried perfectly. I added turmeric for color. Just delicious!.
Love this recipe. We “fry” ours in the air fryer and they are perfect!
This is the first time I tried to make falafel. I tried falafel many times in restaurants but never won my heart ( I live in Dubai so had occasion to try “best of best” falafels. Anyway decided to try this recipe as I was running out of vegetarian dish ideas. Hands down this is the best falafel I have ever had. I made it for my friend and he confirmed this is top notch recipie. We love it! I will be saving this recipie and def making it again.
Just a wee comment, I added lil more flour as the first two felt apart but still, amazing! Thank you !
The flavor was delicious! Just like Israel. I did have a problem frying. Some of them fell apart. Do you have any suggestions?
Please read through comments for suggestions; all of my suggestions can be found in the blog above. Usually it means the mix hasn’t been ground quite fine enough– the finer it’s ground, the better it sticks together.
I lived in Jerusalem for four months on a study abroad, and this is always my go-to recipe for falafel since coming back. THIS IS THE REAL THING and puts to shame most restaurant falafel I’ve tried. I like to mix some plain yogurt in with the tahini sauce because it reminds me of the white sauce my favorite vendors used. Thank you, Tori!!
These falafel are a dream. I made them, shaped them, and froze them raw. They cook from frozen really beautifully, and amazingly they stay crispy and crunchy even after cooling to room temperature, perfect for a picnic.
My mix was a bit wet when I shaped them so next time I’ll add more flour, but other than that they were perfection.
Legitimately the best falafel I’ve ever eaten by a long shot. I’ll never buy premade again.
This was the first time I have ever truly been successful with making falafel. My husband and I both LOVED the results. This was the best falafel we have ever had. Thank you for posting such a detailed recipe that is very user friendly. We will be saving this recipe and using from now on!
For the first time in my life I made falafels this evening. They tasted so good my wife told me to quit my job and open a falafel restaurant.
Can’t wait to use this recipe! We have a restaurant here that serves this with tahini sauce! You make it look so easy! Thank You for doing this!
I made a few late into the night to see if it would work out and they did! So good! Texture, flavor 100%! My question is if I can keep it refrigerated overnight without compromising the texture? Thanks foe this recipe!