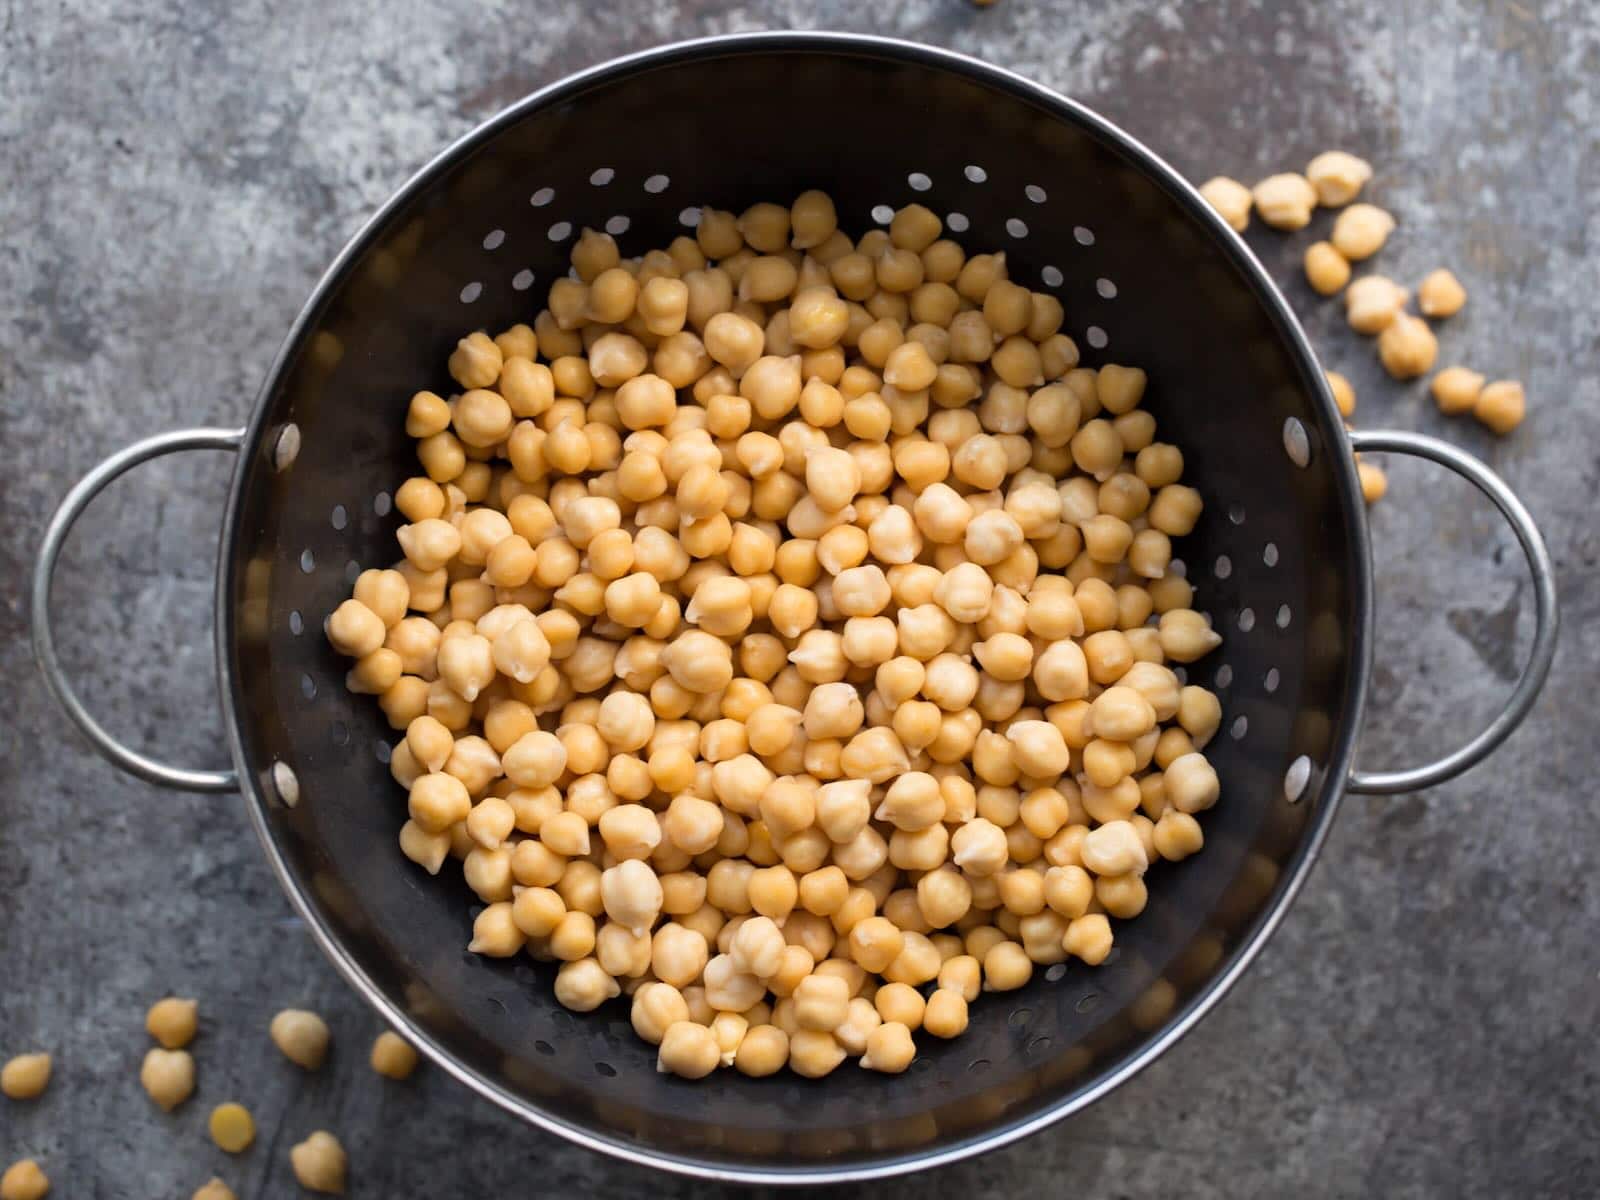
I absolutely love chickpeas, also known as garbanzo beans. These protein-packed legumes have a mild, nutty flavor that goes well in a variety of dishes, including hummus, soups and stews. Because of the time involved in preparing dried chickpeas, most people resort to canned varieties. The trouble with canned chickpeas is that many contain additives for preservation, as well as high sodium content from added salt. Making chickpeas from scratch is a much more natural and healthy way to go, and it’s surprisingly easy. This recipe, photo tutorial and video will show you the whole process, step-by-step.

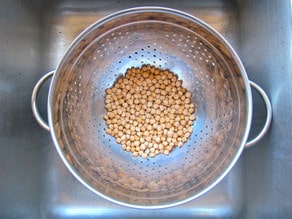
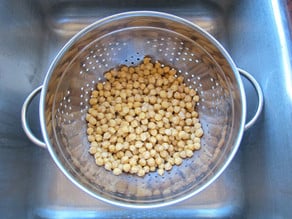
Here is a simple method for quick-soaking and preparing chickpeas for recipes. Chickpeas are soaked before boiling for two reasons – one, they need to be softened before they boil, and two, pre-soaking helps to make the beans more digestible. You can soak them quickly, as described below, or overnight if you prefer. My friend Gila Ronel, a doula and holistic nutritionist in Israel, soaks the beans for a couple of days until they begin to sprout. She says that the nutritional value improves when the chickpeas are sprouted. If you try this, you’ll need to use cold water, not the quick soak method. Make sure you change the water they are soaking in twice daily to keep bacteria at bay. When shopping for your chickpeas, make sure you use a bulk bin with a high turnover rate. The older the chickpeas are, the less tender they will cook. Beans that have been sitting in a pantry for a year or longer tend to go stale and will not cook up as nicely.
Most recipes call for chickpeas that have been soaked and boiled until tender (falafel is one notable exception– chickpeas should only be soaked for falafel, not cooked). I often make a large batch of cooked chickpeas, then refrigerate or even freeze for future use. I have covered the instructions for storing and freezing below. You will notice that home-prepared chickpeas taste much better than the canned variety, and you’ll have more control over the salt content. Preparing the beans this way is also more affordable… you’ll save over 50% by preparing them yourself. Frugality rocks!
Recommended Products:
We are a participant in the Amazon Services LLC Associates Program, an affiliate advertising program designed to provide a means for us to earn fees by linking to Amazon.com and affiliated sites. As an Amazon Associate I earn from qualifying purchases.
How to Soak, Cook, Freeze and Store Chickpeas
Ingredients
- 4 cups dried chickpeas (you may use more or less as needed-- 4 cups dried equals roughly 12 cups cooked beans)
- Salt (optional)
NOTES
Instructions
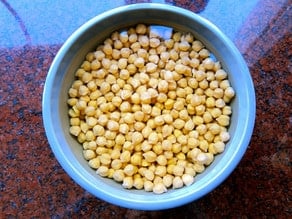
- Before cooking, you will need to soak the beans. You can soak them overnight, if you have the time. Place them in a large bowl and cover with cold water.

- The chickpeas will expand to over double their size, so make sure you cover by several inches of water to allow for expansion. Cover the bowl with a clean towel and let them soak overnight. Drain the water and rinse the beans before cooking.
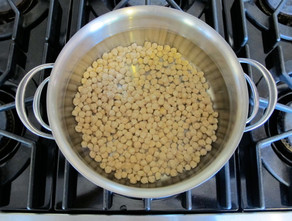
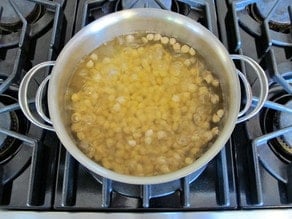
- To quick soak the beans, you will need 1 hour. Place the chickpeas into the bottom of a large pot and cover with water. The chickpeas will expand to over double their size, so make sure you cover by several inches of water to allow for expansion.

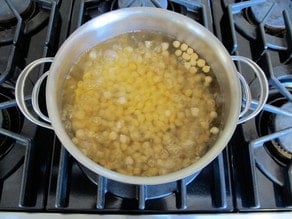
- Bring the chickpeas to a boil. Let them boil for 5 minutes.
- Remove from heat. Let the beans soak in the hot water for 1 hour.
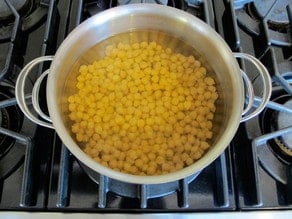
- Drain the water and rinse the beans before cooking.
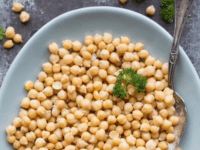
- When you are ready to cook your soaked beans, place them in a large pot and cover with several inches of water. I use about 1 quart of water per 1 cup of soaked beans. Bring to a boil, then reduce to a simmer. Add salt, if desired. I use about 1/8 teaspoon of salt for every 1 quart of water and 1 cup of soaked beans. You may like more salt to taste, or none at all to keep them "au naturel."
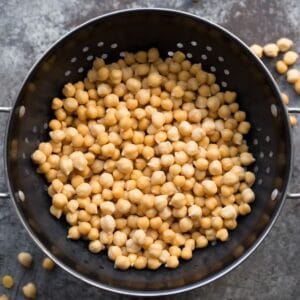
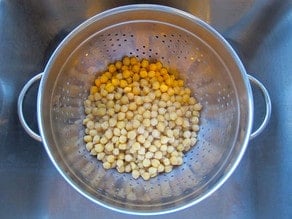
- Let the beans cook for 60-90 minutes until desired tenderness. Certain dishes require very tender beans (like hummus), while other dishes call for firmer beans (like stews and soups that need to be cooked over long periods of time). Adjust cooking time to achieve the desired tenderness for your purposes. If you are freezing the beans, keep in mind that they will freeze best if they are on the firmer side, rather than completely soft. As you cook them, the beans will continue to expand a bit. Keep an eye on the water level and add additional water as needed to keep the beans covered. When the beans are fully cooked, drain in a colander and allow to cool.
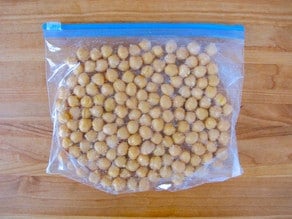
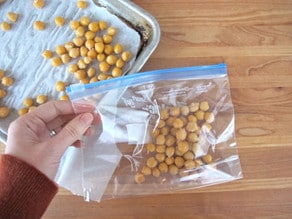
- To store cooked beans in the refrigerator, place them in a covered airtight container or a plastic zipper bag without any additional liquid. Cooked beans will keep 3-4 days in the refrigerator.To store the beans longer for future use, freeze them. Remove as much moisture as possible from the beans by patting them dry with paper towels. Place the beans in reusable or plastic zipper bags spread out in single layers; you don't want to pile the beans on top of each other or they will stick to each other. Freeze, laying the flat single layer down to keep the beans from freezing together. You can freeze several bags this way, one laying flat on top of another.
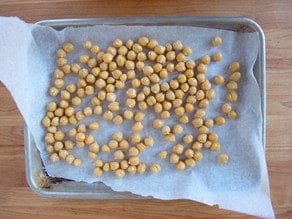
- Alternatively, you can spread out the beans in a single layer on a baking sheet lined with parchment and freeze the beans for 30 minutes.
- Once they are firm, pour them into a plastic zipper bag or airtight container, seal, and put immediately back into the freezer. Using this method, you don't need to put the chickpeas in a single layer-- because they are already half frozen, they will not stick together.
- Frozen beans will keep for up to 1 year.
Nutrition

tried this recipe?
Let us know in the comments!
Nutritional information per serving is for 1 cup of cooked chickpeas (1/3 cup dried chickpeas)– values and cook times will vary based on how what cooking method is used.


Hi, I am a guy so easy is always best when it comes to cooking. Canned beans were easy and I used to run them in cold water for a while to try washing away all the added nasties. Now comes my predicament. I have moved to South East Asia and the canned variety is not available. For this reason I visited this site and everything looked great until I saw the word ‘peel’ pop up somewhere. This is not an activity I anticipated. I am a guy with no fingernails and big hands. To me peeling a chick pea would be worst than torture. Do I need to peel them to make hummus? If so what is the easiest way. I appreciate anyone input on this. Peeling tomatoes was bad enough but chickpea is my worst nightmare. 😉
Hi Yves! You certainly don’t need to peel chickpeas for most cooking applications. I recommend peeling them when making hummus, but you don’t even need to do it then if you don’t want to– it only makes the hummus smoother and lighter. Otherwise, don’t worry about the peeling. If you want to try peeling, it’s fairly easy– gently squeeze each cooked chickpea between two fingers and the skin should slip right off.
I was told to remove the foam that gathers at the top of the boiling water, is that true?
Does freezing work the same way on other types of cooked beans (eg Kidney beans, lentils etc).
Hi Murray, most beans freeze well. The only one I’m not sure about is lentils, as they are small and delicate. I haven’t tried freezing lentils so I am unsure about them, but other beans like kidney, black and navy work well.
Tori, thank you for the detailed cooking instructions. I was looking for a “quick soak” method of cooking chickpeas, and your site came up in the search. I’m happy I found this site. As Arnold would say, “I’ll be back”.
Thanks again.
REMOVING THE SHELL – half way through cooking, drain and submerse in cold water. The shells will crack and float to the top with some agitation. Gets most of the shell off.
Great tip Chris! I am totally trying this next time…
Chris, thanks for the tip on removing the skins from chickpeas. I never bothered trying, because frankly the skins provide fiber; but I have often thought about it when making hummus, because I like the smoother texture that removing the skins allows. I will definitely try this the next time I cook chickpeas for hummus. Thanks again.
In regards to the discussion about baking soda: The baking soda is supposed to help in getting the chickpeas to soften up better. Chickpeas, especially, can be difficult to get to soften, especially in higher elevations. The baking soda is the remedy to this problem.
I’m hoping to prepare chana masala, a South Asian chickpea stew and other recipes which involve other veggies and sauces, etc. Will the flavour or texture of the cooked chickpeas be affected?
Hi Sharon- I’m sorry, I don’t understand your question. Do you mean after adding the cooked chickpeas to the recipe, will the flavor or texture change? Of course the flavor would change if you put them in a sauce… and the longer you cook them the softer they become. Sorry if I’m not getting what you mean!
I just wanted to jump in here as I often use chickpeas in Asian or Indian dishes. In fact I have just made a Chickpea Korma with chapatis for dinner (very tasty). Anyway, I think I know what you mean, but forgive me too if I am wrong. As Tori said the chickpeas will change depending on the sauce etc. However, I find the great thing about chickpeas is that they generally keep there shape. I mean by this that I have never been able to boil them or fry them until they become mushy. For example other pulses absorb liquids very quickly and can go very soft. If you were making a lentil Masala for instance, after a short while of cooking you would get basically a thick sauce as the lentils soften.
What I am trying to say it that the beauty of chickpeas is that they retain there shape even though they may be soft inside. For this reason I would make the Masala sauce quite thick as the chickpeas will not take on too much liquid if you see what I mean. Perhaps keeping the skins on helps to do this and if I may refer to the above post; I always keep the skins chickpeas on as I think they add to the texture and taste of hummus. I suppose everyone looks at things from a different angle
Hummus tastes better without the skin of the chick pea, but it’s quite a process to remove it by hand. Do you have any tricks for taking the skin off?
I wish! I’ve been on the hunt for a tip like this. I asked at my favorite hummus bar recently (which has the smoothest creamiest hummus ever), and was told that when you cook the chickpeas for a long time, a lot of the skins float to the top of the water. I’m going to try cooking my chickpeas longer next time and hope that they’re right. I agree that the skinning process is a pain in the booty! 🙂
Hi Tori, Love the recipe, and I cook for 100 minutes (for hummus) and the skins fall off in the rinsing process!
Robert, yes, after talking with my local hummus guy I have learned that longer cooking = easy removal of skins! I should do a post about this. Glad this was helpful!
Put some baking soda in the cooking water and the skins come right off and float to the top. I don’t do this as I like my beans intact. I’m guessing 1/8th to 1/4th tsp. per pound might work. I don’t think you need much.
Thanks for the info. Shirley
I have been cooking chickpeas for years. However, I generally buy the tinned variety for convenience and I always thought that the time taken to cook them outweighed the lower price of the chick peas. Having said that, I think the method used here adds some sophistication to my ‘boil’em for as long as I can method’. Thanks for the tips.
I learned from my Grandmother to add a tsp of baking soda to any bean recipe, ie chili, navy beans, butter beans etc. The reason is it cuts down the gas one experiences commonly after bean dishes. It works, could this be the reason for chick peas as well. Hmm, have to wonder.
Quite possible Linda! I think I have heard this as well.
Please email me vegetarian recipes. I am moving from a meat diet slowly to a fish and vegan diet.
Thank you.
Hi Ann, are you subscribed to the site? I’m not sure how to adjust your preferences to only send vegetarian recipes, however you can always check the vegetarian and vegan categories on my site, which are auto-updated each time a new recipe is added. Here are the links:
https://toriavey.com/toris-kitchen/recipes/vegetarian/
https://toriavey.com/toris-kitchen/recipes/recipes-vegan/
Hi Tori, So I made my chick peas with the baking soda and all went well. Next time I’ll do it without; can’t imagine much difference, as you said. I ended up using them all in 2 different recipes but next time hope to get to the freezing stage. Love your blog! Thanks.
Agree with the other posters about how helpful this is. I’ve read in a few other places (most notably Madhur Jaffrey) that when soaking the chick peas, one should add baking soda. Any thoughts on this? In the past, I’ve done them without. Just wondering what you think.
I have heard this too Maria, but I haven’t noticed a big difference personally between using baking soda and not. I’d be interested to hear if other readers have noticed a difference, since I haven’t experimented with it in a few years and would be willing to revisit it if people say it’s really worthwhile.
Using baking soda in your soak water really makes a big difference if your beans have been sitting around awhile and have gotten dried out. This goes for any beans. That’s probably why people stated their hummus was smoother if they soaked the beans first in baking soda. If they are really fresh beans it probably won’t make a difference. If you don’t soak them they can be more firm once cooked, but still perfectly edible. However, if you know, or suspect your beans might be dried out, add baking soda to the soaking water really helps to soften them up, but be sure to rinse them off once they’ve soaked. There are a lot of anti-nutrients, phytates, and enzyme inhibitors that leached out into the water besides the baking soda that you don’t want to eat. That’s why it’s important to soak your beans. I wouldn’t advise adding baking soda to the cooking water because the skins will soften up to the point of coming off. If you like them, that way go for it. The beans will still be perfectly edible and even really good if you have a good recipe. You just may prefer your beans intact rather than having a lot of skins floating on top.
What a great site! I advise my young aspiring family cooks to go to your site for their Jewish recipes… As for chickpeas…I love hummus and learned while I was in Israel that the reason their hummus is so smooth is because they remove the outer membrane on the beans before preparing (and after cooking the beans, obviously). It’s a little time consuming, but they come off easily and it makes all the difference in the world…
I add turmeric to water when soaking and cooking resulting in beautiful bright yellow chick peas
Thanks for this tip! I also add tumeric when cooking the chick peas (and when cooking many things) but hadn’t thought about it at the soaking stage. Do you disbard the soaking water with tumeric, or reuse it to boil the chickpeas?
I love the pictures this page is a great tutorial!
Thank you for this terrific tutorial. I used to make beans from scratch eons ago but got into the habit of using cans and sort of forgot how to cook them (apart from in a pressure cooker, which I no longer own). So, my husband, bless his heart, went to three different stores to get the best deal on dry chickpeas and bought a ton. I got out my huge soup pot and soaked and am in the process of cooking 3/4 of them now that I know I can freeze them… they look sooo great, I feel so virtuous. I am using a hunk of kombu as a softener when I cook (vs. salt) as I remember doing that in a long-ago macobiotic phase in my life. Thank you for this post! And I will be back– I love Middle Eastern food!
Best site for this subject. I will make these more often now. Makes an AWESOME snack too!!
Thank you for posting this information. I love homemade hummus but hate to cook up a whole bag. This was tremendously helpful and will be used today.